Sony STR-DN1010 Operating Instructions - Page 53
Tuner Operations, Listening to FM/AM radio - ece a
 |
UPC - 027242779945
View all Sony STR-DN1010 manuals
Add to My Manuals
Save this manual to your list of manuals |
Page 53 highlights
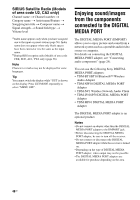
Tuner Operations Recording onto a recording media 1 Press the input button of the playback component. You can also use INPUT SELECTOR +/- on the receiver. 2 Prepare the playback component for playing. For example, insert the video tape you want to copy into the VCR. 3 Prepare the recording component. Insert a blank video tape, etc. into the recording component (connected to VIDEO 1 OUT jacks) for recording. 4 Start recording on the recording component, then start playback on the playback component. Notes • Some sources contain copy guards to prevent recording. In this case, you may not be able to record from the source. • Only analog input signals are output from the analog output jack (for recording). • HDMI sound cannot be recorded. Tuner Operations Listening to FM/AM radio You can listen to FM and AM broadcasts through the built-in tuner. Before operation, make sure you have connected the FM and AM antennas (aerials) to the receiver (page 35). Tip The tuning scale for direct tuning differs depending on the area code as shown in the following table. For details on area codes, see page 4. Area code FM AM U2, CA2 100 kHz CEK, ECE, AU1, TW2 50 kHz 10 kHz* 9 kHz * The AM tuning scale can be changed (page 55). SHIFT Numeric buttons GUI MODE V/v/b, TOOLS/ OPTIONS MENU 53GB
-
 1
1 -
2
-
3
-
4
-
5
-
6
-
7
-
8
-
9
-
10
-
11
-
12
-
13
-
14
-
15
-
16
-
17
-
18
-
19
-
20
-
21
-
22
-
23
-
24
-
25
-
26
-
27
-
28
-
29
-
30
-
31
-
32
-
33
-
34
-
35
-
36
-
37
-
38
-
39
-
40
-
41
-
42
-
43
-
44
-
45
-
46
-
47
-
 48
48 -
 49
49 -
 50
50 -
 51
51 -
 52
52 -
 53
53 -
 54
54 -
 55
55 -
 56
56 -
 57
57 -
 58
58 -
59
-
60
-
61
-
62
-
63
-
64
-
65
-
66
-
67
-
68
-
69
-
70
-
71
-
72
-
73
-
74
-
75
-
76
-
77
-
78
-
79
-
80
-
81
-
82
-
83
-
84
-
85
-
86
-
87
-
88
-
89
-
90
-
91
-
92
-
93
-
94
-
95
-
96
-
97
-
98
-
99
-
100
-
101
-
102
-
103
-
104
-
105
-
106
-
107
-
108
-
109
-
110
-
111
-
112
-
113
-
114
-
115
-
116
-
117
-
118
-
119
-
120
-
121
-
122
-
123
-
124
-
125
-
126
-
127
-
128
-
129
-
130
-
131
-
132
-
133
-
134
-
135
-
136
 |
 |
