Toshiba 52LX177 Owner's Manual - English
Toshiba 52LX177 - 52" LCD TV Manual
 |
UPC - 022265000700
View all Toshiba 52LX177 manuals
Add to My Manuals
Save this manual to your list of manuals |
Toshiba 52LX177 manual content summary:
- Toshiba 52LX177 | Owner's Manual - English - Page 1
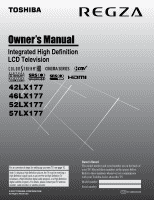
Definition LCD Television HIGH-DEFINITION TELEVISION 42LX177 46LX177 52LX177 57LX177 For an overview of steps for setting up your new TV, see page 10. Note: To display a High Definition picture, the TV must be receiving a High Definition signal (such as an over-the-air High Definition TV broadcast - Toshiba 52LX177 | Owner's Manual - English - Page 2
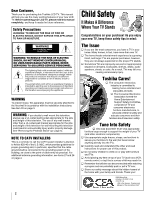
a Carefully read and understand the other enclosed instructions for proper use of this product. a Do not allow children to climb on or play with furniture and TVs. a Avoid placing any item on top of your TV (such as a VCR, remote control, or toy) that a curious child may reach for. a Remember that - Toshiba 52LX177 | Owner's Manual - English - Page 3
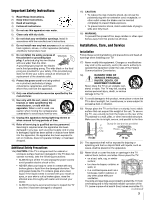
, take the following precautions: • ALWAYS turn off the TV and unplug the power cord to avoid possible electric shock or fire. • NEVER allow your body to come in contact with any broken glass or liquid from the damaged television. The LCD panel inside the TV contains glass and a toxic liquid. If the - Toshiba 52LX177 | Owner's Manual - English - Page 4
technician to use only replacement parts specified by the manufacturer. • Upon completion of service, ask the service technician to perform routine safety checks to determine that the TV is in safe operating condition. 39) The cold cathode fluorescent lamp in the LCD panel contains a small amount of - Toshiba 52LX177 | Owner's Manual - English - Page 5
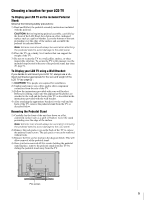
location for your LCD TV To Display your LCD TV on the included Pedestal Stand: Observe the following safety precautions: 1) Read and Follow the pedestal assembly instructions included with the pedestal. CAUTION: Before beginning pedestal assembly, carefully lay the front of the LCD Panel face down - Toshiba 52LX177 | Owner's Manual - English - Page 6
LCD technology, is not a sign of malfunction, and is not covered under your warranty. Such pixels are not visible when the picture is viewed from a normal viewing distance. Note: Interactive video games that involve shooting a "gun" type of joystick at an on-screen target may not work with this TV - Toshiba 52LX177 | Owner's Manual - English - Page 7
Important Safety Instructions 3 Installation, Care, and Service 3 Chapter 1: Introduction 9 Welcome to Toshiba 9 Features of your new TV 9 Overview of steps for installing, setting up, and using your new TV 10 TV front and side panel controls and connections 11 TV back panel connections 12 - Toshiba 52LX177 | Owner's Manual - English - Page 8
Chapter 9: Troubleshooting 104 General troubleshooting 104 Home network troubleshooting 106 LED indications 108 Chapter 10: Appendix 109 Specifications 109 Limited United States Warranty for LCD Televisions 26" and Larger 111 Limited Canadian Warranty for Toshiba Brand Flat Panel Televisions - Toshiba 52LX177 | Owner's Manual - English - Page 9
program guide and data-enhanced television services may require the use of a set-top box. For more information call your local cable operator. Features of your new TV The following are just a few of the many exciting features of your new Toshiba widescreen, integrated HD, LCD TV: • Integrated - Toshiba 52LX177 | Owner's Manual - English - Page 10
. The yellow LED will blink until the TV goes into standby mode. When the TV is in standby mode, press POWER on the TV control panel or remote control to turn on the TV. If the TV stops responding to the controls on the remote control or TV control panel and you cannot turn the TV off or on, press - Toshiba 52LX177 | Owner's Manual - English - Page 11
on and off. If the TV stops responding to the controls on the remote control or TV control panel and you cannot turn off the TV, press and hold the POWER button on the TV control panel for 5 or more seconds to reset the TV. 5 ARROWS BbC c - When a menu is on-screen, these buttons function as up/down - Toshiba 52LX177 | Owner's Manual - English - Page 12
Chapter 1: Introduction TV back panel connections For an explanation of cable types and connections, see pages 14-23. 1 TV back 2 3 45 6 Power cord Cable Clamper 1 IR OUT - For controlling infrared remote-controlled devices through the TV. You can connect up to two devices with an optical IR - Toshiba 52LX177 | Owner's Manual - English - Page 13
port - For service use only. Used for updating the television's firmware. HDMI, the HDMI logo and High-Definition Multimedia Interface are trademarks or registered trademarks of HDMI Licensing LLC. Manufactured under license from Dolby Laboratories. Dolby, Pro Logic, and the double-D symbol are - Toshiba 52LX177 | Owner's Manual - English - Page 14
IR blaster cable is for use with video devices with IR (infrared) remote control. This cable can be used with the TV's IR pass-through feature (- page 18). To obtain IR blaster cable: Visit www.ceaccessories.toshiba.com. Optical audio cable Optical audio cable is for connecting receivers with Dolby - Toshiba 52LX177 | Owner's Manual - English - Page 15
TV lower back panel You will need: • coaxial cables • standard A/V cables - For better picture performance, if your VCR has S-video, use an S-video cable (plus the audio cables) instead of the standard video cable. Do not connect both types of video cable to VIDEO 1 at the same time or the picture - Toshiba 52LX177 | Owner's Manual - English - Page 16
Cable box output is set to). Use the Cable box controls to change channels. To view the VCR: Turn ON the VCR. Select the VIDEO 1 video input source on the TV.* * To select the video input source, press INPUT on the remote control (- page 27). To program the TV remote control to operate other devices - Toshiba 52LX177 | Owner's Manual - English - Page 17
receiver to either set of ColorStream terminals on the TV (HD-1 or HD-2). The ColorStream HD-1 and HD-2 terminals can be used with Progressive (480p, 720p) and Interlaced (480i, 1080i) scan systems. A 1080i signal will provide the best picture performance (1080p is not supported). - If your DVD - Toshiba 52LX177 | Owner's Manual - English - Page 18
of the device and attach it using double-sided mounting tape. If you have TV upper back panel 18 Note: • If you use the device's remote control to operate the device, you also will need to use the TV's remote control to operate the TV. • The IR pass-through feature does not support all IR-controlled - Toshiba 52LX177 | Owner's Manual - English - Page 19
panel To view the camcorder video: Select the VIDEO 2 video input source on the TV.* * To select the video input source, press INPUT on the remote control (- page 27). To program the TV remote control to operate other devices, see Chapter 3. To operate the TV with this connection, point the Toshiba - Toshiba 52LX177 | Owner's Manual - English - Page 20
See "Setting the HDMI™ audio mode" (- page 48). TV lower back panel HDMI device VIDEO AUDIO L R IN IN OUT L R HDMI OUT To view the HDMI device video: Select the HDMI 1, HDMI 2, or HDMI 3 video input source on the TV.* * To select the video input source, press INPUT on the remote control - Toshiba 52LX177 | Owner's Manual - English - Page 21
the basic functions of connected audio/video devices using the TV's remote control if you connect a CE-Link compatible audio receiver or playback device. For an explanation of setup and operations, see pages 73-74. TV lower back panel VIDEO AUDIO L R IN OUT L R Audio receiver HDMI IN HDMI - Toshiba 52LX177 | Owner's Manual - English - Page 22
, Pro Logic, and the double-D symbol are registered trademarks of TV and the digital audio device. 2 Press Y on the TV's remote control and open the Audio menu. 3 Highlight Audio Setup and press T. LINE IN LR TV upper back panel Audio Digital Audio Selector Audio Settings Advanced Audio Settings - Toshiba 52LX177 | Owner's Manual - English - Page 23
. If connecting a PC with an HDMI terminal, use an HDMI cable (type A connector). Separate analog cables are not necessary (- page 20). TV upper back panel TV lower back panel Conversion adapter (if necessary) • To use a PC, set the monitor output resolution on the PC before connecting it to the - Toshiba 52LX177 | Owner's Manual - English - Page 24
mail address. • Contact your ISP (Internet Service Provider) to obtain and set up Internet/e-mail service. • See Chapter 8 for details on configuring and using personal e-mails, file sharing, the JPEG Picture Viewer, and the MP3 Audio Player. Note: • The TV's home network feature is compatible with - Toshiba 52LX177 | Owner's Manual - English - Page 25
cable with this connection. TV lower back panel Example #3: Connecting the TV to a home network with part of your DSL or cable modem. Your switch may be separate from your router. For assistance, contact your ISP or an IT professional. [2] Coaxial or telephone cable (depending on your modem type - Toshiba 52LX177 | Owner's Manual - English - Page 26
the back of the remote control. Remote control effective range For optimum performance, aim the remote control directly at the TV remote sensor. Make sure there are no obstructions between the remote control and the TV. Point remote control toward remote sensor on front of TV. 2 Install two "AA - Toshiba 52LX177 | Owner's Manual - English - Page 27
3 POWER turns the TV on and off. When the TV is on, the green LED indicator on the TV front will be illuminated. 4 MODE SELECT sets the six remote control device modes: TV, CABLE/SAT, DVD, VCR/PVR, AUX 1, and AUX 2. Press TV until the keypad blinks 3 times to control the TV. The selected MODE key - Toshiba 52LX177 | Owner's Manual - English - Page 28
Chapter 3: Using the remote control 21 RECALL displays TV status information (- page 76). 22 SKIP Z and SKIP z can be used for jumping to the beginning and end of a line when used with the software keyboard (- page 94). 23 C.CAPTION (TV/VCR) opens the closed caption/audio selector screen. (The audio - Toshiba 52LX177 | Owner's Manual - English - Page 29
functional key chart REMOTE CONTROL KEY Toshiba TV (TV) CABLE SAT (satellite) MODE SELECT LIGHT SLEEP POWER 1 (. , ? !) 2 (a b c) 3 (d e f) 4 (g h i) 5 (j k l) 6 (m n o) 7 (p q r) 8 (t u v) 9 (w x y z) 0 (' " ( )) 100/-/+10 INPUT ( ) PIC SIZE MENU FAV BROWSER/ SET UP THINC/ TOP MENU GUIDE INFO - Toshiba 52LX177 | Owner's Manual - English - Page 30
Chapter 3: Using the remote control REMOTE CONTROL KEY Toshiba TV (TV) CABLE CH RTN/ DVD RTN RECALL MUTE SLOW SKIP z SKIP Z REW PAUSE/STEP PLAY FF C.CAPTION TV/VCR DISC/AM/FM STOP REC CH B b POP FREEZE A and D Previous channel On-screen display Sound mute Slow FWD* Slow REW* DAY+*2 DAY-*2 - Toshiba 52LX177 | Owner's Manual - English - Page 31
below. Note: The TV remote control is preprogrammed to operate most Toshiba devices. To operate a non-Toshiba device or a Toshiba device that the remote control is not preprogrammed to operate, you will need to program the remote control. See "Programming the remote control to operate your other - Toshiba 52LX177 | Owner's Manual - English - Page 32
lock feature (8000) By default (factory setting), the remote control's volume keys (z Z and W) are locked to the "TV" device mode. The remote control will operate the TV's volume, even when "TV" is not the current device mode. (This includes all remote control device modes except AUX 1 and AUX - Toshiba 52LX177 | Owner's Manual - English - Page 33
Multi-brand remote control device codes TVs Brand Toshiba Cable boxes Brand A-Mark ABC Accuphase Acorn Action Active 10012, 10637 10017 11877, 10877, 10237, 10008 Chapter 3: Using the remote control Panasonic Panther Paragon Penney Philips Pioneer Prism Pulsar Quasar RadioShack RCA Regal Runco - Toshiba 52LX177 | Owner's Manual - English - Page 34
21502 20705 20784, 20705, 20770, 20833, 20869, 21169, 21172, 21234, 21242 20770 20770 20490, 20634 20778 21407 34 Chapter 3: Using the remote control Digitrex Disney DiViDo Dual Durabrand DVD2000 Electrohome Emerson Enterprise Entivo Enzer ESA Firstline Fisher Funai Gateway GE Go Video Go Vision - Toshiba 52LX177 | Owner's Manual - English - Page 35
Tatung Teac Technics Technika Tevion Theta Digital Thomson Tivo Toshiba Unimax Universum Urban Concepts US Logic V Venturer Visio Vizio 21158, 21304, 21730 21348 21164 20741 Chapter 3: Using the remote control LiteOn Magnavox Panasonic Philips Pioneer Polaroid RCA Samsung Sensory Science Sharp - Toshiba 52LX177 | Owner's Manual - English - Page 36
, 30000, 30278, 30038, 31237 30037, 30081, 30000, 30072, 30278, 30020, 30062 30000, 30008 30081, 30042 30081 30000 Chapter 3: Using the remote control Harman/Kardon Harvard Harwood Headquarter Hewlett Packard HI-Q Hitachi Howard Computers HP Hughes Network Systems Humax Hush Hytek iBUYPOWER ITT - Toshiba 52LX177 | Owner's Manual - English - Page 37
30432, 30739, 31014 30240 30048, 30039 Chapter 3: Using the remote control Sansui Sanyo Scientific Atlanta Scott Sears Sharp Shintom Shogun Siemens Signature Singer Tevion Thomas Thomson Tisonic Tivo TMK TNIX Tocom Toshiba Tosonic Totevision Touch Trix Ultra Unitech Vector Vector Research - Toshiba 52LX177 | Owner's Manual - English - Page 38
ReplayTV Samsung Sonic Blue Sony Stack 9 Systemax Tagar Systems Tivo Toshiba Touch Viewsonic Voodoo ZT Group Code 31972 31972 31972 31972 30739 11877, 10877 11006 10276 11256 10899 38 Chapter 3: Using the remote control DBS/PVR Combo Brand DirecTV Dish Network System Dishpro Echostar Expressvu - Toshiba 52LX177 | Owner's Manual - English - Page 39
, 41142, 41306 40531 41801 40189 Chapter 3: Using the remote control Harman/Kardon Hitachi Integra JBL JVC Kawasaki Kenwood KLH Koss LG , 41469, 41801 40186 41077 41811 Sony Stereophonics Sunfire Teac Technics Thorens Toshiba Venturer Victor Wards Yamaha Zenith 41058, 41441, 41258, 41622, 41658, - Toshiba 52LX177 | Owner's Manual - English - Page 40
of your TV's menu system. To open the main menus (illustrated below), press Y on the remote control or TV control panel. Icon Applications Video Audio Preferences Locks Setup Item Picture Viewer Audio Player Personal E-mail Channel Browser™ Help Start Demo Mode Picture Settings Noise Reduction - Toshiba 52LX177 | Owner's Manual - English - Page 41
screen] 49 THINC™ menu The THINC* menu provides access to the CE-Link Player Control, Picture Viewer, Audio Player, Personal E-mail, Channel Browser, and Favorites Browser features. The THINC menu is not part of the main menu system. You can only view the THINC menu by pressing C on the remote - Toshiba 52LX177 | Owner's Manual - English - Page 42
panel to access and navigate your TV's on-screen menu system. • Press Y to open the menu system. • When a menu is open, use the up/down/left/right arrow buttons (BbC c) on the remote control or TV control panel to move in the corresponding direction in the menu. • Press T to save your menu settings - Toshiba 52LX177 | Owner's Manual - English - Page 43
Y on the remote or on the TV for 2 seconds. Note: The on-screen demonstration will automatically restart if you do not make a selection within 120 seconds. To exit the demo mode: Press MENU and VOLUMEC buttons on the TV control panel at the same time and hold for about 2 seconds, or set Demo Mode to - Toshiba 52LX177 | Owner's Manual - English - Page 44
press T. To revert to your original settings, highlight Cancel and press T. Programming channels into the TV's channel memory When you press < or , on the remote control or TV control panel, your TV will stop only on the channels you programmed into the TV's channel memory. Follow the steps below - Toshiba 52LX177 | Owner's Manual - English - Page 45
Chapter 5: Setting up your TV 4 (A new set of Installation menu icons will appear, as shown below.) Open on the remote control (or highlight Abort in the on-screen display and press T). When channel programming is finished, press < or , to view the programmed channels. Manually adding and deleting - Toshiba 52LX177 | Owner's Manual - English - Page 46
the Auto Input feature This feature allows you to change TV inputs using the mode select buttons-TV, CABLE/SAT, DVD, VCR/PVR, AUX1, AUX2-on the remote control. Once an input has been set for a specific mode select button, the TV will automatically switch to that input when that mode select button - Toshiba 52LX177 | Owner's Manual - English - Page 47
TV. You will be able to view and assign these logos from the Channel Labeling window. If the desired channel label is not provided in the list, you will be able to manually 5 To save your settings, highlight Done and press key on the remote control to highlight the desired character on the on-screen - Toshiba 52LX177 | Owner's Manual - English - Page 48
Chapter 5: Setting up your TV To delete the custom label: 1 Open the Channel Labeling window. 2 Audio HDMI 1 Audio MTS Language Speakers Optical Output Format Dolby Digital Dynamic Range Control Reset No Auto Stereo English On Dolby Digital Compressed Done Note: Because the PC and HDMI-1 - Toshiba 52LX177 | Owner's Manual - English - Page 49
Apr 11 2007 - 01:08:19 FW: 22 Done To close the screen and return to the Installation menu: Highlight Done and press T. To return to window provides the ability to reset the TV settings.Type in your PIN now (or "0000" if no PIN has been set) to restore settings to their factory default values. Done - Toshiba 52LX177 | Owner's Manual - English - Page 50
on more quickly. While in Fast mode, the yellow LED on the front of the TV will be lit. To set the Power-On Mode feature: 1 Press Y, and open the Setup menu. 2 Highlight Power-On Mode and press c. 3 Press B or b to select either Power-Saving or Fast. Selecting the Demo Mode You can select the - Toshiba 52LX177 | Owner's Manual - English - Page 51
remote control or TV control panel to change the input. The current signal source displays in the top right corner of the Input Selection screen video input sources according to the specific devices you have connected to the TV (- "Labeling the video input sources set up the Auto Input feature (- page - Toshiba 52LX177 | Owner's Manual - English - Page 52
remote control. 5 To save the new input labels, highlight Done and press T. To revert to the factory default labels, highlight Reset and press T. Input labeling example: The screen below left shows the default Input Selection screen (with none of the inputs labeled as a specific device). The screen - Toshiba 52LX177 | Owner's Manual - English - Page 53
list. Picture Preview • A small thumbnail preview of the current channel or input will appear in the list. • Picture snapshots will power on/off cycle. When History List is set to Power Off Clear (On), the channels and inputs stored in the list will be cleared with every power on/off cycle of the TV - Toshiba 52LX177 | Owner's Manual - English - Page 54
or Favorites) 2 Input type 3 Channel or input remote control. • All channels that are tuned using < or , on the remote control. Note: Whenever an item is selected that cannot be tuned (for various reasons), the TV set to "Power Off Clear (On)," turning off the TV will clear the History List. 54 - Toshiba 52LX177 | Owner's Manual - English - Page 55
remote control or TV control panel. Note:This feature will not work unless you program channels into the TV's channel memory (- page 44). Tuning to a specific R for about 2 seconds until the message "Channel Memorized" appears on-screen. The channel has been programmed to the R button. 3 You can - Toshiba 52LX177 | Owner's Manual - English - Page 56
program the way that looks best to you. You can save separate picture size preferences for each input on your TV. To select the picture size using the remote control: 1 Press I on the remote control. 2 While the Picture Size screen is open, you can do one of the following to select the desired - Toshiba 52LX177 | Owner's Manual - English - Page 57
. If the signal being received is other than 1080i, 1080p, or 720p, "Native" will be grayed out in the Picture Size screen. • This mode is supported only for HDMI and ColorStream inputs. • Depending on the input signals, the border of the picture may be hidden, displayed in black, or noisy. Native - Toshiba 52LX177 | Owner's Manual - English - Page 58
When the auto aspect ratio feature is set to On, the TV will automatically select the picture size when one of the following input sources is received: • A 480i signal from the VIDEO 1, VIDEO 2, ColorStream HD-1, or ColorStream HD-2 input. • A 480i, 480p, 720p, 1080i, 1080p, or VGA signal from - Toshiba 52LX177 | Owner's Manual - English - Page 59
and the TV will return to moving picture. • The FREEZE feature is not available when the POP double-window is open. If you press B, the message "Not Available" will appear. Using the POP double-window feature The POP (picture-out-picture) double-window feature splits the screen into two windows - Toshiba 52LX177 | Owner's Manual - English - Page 60
, as described below. Mode Sports Standard Movie Document Preference Pro 1 Pro 2 Picture Quality Bright and dynamic picture (factory setting) Standard picture settings (factory setting) Lower contrast for darkened room (factory setting) Designed for viewing of tables/documents from a PC (factory - Toshiba 52LX177 | Owner's Manual - English - Page 61
the entire screen. When in video mode and no signal is input, this will automatically be set to 0. (Settings are stored Picture Settings Reset Mode: Sports On Done Contrast 70 4 To save the new settings, highlight Done and press T. You can use any of the picture modes (- "Selecting the picture - Toshiba 52LX177 | Owner's Manual - English - Page 62
screen display of the dialogue, narration, and sound effects of TV programs and videos that are closed captioned (usually marked "CC" in program guides). • Text-An on-screen -standard Preferences CC Selector Base CC Mode Digital CC Settings Auto Input Off Off CC1 CC2 Input Labeling CC3 Channel - Toshiba 52LX177 | Owner's Manual - English - Page 63
CC Settings Auto Input Input Labeling Channel Labeling Menu Language English Channel Browser Setup 3 Press B or b to select Closed Caption, and then press C or c to select the desired service. Closed Caption Audio CC1 None 4 Press O. Using the Closed Caption button on the remote control - Toshiba 52LX177 | Owner's Manual - English - Page 64
Compressed Done 4 To save the new settings, highlight Done and press T. To reset the settings to the factory defaults, highlight Reset and press T. Note: • You can typically leave the TV in Stereo mode because it will automatically output the type of sound being broadcast (stereo or monaural - Toshiba 52LX177 | Owner's Manual - English - Page 65
second audio program (SAP) can be heard only on those TV stations that offer it. For example, a station might , you will see the current program on the screen but hear the other language instead of the program all in SAP mode. If this happens, set the MTS feature to Stereo mode. Adjusting the - Toshiba 52LX177 | Owner's Manual - English - Page 66
decoder or other digital audio system to the Optical Audio Out terminal on the TV (see "Connecting a digital audio system" on page 22). To select the Dolby Digital Dynamic Range Control No Auto Stereo English On Dolby Digital Compressed Reset Done 4 To save the new settings, highlight Done and - Toshiba 52LX177 | Owner's Manual - English - Page 67
TV's features Using the Locks menu The Locks menu includes the Enable Rating Blocking, Edit Rating Limits, Channels Block, Input Lock, Front (control) Panel highlight the Locks menu icon. 2 Press b to display the PIN code entering screen. 3 Enter your four-digit PIN code and press T. 4 Press b to - Toshiba 52LX177 | Owner's Manual - English - Page 68
only be downloaded one time. You will not be able to download any updates to the rating system should such updates become available. • The additional rating system is not designed, transmitted, or controlled by the TV or Toshiba, nor is the availability of an additional rating system determined or - Toshiba 52LX177 | Owner's Manual - English - Page 69
control. If it is rated "None," the word "NONE" appears in the RECALL screen (as shown below right). If rating information is not provided, no rating will appear in the RECALL screen. TV - PG L V NONE Blocking channels With the Channels Block feature, you can block specific Off Front Panel Lock - Toshiba 52LX177 | Owner's Manual - English - Page 70
TV to a program that exceeds the rating limits you set, the TV will enter program lock mode and the following message will appear on-screen: This program exceeds the rating limit you set picture appears. All locking is disabled until the TV is turned off, and will be enabled when the TV Panel Lock - Toshiba 52LX177 | Owner's Manual - English - Page 71
, or 120 minutes) and press T. Using the control panel lock feature You can lock the control panel to prevent your settings from being changed accidentally (by children, for example). When the control panel lock is On, none of the controls on the TV control panel will operate except POWER. To lock - Toshiba 52LX177 | Owner's Manual - English - Page 72
TV's features Using the PC settings feature Setting the PC Audio You can view an image from a PC on the TV screen. When a PC is connected to the TV's PC IN terminal, you can use the PC Settings feature to make adjustments to the image. If the edges of the picture Range Control No Auto Stereo English - Toshiba 52LX177 | Owner's Manual - English - Page 73
device you are watching. Available remote control key functions: Before using the following key functions, first select the TV mode by pressing the TV mode select button until the keypad blinks 3 times. • S begins playback. • D stops playback. • A pauses the picture during play or record mode - Toshiba 52LX177 | Owner's Manual - English - Page 74
volume of the speakers connected to the TV via an audio receiver. First, select TV mode by pressing the TV button under MODE SELECT on the remote control. • z Z adjust the volume level. • W turns off the sound. Note: • To use this function: - Set Speaker Preference to Audio Receiver in the CELink - Toshiba 52LX177 | Owner's Manual - English - Page 75
: If your HDMI connection is capable of 1080p and/or your TV is capable of refresh rates greater than 60Hz or supports Deep Color, you will need a Category 2 cable. Conventional HDMI/DVI cables may not work properly with this mode. To set the HDMI Settings: 1 Select the appropriate HDMI input mode - Toshiba 52LX177 | Owner's Manual - English - Page 76
it is possible that you will be away from the TV for an extended period of time after the power is restored. To close the RECALL screen: Press E again. To display TV status information using INFO: Press Q on the remote control. The following additional information will display for off air digital - Toshiba 52LX177 | Owner's Manual - English - Page 77
press C or c to adjust the static gamma. The adjustment range is within ±4 from center. Advanced Picture Settings Dynamic Contrast Static Gamma 0 Color Temperature Vertical Edge Enhancer Cinema Mode ClearFrame Film Stabilization Reset Mode: Preference High Cool High Film On Off Done • If - Toshiba 52LX177 | Owner's Manual - English - Page 78
Vertical Edge Enhancer field, select the mode you prefer (Off, Low, Middle, or High). Advanced Picture Settings Dynamic Contrast Static Gamma 0 Color Temperature Vertical Edge Enhancer Cinema Mode ClearFrame Film Stabilization Reset Mode: Preference Off Cool High Film On Off Done 5 To - Toshiba 52LX177 | Owner's Manual - English - Page 79
obtained by setting the Cinema Mode to Film. To set the Cinema Mode to Film: 1 Press Y and open the Video menu. 2 Highlight Picture Settings and press T. 3 Highlight Advanced Picture Settings and press T. 4 In the Cinema Mode field, select Film. Advanced Picture Settings Dynamic Contrast Static - Toshiba 52LX177 | Owner's Manual - English - Page 80
Video menu. 2 Highlight Picture Settings and press T. 3 Highlight Advanced Picture Settings and press T. 4 In the Film Stabilization field, select On. Advanced Picture Settings Dynamic Contrast Static Gamma 0 Color Temperature Vertical Edge Enhancer Cinema Mode ClearFrame Film Stabilization - Toshiba 52LX177 | Owner's Manual - English - Page 81
Chapter 7: Using the TV's advanced features Using MPEG noise reduction The MPEG noise Note: If you select one of the factory-set picture modes (Sports, Standard, Movie, or Document) and then change the ColorMaster Pro setting, the picture mode automatically changes to Preference. To turn off - Toshiba 52LX177 | Owner's Manual - English - Page 82
TV picture, press B again. Color Adjustment Red Standard Color After Adjustment Hue 0 - + Saturation 0 - + Brightness 0 - + 4 Press B or b to select either Hue, Saturation, or Brightness, and then press C and c to adjust the setting. Note: To revert to the factory settings on-screen will - Toshiba 52LX177 | Owner's Manual - English - Page 83
input, or turn the TV off and then on again. Note: • You can change the video input by pressing + on the remote control (- page 51). • When the Game Mode is set to On, the following features (- pages 79 and 80) are not available (grayed out). -Cinema Mode: grayed out and set to Video -Clear Frame - Toshiba 52LX177 | Owner's Manual - English - Page 84
TruBass) that creates a thrilling surround sound experience with deep, rich bass from stereo sound sources. Your TV's audio will sound fuller, richer, and wider. To adjust the WOW™ settings: 1 Put the TV in STEREO mode (- "Selecting stereo/SAP broadcasts" on page 64). 2 Press Y and open the Audio - Toshiba 52LX177 | Owner's Manual - English - Page 85
• Video: Issues related to video processing, output, settings, etc. • Network: Issues related to the network features on the TV. • Connection: Issues related to connection of external devices. • Tuning: Issues related to tuning of various types of channels. • Miscellaneous: Important issues that do - Toshiba 52LX177 | Owner's Manual - English - Page 86
the TV's advanced features Specific Help Items Within each subgroup, there will be a list of related items. From this window, you can select a specific Second Audio Program (SAP) is enabled. Press " OK " to disable SAP and set to Stereo (default) , or enter the " Audio Setup " mode through Audio - Toshiba 52LX177 | Owner's Manual - English - Page 87
your home network 1 Connect the TV to your home network via the TV's RJ-45 (Ethernet) port. See pages 24 and 25 for connection instructions. 2 If you want to use file sharing only and do not have Internet service in your home: Go to section B, "Setting up the network address," on the next page. Note - Toshiba 52LX177 | Owner's Manual - English - Page 88
be a problem with the network connection. Please check network cables and settings. Retry Abort a) Make sure all cables for your home network are securely connected. b) Make sure your home network is set up properly. See page 24 for TV connection information. Also consult the owner's manuals for - Toshiba 52LX177 | Owner's Manual - English - Page 89
address setup was successful (even though the TV displayed the error message). Manually setting up the network address This setup requires highlight the IP Address field, and then use the Number buttons on the remote control to input the IP address. Basic Network Setup Please enter your Network - Toshiba 52LX177 | Owner's Manual - English - Page 90
) are on your PC: 1 On your PC, click the "Start" button. 2 Click "Settings | Control Panel." 3 In the Control Panel, double-click "System." 4 Select the "General" tab, which will display your PC's current operating system and service pack. Setting up file sharing on a PC with Microsoft® Windows® XP - Toshiba 52LX177 | Owner's Manual - English - Page 91
"Home File Server Setup" menu. b) Click to check "Allow" next to "Full Control." c) Click "Apply." d) Click "OK" to close the window. 4 Go to section D, "Setting up file sharing on the TV," on page 93. c) Click "Permissions" (which will open the Permissions window for the selected folder). Go to - Toshiba 52LX177 | Owner's Manual - English - Page 92
user must match the user stored in the TV's "Home File Server Setup" menu. b) Click to check "Allow" next to "Full Control." c) Click "Apply." d) Click " holding a folder). 6 Go to section D, "Setting up file sharing on the TV," on the next page. For home network troubleshooting tips, see Chapter 9. - Toshiba 52LX177 | Owner's Manual - English - Page 93
will act as the "Home Server" for file sharing with the TV. Home File Server Setup Please enter your Home File Server Setup Information. Home Server Name ABCD User Name XYZ Password JPEG Picture Directory MP3 Music Directory ******* Pics , MP3 s Software Upgrade Directory -- Cancel Done - Toshiba 52LX177 | Owner's Manual - English - Page 94
and return to the previous screen. Note: Help instructions are provided in the on-screen display and include specific remote control key functions that are applicable only can only be resolved by a software update, your Toshiba customer service representative will provide you with the appropriate - Toshiba 52LX177 | Owner's Manual - English - Page 95
. • The technical criteria set out in this manual are meant as a guide only. • You must obtain any required permission from copyright owners to download or use copyrighted content. Toshiba cannot and does not grant such permission. Media specifications File/folder name specifications - Maximum file - Toshiba 52LX177 | Owner's Manual - English - Page 96
photos (JPEG files) on your TV's screen in thumbnail mode or as a slide show. Note: • You cannot use the Picture Viewer and Audio Player at the same time. • You must obtain any required permission from copyright owners to download or use copyrighted content. Toshiba cannot and does not grant such - Toshiba 52LX177 | Owner's Manual - English - Page 97
CE-Link Setup Sleep Timer HDMI Settings PC Settings Slide Show Interval 2 Sec Power-On Mode Demo Mode Power-Saving On 2 Sec 5 Sec 10 Sec 15 Sec 20 Sec To close the Picture Viewer: Press O to close the Picture Viewer and return to normal TV watching. During the slide show: • To - Toshiba 52LX177 | Owner's Manual - English - Page 98
use the Picture Viewer and Audio Player at the same time. • You must obtain any required permission from copyright owners to download or use copyrighted content. Toshiba cannot and does not grant such permission. Playing MP3 files stored on a networked PC 1 Make sure you have correctly set up your - Toshiba 52LX177 | Owner's Manual - English - Page 99
and whether to keep the TV set connected (or make available easy connection) to the internet. The Personal E-mail Setup will allow up to 4 users to set up profiles from which each profile may access their e-mail account. Required information and services Before you can set up the Personal E-mail - Toshiba 52LX177 | Owner's Manual - English - Page 100
See "Description of fields in the E-mail Account Setup window" (- page 101) for details on the settings for these fields. 12 Highlight Test and press T to confirm that the e-mail account settings work correctly. 13 When testing is finished, a message will appear indicating whether the e-mail account - Toshiba 52LX177 | Owner's Manual - English - Page 101
the e-mail account. Note: The TV does not support encrypted e-mail. POP3 Port Number Use the software keyboard to enter the port number used by the user's POP3 (incoming mail) server. This field is set troubleshooting tips, see Chapter 9. (continued) 101 - Toshiba 52LX177 | Owner's Manual - English - Page 102
Notification When the TV detects unread e-mail in a user's inbox, a notification will appear in the bottom right corner of the screen that contains (picture-in-picture) window in the upper left corner of the screen. You can change channels in the PIP window by pressing < / , on the remote control. - Toshiba 52LX177 | Owner's Manual - English - Page 103
button (as shown in the guide at the bottom of the screen). Note: If you delete an e-mail on the TV, it will also be deleted from To view a JPEG attachment using the Picture Viewer, highlight the Paperclip icon and press T. To return to the Read View from the Picture Viewer, press O. To return to - Toshiba 52LX177 | Owner's Manual - English - Page 104
the TV stops responding to the controls on the remote control or TV control panel and you cannot turn off the TV, press and hold the POWER button on the TV control panel for 5 or more seconds to reset the TV. Other problems • If your TV's problem is not addressed in this Troubleshooting section or - Toshiba 52LX177 | Owner's Manual - English - Page 105
may not operate certain features on your external device. Refer to the owner's manual for your other device to determine its available features. If your TV remote control does not operate a specific feature on another device, use the remote control that came with the device (- pages 31-39). • If the - Toshiba 52LX177 | Owner's Manual - English - Page 106
a valid or supported MP3 file. TV for display. See "Media specifications" in Chapter 8 for Picture Viewer and JPEG file specifications. Basic network setup problems instructions on enabling DHCP. If you do not have a router, you must manually set up the network address (- page 89). • Internet service - Toshiba 52LX177 | Owner's Manual - English - Page 107
network setup on the PC is incorrect. Make sure both the PC and TV are using the same network type (DHCP/ manual) and have compatible network settings. • The networked PC does not have shared folders set up correctly. See "Setting up file sharing on your PC" in Chapter 8 for details. • There are no - Toshiba 52LX177 | Owner's Manual - English - Page 108
LED will blink while the TV is booting until the remote control is usable. This is normal and is not a sign of malfunction. TV front POWER Yellow LED Green LED LED Indication 1) Green is ON (solid). 2) Yellow is ON (solid). Condition The TV is operating properly. Standby with Power-On Mode set to - Toshiba 52LX177 | Owner's Manual - English - Page 109
135) Power Source 120 V AC, 60 Hz Power Consumption 42LX177: 46LX177: 52LX177: 57LX177: 188 W (average) 0.6 W in standby mode 213 W (average) 0.4 W in standby mode 232 W (average) 0.4 W in standby mode 352 W (average) 0.3 W in standby mode Audio Power 10 W + 10 W Speaker Type Two 4 inches - Toshiba 52LX177 | Owner's Manual - English - Page 110
Chapter 10: Appendix Dimensions 42LX177: 46LX177: 52LX177: 57LX177: Width: 40-1/4 inches (1,020 mm) Height: (no moisture condensation) Supplied Accessories • Remote control with two size "AA" alkaline batteries • Owner's manual (this book) • Lead clip Use this clip to attach the TV to a wall, - Toshiba 52LX177 | Owner's Manual - English - Page 111
, after following all of the operating instructions in this manual and reviewing the section entitled "Troubleshooting," you find that service is needed: (1) To find the nearest TACP Authorized Service Station, visit TACP's website at www.tacp.toshiba.com/service or contact TACP's Consumer Solution - Toshiba 52LX177 | Owner's Manual - English - Page 112
of a Television on which the TOSHIBA label or logo, rating label or serial number have been defaced or removed; i. On-site service and repair of the Television; and j. Damage to the Television caused by failure to follow the specifications, User manuals or guides as to usage and/or storage. 112 - Toshiba 52LX177 | Owner's Manual - English - Page 113
, ETC.). YOU MUST READ AND FOLLOW ALL SET-UP AND USAGE INSTRUCTIONS IN THE APPLICABLE USER GUIDES AND/OR MANUALS. IF YOU FAIL TO DO SO, THIS TELEVISION MAY NOT FUNCTION PROPERLY AND YOU MAY SUFFER DAMAGE. THIS WARRANTY WILL NOT COVER ANY SERVICE THAT IS REQUIRED, IN PART OR IN WHOLE, AS A RESULT OF - Toshiba 52LX177 | Owner's Manual - English - Page 114
in this product may be obtained by contacting Toshiba Consumer Solutions at (800)631-3811. There PROCUREMENT OF SUBSTITUTE GOODS OR SERVICES; LOSS OF USE, DATA given attribution as the author of the parts of the library used. This can be you include any Windows specific code (or derivative thereof - Toshiba 52LX177 | Owner's Manual - English - Page 115
Personal E-mail setup 99 Picture adjustment 60 Picture mode 60 Picture quality 61 Picture scroll 58 Picture size selection 56 Picture Viewer 95, 96 POP button 59 POP3 Password 101 POWER button 11, 27 Power-On Mode 50 R RECALL button 76 Remote control Battery installation 26 Effective - Toshiba 52LX177 | Owner's Manual - English - Page 116
90 Side panel control 11 Sleep timer 73 Slide show 97 Speaker On/Off 66 Specifications 109 StableSound 65 Stereo sound 64 SurfLock 55 S-video cable 14 System status 49 T TheaterLock™ feature 61 TheaterWide® picture size 56 THINC button 27 THINC™ system 13 Troubleshooting 104 TV status - Toshiba 52LX177 | Owner's Manual - English - Page 117
Notes 117 - Toshiba 52LX177 | Owner's Manual - English - Page 118
, Cinema Series, ColorStream, GameTimer, StableSound, and TheaterWide are registered trademarks of Toshiba America Consumer Products, L.L.C. Channel Browser, SurfLock, DynaLight, ColorMaster, ClearFrame, TheaterLock, and THINC are trademarks of Toshiba America Consumer Products, L.L.C. REGZA is
-
 1
1 -
 2
2 -
 3
3 -
 4
4 -
 5
5 -
 6
6 -
 7
7 -
8
-
9
-
10
-
11
-
12
-
13
-
14
-
15
-
16
-
17
-
18
-
19
-
20
-
21
-
22
-
23
-
24
-
25
-
26
-
27
-
28
-
29
-
30
-
31
-
32
-
33
-
34
-
35
-
36
-
37
-
38
-
39
-
40
-
41
-
42
-
43
-
44
-
45
-
46
-
47
-
48
-
49
-
50
-
51
-
52
-
53
-
54
-
55
-
56
-
57
-
58
-
59
-
60
-
61
-
62
-
63
-
64
-
65
-
66
-
67
-
68
-
69
-
70
-
71
-
72
-
73
-
74
-
75
-
76
-
77
-
78
-
79
-
80
-
81
-
82
-
83
-
84
-
85
-
86
-
87
-
88
-
89
-
90
-
91
-
92
-
93
-
94
-
95
-
96
-
97
-
98
-
99
-
100
-
101
-
102
-
103
-
104
-
105
-
106
-
107
-
108
-
109
-
110
-
111
-
112
-
113
-
114
-
115
-
116
-
117
-
118
 |
 |
HIGH
-DEFINITION TELEVISION
42LX177
46LX177
52LX177
57LX177
YC/M
VX1A00045900
Integrated High Definition
LCD Television
© 2007 TOSHIBA CORPORATION
All Rights Reserved
Owner’s Record
The model number and serial number are on the back of
your TV. Record these numbers in the spaces below.
Refer to these numbers whenever you communicate
with your Toshiba dealer about this TV.
Model number:
Serial number:
For an overview of steps for setting up your new TV, see page 10.
Note: To display a High Definition picture, the TV must be receiving a
High Definition signal (such as an over-the-air High Definition TV
broadcast, a High Definition digital cable program, or a High Definition
digital satellite program). For details, please contact your TV antenna
installer, cable provider, or satellite provider.