Toshiba 52LX177 Owner's Manual - English - Page 75
Using the HDMI settings feature
 |
UPC - 022265000700
View all Toshiba 52LX177 manuals
Add to My Manuals
Save this manual to your list of manuals |
Page 75 highlights
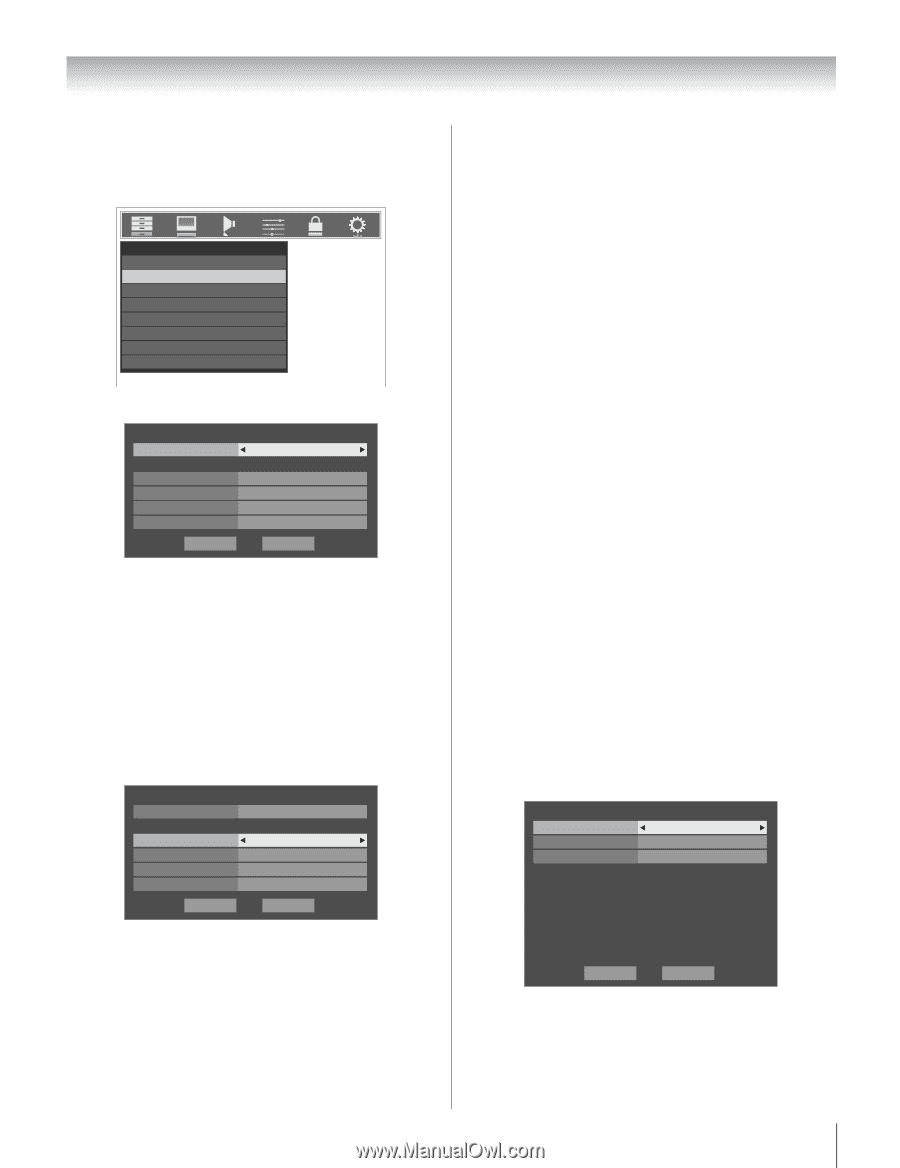
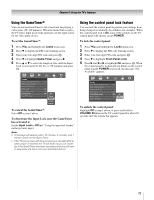
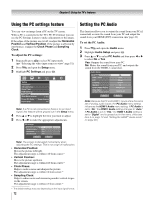
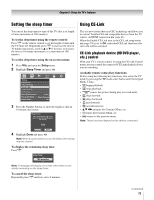
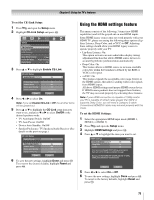
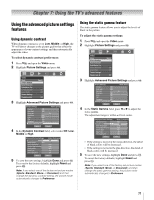
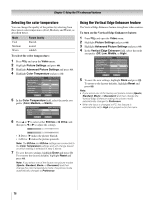
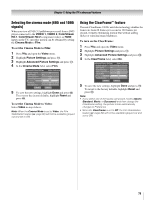
Chapter 6: Using the TV's features To set the CE-Link Setup: 1 Press Y and open the Setup menu. 2 Highlight CE-Link Setup and press T. Setup Installation CE-Link Setup Sleep Timer HDMI Settings PC Settings Slide Show Interval 2 Sec Power-On Mode Power-Saving Demo Mode On 3 Press B or b to highlight Enable CE-Link. CE-Link Setup Enable CE-Link On TV Auto Input Switch TV Auto Power Device Auto Standby Speaker Preference Reset On Off On TV Speakers Done 4 Press C or c to select On. Note: If you set Enable CE-Link to Off, the all other items will be grayed out. 5 Press B or b to highlight the CE-Link setup item you want to use, and press C or c to select On/Off or the desired speakers mode. • TV Auto Input Switch: On/Off • TV Auto Power: On/Off • Device Auto Standby: On/Off • Speaker Preference: TV Speakers/Audio Receiver (See details on the previous page.) CE-Link Setup Enable CE-Link On TV Auto Input Switch TV Auto Power Device Auto Standby Speaker Preference Reset On Off On TV Speakers Done 6 To save the new settings, highlight Done and press T. To revert to the factory defaults, highlight Reset and press T. Using the HDMI settings feature This menu consists of the following 3 items (new HDMI capabilities) and will be grayed out on non-HDMI inputs. Some HDMI legacy sources may not work properly with your HDMI TV, please try setting the following three options (LipSync Latency, Deep Color, and xvYCC) to Off. Adjusting these settings should allow your HDMI legacy source to operate properly with your TV. • Lip-Sync Latency: On This option activates an auto audio/video display timing adjustment function that allows HDMI source devices to accurately perform synchronization automatically. • Deep Color: On This feature allows to HDMI source to increase available colors bits within the boundaries defined by the RGB or YCbCr color space. • xvYCC: On This feature expands the acceptable color range (limits) in the HDMI signals, then allows sending wider color signals from HDMI source. All above HDMI settings need proper HDMI source device. If HDMI source products does not support these features, the TV may not work properly by activating these features. Note: If your HDMI connection is capable of 1080p and/or your TV is capable of refresh rates greater than 60Hz or supports Deep Color, you will need a Category 2 cable. Conventional HDMI/DVI cables may not work properly with this mode. To set the HDMI Settings: 1 Select the appropriate HDMI input mode (HDMI 1, HDMI 2, or HDMI 3). 2 Press Y and open the Setup menu. 3 Highlight HDMI Settings and press T. 4 Press B or b to highlight the item you want to set. HDMI Settings HDMI 1 Lip-Sync Latency On Deep Color On xvYCC On Once you have changed On/Off settings, please press Done and wait for changes completed message. Warning: DO NOT TURN OFF OR UNPLUG THE TV UNTIL COMPLETED MESSAGE IS DISPLAYED!! Reset Done 5 Press C or c to select On or Off . 6 To save the new settings, highlight Done and press T. To revert to the factory defaults, highlight Reset and press T. 75
-
 1
1 -
2
-
3
-
4
-
5
-
6
-
7
-
8
-
9
-
10
-
11
-
12
-
13
-
14
-
15
-
16
-
17
-
18
-
19
-
20
-
21
-
22
-
23
-
24
-
25
-
26
-
27
-
28
-
29
-
30
-
31
-
32
-
33
-
34
-
35
-
36
-
37
-
38
-
39
-
40
-
41
-
42
-
43
-
44
-
45
-
46
-
47
-
48
-
49
-
50
-
51
-
52
-
53
-
54
-
55
-
56
-
57
-
58
-
59
-
60
-
61
-
62
-
63
-
64
-
65
-
66
-
67
-
68
-
69
-
 70
70 -
 71
71 -
 72
72 -
 73
73 -
 74
74 -
 75
75 -
 76
76 -
 77
77 -
 78
78 -
 79
79 -
 80
80 -
81
-
82
-
83
-
84
-
85
-
86
-
87
-
88
-
89
-
90
-
91
-
92
-
93
-
94
-
95
-
96
-
97
-
98
-
99
-
100
-
101
-
102
-
103
-
104
-
105
-
106
-
107
-
108
-
109
-
110
-
111
-
112
-
113
-
114
-
115
-
116
-
117
-
118
 |
 |