Xerox M118i OmniPage SE User Guide - Page 61
Table grids in the image
 |
UPC - 095205219265
View all Xerox M118i manuals
Add to My Manuals
Save this manual to your list of manuals |
Page 61 highlights
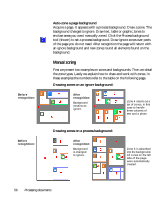
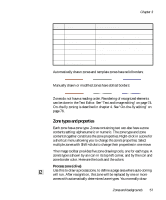
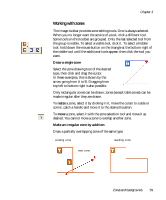
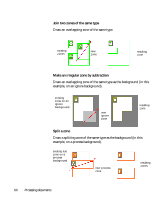
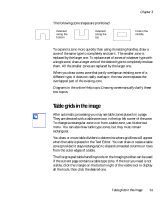
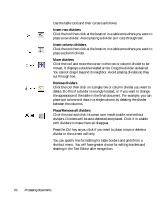
The following zone shapes are prohibited: Indented along the bottom Indented along the top Chapter 3 Hole in the middle To expand a zone more quickly than using its resizing handles, draw a zone of the same type to completely enclose it. The smaller zone is replaced by the larger one. To replace a set of zones of whatever type with a single zone, draw a larger zone of the desired type to completely enclose them. All the smaller zones are replaced by the larger one. When you draw a new zone that partly overlaps an existing zone of a different type, it does not really overlap it; the new zone replaces the overlapped part of the existing zone. Diagrams in the online Help topic Drawing zones manually clarify these two topics. Table grids in the image After automatic processing you may see table zones placed on a page. They are denoted with a table zone icon in the top left corner of the zone. To change a rectangular zone to or from a table zone, use its shortcut menu. You can also draw table type zones, but they must remain rectangular. You draw or move table dividers to determine where gridlines will appear when the table is placed in the Text Editor. You can draw or resize a table zone (provided it stays rectangular) to discard unneeded columns or rows from the outer edges of a table. The five grouped table handling tools on the Imaging toolbar can be used if the current page contains a table type zone. If the tool you need is not visible, click the triangle on the bottom right of the visible tool to display all the tools, then click the desired one. Table grids in the image 61
-
 1
1 -
2
-
3
-
4
-
5
-
6
-
7
-
8
-
9
-
10
-
11
-
12
-
13
-
14
-
15
-
16
-
17
-
18
-
19
-
20
-
21
-
22
-
23
-
24
-
25
-
26
-
27
-
28
-
29
-
30
-
31
-
32
-
33
-
34
-
35
-
36
-
37
-
38
-
39
-
40
-
41
-
42
-
43
-
44
-
45
-
46
-
47
-
48
-
49
-
50
-
51
-
52
-
53
-
54
-
55
-
 56
56 -
 57
57 -
 58
58 -
 59
59 -
 60
60 -
 61
61 -
 62
62 -
 63
63 -
 64
64 -
 65
65 -
 66
66 -
67
-
68
-
69
-
70
-
71
-
72
-
73
-
74
-
75
-
76
-
77
-
78
-
79
-
80
-
81
-
82
-
83
-
84
-
85
-
86
-
87
-
88
-
89
-
90
-
91
-
92
-
93
-
94
-
95
-
96
-
97
-
98
-
99
-
100
-
101
-
102
 |
 |
