Yamaha RX V661 MCXSP10 Manual - Page 52
Using audio features, Enjoying pure hi-fi sound, Adjusting the tonal quality
 |
UPC - 027108927411
View all Yamaha RX V661 manuals
Add to My Manuals
Save this manual to your list of manuals |
Page 52 highlights
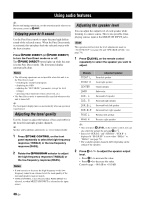
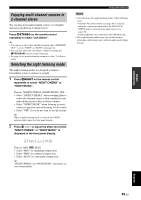
USING AUDIO FEATURES Using audio features y Before performing operations, set the operation mode selector on the remote control to KAMP. Enjoying pure hi-fi sound Use the Pure Direct mode to enjoy the pure high fidelity sound of the selected source. When the Pure Direct mode is activated, this unit plays back the selected source with the least circuitry. Press GPURE DIRECT (or TPURE DIRECT) to turn the Pure Direct mode on or off. The GPURE DIRECT button lights up while this unit is in the Pure Direct mode. The front panel display automatically dims. Notes • The following operations are not possible when this unit is in the Pure Direct mode: - switching the sound field program - displaying the OSD - adjusting the "SET MENU" parameters (except for level settings) - operating video functions (video conversion, etc.) • The Pure Direct mode is automatically canceled whenever this unit is turned off. y The front panel display turns on momentarily when an operation is performed. Adjusting the tonal quality Use this feature to adjust the balance of bass and treble for the front left and right speaker channels. y Speaker and headphone adjustments are stored independently. 1 Press CTONE CONTROL on the front panel repeatedly to select the high-frequency response (TREBLE) or the low-frequency response (BASS). 2 Rotate the DPROGRAM selector to adjust the high-frequency response (TREBLE) or the low-frequency response (BASS). Notes • If you increase or decrease the high-frequency or the lowfrequency sound to an extreme level, the tonal quality of the surround speakers may not match. • TONE CONTROL is not effective when PURE DIRECT is selected, or when MULTI CH INPUT is selected as the input source. Adjusting the speaker level You can adjust the output level of each speaker while listening to a music source. This is also possible when playing sources input at the MULTI CH INPUT jacks. Note This operation will override the level adjustments made in "AUTO SETUP" (see page 28) and "SPEAKER LEVEL" (see page 74). 1 Press CLEVEL on the remote control repeatedly to select the speaker you want to adjust. Display Adjusted speaker FRONT L Front left speaker FRONT R Front right speaker CENTER Center speaker SWFR Subwoofer SUR. L Surround left speaker SUR. R Surround right speaker SUR.B.L Surround back left speaker SUR.B.R Surround back right speaker PRNS L Presence left speaker PRNS R Presence right speaker y • Once you press CLEVEL on the remote control, you can also select the speaker by pressing Dk / n. • Instead of "SUR.B.L" and "SUR.B.R", "SUR.B" is displayed if "SB L/R SP" is set to either "SMLx1" or "LRGx1" (see page 73). • The available speaker channels differ depending on the setting of the speakers. 2 Press Dl / h to adjust the speaker output level. • Press Dh to increase the value. • Press Dl to decrease the value. Control range: -10.0 dB to +10.0 dB 48 En
-
 1
1 -
2
-
3
-
4
-
5
-
6
-
7
-
8
-
9
-
10
-
11
-
12
-
13
-
14
-
15
-
16
-
17
-
18
-
19
-
20
-
21
-
22
-
23
-
24
-
25
-
26
-
27
-
28
-
29
-
30
-
31
-
32
-
33
-
34
-
35
-
36
-
37
-
38
-
39
-
40
-
41
-
42
-
43
-
44
-
45
-
46
-
 47
47 -
 48
48 -
 49
49 -
 50
50 -
 51
51 -
 52
52 -
 53
53 -
 54
54 -
 55
55 -
 56
56 -
 57
57 -
58
-
59
-
60
-
61
-
62
-
63
-
64
-
65
-
66
-
67
-
68
-
69
-
70
-
71
-
72
-
73
-
74
-
75
-
76
-
77
-
78
-
79
-
80
-
81
-
82
-
83
-
84
-
85
-
86
-
87
-
88
-
89
-
90
-
91
-
92
-
93
-
94
-
95
-
96
-
97
-
98
-
99
-
100
-
101
-
102
-
103
-
104
-
105
-
106
-
107
-
108
-
109
-
110
-
111
-
112
-
113
-
114
-
115
-
116
-
117
-
118
-
119
-
120
-
121
-
122
-
123
-
124
-
125
-
126
-
127
-
128
-
129
-
130
 |
 |
