3Com 3CCFEM556B User Guide - Page 30
Running Setup to Install Microsoft Network Clients
 |
UPC - 662662532154
View all 3Com 3CCFEM556B manuals
Add to My Manuals
Save this manual to your list of manuals |
Page 30 highlights
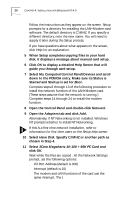
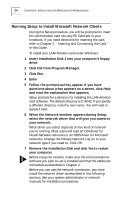
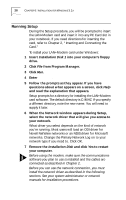
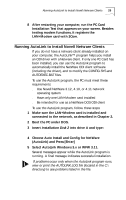
24 CHAPTER 5: INSTALLATION FOR WINDOWS FOR WORKGROUPS Running Setup to Install Microsoft Network Clients During the Setup procedure, you will be prompted to insert the LAN+Modem card into any PC Card slot in your notebook. If you need directions for inserting the card, refer to Chapter 2, "Inserting and Connecting the Card," in this Guide. To install your LAN+Modem card under Windows: 1 Insert Installation Disk 1 into your computer's floppy drive. 2 Click File from Program Manager. 3 Click Run. 4 Enter a:\setup 5 Follow the prompts as they appear. If you have questions about what appears on a screen, click Help and read the explanation that appears. Setup prompts for a directory for installing the LAN+Modem card software. The default directory is C:\MHZ. If you specify a different directory, note the new name. You will need to supply it later. 6 When the Network window appears during Setup, select the network driver that will give you access to your network. What driver you select depends on the kind of network you're running. Most users will load an ODI driver for Novell NetWare networks or an NDIS driver for Microsoft networks. Change the Primary Network Log on to your network type if you need to. Click OK. 7 Remove the Installation Disk and click Yes to restart your computer. Before using the modem, make sure the communications software you plan to use is installed and that the cables are connected as described in Chapter 2. Before you can use the network connection, you must install the network driver as described in the following sections. See your system administrator or network manuals for installation procedures.
-
 1
1 -
2
-
3
-
4
-
5
-
6
-
7
-
8
-
9
-
10
-
11
-
12
-
13
-
14
-
15
-
16
-
17
-
18
-
19
-
20
-
21
-
22
-
23
-
24
-
 25
25 -
 26
26 -
 27
27 -
 28
28 -
 29
29 -
 30
30 -
 31
31 -
 32
32 -
 33
33 -
 34
34 -
 35
35 -
36
-
37
-
38
-
39
-
40
-
41
-
42
-
43
-
44
-
45
-
46
-
47
-
48
-
49
-
50
-
51
-
52
-
53
-
54
-
55
-
56
-
57
-
58
-
59
-
60
-
61
-
62
-
63
-
64
-
65
-
66
-
67
-
68
-
69
-
70
-
71
-
72
-
73
-
74
-
75
-
76
-
77
-
78
-
79
-
80
 |
 |