Autodesk 00308-011408-9F30A User Guide - Page 86
Printing, Plotting, and Publishing, To preview output onscreen
 |
UPC - 606121128243
View all Autodesk 00308-011408-9F30A manuals
Add to My Manuals
Save this manual to your list of manuals |
Page 86 highlights
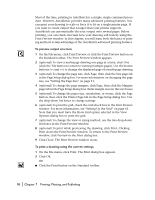
Most of the time, printing in AutoSketch is a simple, single command procedure. However, AutoSketch provides many advanced printing features. You can print your drawing to scale or force it to fit on a single printer page. If you want to create output that is larger than your printer supports, AutoSketch can automatically tile your output onto several pages. Before printing, you can check onscreen how your drawing will look by using the Print Preview window. In this chapter, you will learn both the basics of printing and how to take advantage of the AutoSketch advanced printing features. To preview output onscreen 1 On the File menu, click Print Preview, or click the Print Preview button on the Standard toolbar. The Print Preview window appears. 2 (optional) To view a multi-page drawing one page at a time, click One (click the Tile button to return to viewing multiple pages). Use the browse buttons (>) to change the displayed page of a multi-page drawing. 3 (optional) To change the page size, click Page, then click the Size page tab in the Page Setup dialog box. For more information on changing the page size, see "Setting the Page Size" on page 51. 4 (optional) To change the page margins, click Page, then click the Margins page tab in the Page Setup dialog box. Enter margin sizes in the text boxes. 5 (optional) To change the paper size, orientation, or source, click the Page button, then click the Printer Page tab in the Page Setup dialog box. Use the drop-down list boxes to change settings. 6 (optional) To print the grid, check the Grid check box in the Print Preview window. For more information, see "Setting Up the Grid" on page 61. Note that you must have the Show Grid option selected in the View Options dialog box to print the grid. 7 (optional) To change the view or sizing method, use the two drop-down list boxes in the Print Preview window. 8 (optional) To print while previewing the drawing, click Print. Clicking Print closes the Print Preview window. To return to the Print Preview window, click Preview in the Print dialog box. 9 Click Close. The Print Preview window closes. To print a drawing using the current settings 1 On the File menu, click Print. The Print dialog box appears. 2 Click OK. OR s Click the Print button on the Standard toolbar. 76 | Chapter 7 Printing, Plotting, and Publishing
-
 1
1 -
2
-
3
-
4
-
5
-
6
-
7
-
8
-
9
-
10
-
11
-
12
-
13
-
14
-
15
-
16
-
17
-
18
-
19
-
20
-
21
-
22
-
23
-
24
-
25
-
26
-
27
-
28
-
29
-
30
-
31
-
32
-
33
-
34
-
35
-
36
-
37
-
38
-
39
-
40
-
41
-
42
-
43
-
44
-
45
-
46
-
47
-
48
-
49
-
50
-
51
-
52
-
53
-
54
-
55
-
56
-
57
-
58
-
59
-
60
-
61
-
62
-
63
-
64
-
65
-
66
-
67
-
68
-
69
-
70
-
71
-
72
-
73
-
74
-
75
-
76
-
77
-
78
-
79
-
80
-
 81
81 -
 82
82 -
 83
83 -
 84
84 -
 85
85 -
 86
86 -
 87
87 -
 88
88 -
 89
89 -
 90
90 -
 91
91 -
92
-
93
-
94
-
95
-
96
-
97
-
98
-
99
-
100
-
101
-
102
-
103
-
104
-
105
-
106
-
107
-
108
-
109
-
110
-
111
-
112
-
113
-
114
-
115
-
116
-
117
-
118
-
119
-
120
-
121
-
122
-
123
-
124
-
125
-
126
-
127
-
128
-
129
-
130
-
131
-
132
-
133
-
134
-
135
-
136
-
137
-
138
-
139
-
140
-
141
-
142
-
143
-
144
-
145
-
146
-
147
-
148
-
149
-
150
-
151
-
152
-
153
-
154
-
155
-
156
-
157
-
158
-
159
-
160
-
161
-
162
-
163
-
164
-
165
-
166
-
167
-
168
-
169
-
170
-
171
-
172
-
173
-
174
-
175
-
176
-
177
-
178
-
179
-
180
-
181
-
182
-
183
-
184
-
185
-
186
-
187
-
188
-
189
-
190
-
191
-
192
-
193
-
194
-
195
-
196
-
197
-
198
-
199
-
200
-
201
-
202
-
203
-
204
-
205
-
206
-
207
-
208
-
209
-
210
-
211
-
212
-
213
-
214
-
215
-
216
-
217
-
218
-
219
-
220
-
221
-
222
-
223
-
224
-
225
-
226
-
227
-
228
-
229
-
230
-
231
-
232
-
233
-
234
-
235
-
236
-
237
-
238
-
239
-
240
-
241
-
242
-
243
-
244
-
245
-
246
-
247
-
248
-
249
-
250
-
251
-
252
-
253
-
254
-
255
-
256
-
257
-
258
-
259
-
260
-
261
-
262
-
263
-
264
-
265
-
266
-
267
-
268
-
269
-
270
-
271
-
272
-
273
-
274
-
275
-
276
-
277
-
278
-
279
-
280
-
281
-
282
-
283
-
284
-
285
-
286
-
287
-
288
-
289
-
290
-
291
-
292
-
293
-
294
-
295
-
296
-
297
-
298
-
299
-
300
-
301
-
302
-
303
-
304
-
305
-
306
-
307
-
308
-
309
-
310
-
311
-
312
-
313
-
314
-
315
-
316
-
317
-
318
-
319
-
320
-
321
-
322
-
323
-
324
-
325
-
326
-
327
-
328
-
329
-
330
-
331
-
332
-
333
-
334
-
335
-
336
-
337
-
338
-
339
-
340
-
341
-
342
-
343
-
344
-
345
-
346
-
347
-
348
-
349
-
350
-
351
-
352
-
353
-
354
-
355
-
356
-
357
-
358
-
359
-
360
-
361
-
362
-
363
-
364
-
365
-
366
-
367
-
368
-
369
-
370
-
371
-
372
-
373
-
374
-
375
-
376
-
377
-
378
-
379
-
380
-
381
-
382
-
383
-
384
-
385
-
386
-
387
-
388
-
389
-
390
-
391
-
392
-
393
-
394
-
395
-
396
-
397
-
398
-
399
-
400
 |
 |