Brother International MFC-J4410DW Users Manual Advanced - English - Page 16
Sending a fax, Additional sending options, Sending faxes using multiple settings, Stop faxing
 |
View all Brother International MFC-J4410DW manuals
Add to My Manuals
Save this manual to your list of manuals |
Page 16 highlights
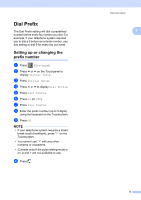
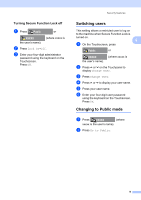
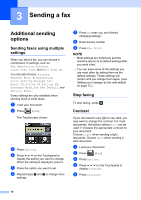
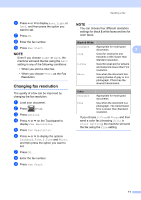
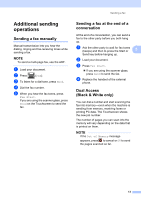
3 Sending a fax 3 Additional sending options 3 Sending faxes using multiple settings 3 When you send a fax, you can choose a combination of settings, such as Fax Resolution, Contrast, Glass Scan Size, and Real Time TX. You can also choose: History, Address Book, Broadcasting, Color Setting, Delayed Fax, Batch TX, Polled TX, Polling RX, Overseas Mode, Set New Default, and Factory Reset. Some settings are only available when sending black & white faxes. a Load your document. b Press (Fax). The Touchscreen shows: c Press Options. d Press s or t on the Touchpanel to display the setting you want to change. When the setting is displayed, press it. e Press the option you want to set. f Repeat steps d and e to change more settings. g Press OK when you are finished changing settings. h Enter the fax number. i Press Fax Start. NOTE • Most settings are temporary and the machine returns to its default settings after you send a fax. • You can save some of the settings you use most often by setting them as the default settings. These settings will remain until you change them again. (See Setting your changes as the new default on page 12.) Stop faxing 3 To stop faxing, press . Contrast 3 If your document is very light or very dark, you may want to change the contrast. For most documents, the factory setting Auto can be used. It chooses the appropriate contrast for your document. Choose Light when sending a light document. Choose Dark when sending a dark document. a Load your document. b Press (Fax). c Press Options. d Press s or t on the Touchpanel to display Contrast. e Press Contrast. 10
-
 1
1 -
2
-
3
-
4
-
5
-
6
-
7
-
8
-
9
-
10
-
 11
11 -
 12
12 -
 13
13 -
 14
14 -
 15
15 -
 16
16 -
 17
17 -
 18
18 -
 19
19 -
 20
20 -
 21
21 -
22
-
23
-
24
-
25
-
26
-
27
-
28
-
29
-
30
-
31
-
32
-
33
-
34
-
35
-
36
-
37
-
38
-
39
-
40
-
41
-
42
-
43
-
44
-
45
-
46
-
47
-
48
-
49
-
50
-
51
-
52
-
53
-
54
-
55
-
56
-
57
-
58
-
59
-
60
-
61
-
62
-
63
-
64
-
65
-
66
-
67
-
68
-
69
-
70
-
71
-
72
-
73
-
74
-
75
-
76
-
77
-
78
-
79
-
80
-
81
-
82
-
83
-
84
-
85
-
86
-
87
-
88
 |
 |