Canon DC220 DC220 DC230 Instruction Manual - Page 81
External Connections
 |
UPC - 013803079500
View all Canon DC220 manuals
Add to My Manuals
Save this manual to your list of manuals |
Page 81 highlights
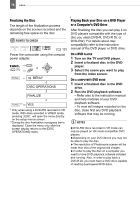
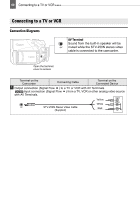
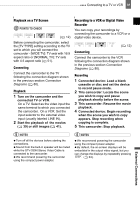
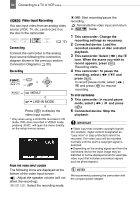
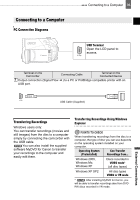
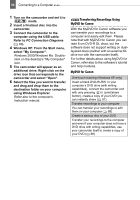
Connecting to a TV or VCR 81 Playback on a TV Screen POINTS TO CHECK ( 12) Before connecting the camcorder, select the [TV TYPE] setting according to the TV set to which you will connect the camcorder - [WIDE TV]: TV sets with 16:9 aspect ratio or [NORMAL TV]: TV sets with 4:3 aspect ratio ( 51). Connecting Connect the camcorder to the TV following the connection diagram shown in the previous section Connection Diagrams ( 80). Playback 1 Turn on the camcorder and the connected TV or VCR. On a TV: Select as the video input the same terminal to which you connected the camcorder. On a VCR: Set the input selector to the external video input (usually labeled LINE IN). 2 Start the playback of the movies ( 39) or still images ( 41). Recording to a VCR or Digital Video Recorder You can copy your recordings by connecting the camcorder to a VCR or a digital video device. ( 12) Connecting Connect the camcorder to the VCR following the connection diagram shown in the previous section Connection Diagrams ( 80). Recording 1 Connected device: Load a blank cassette or disc and set the device to record pause mode. 2 This camcorder: Locate the scene you wish to copy and pause playback shortly before the scene. 3 This camcorder: Resume the movie playback. 4 Connected device: Begin recording when the scene you wish to copy appears. Stop recording when copying is complete. 5 This camcorder: Stop playback. NOTES Turn off all the devices before starting the connections. Sound from the built-in speaker will be muted while the STV-250N Stereo Video Cable is connected to the camcorder. We recommend powering the camcorder using the compact power adapter. NOTES We recommend powering the camcorder using the compact power adapter. By default, the on-screen displays will be embedded in the output video signal, but you can change the displays by repeatedly pressing DISP. ( 63). External Connections
-
 1
1 -
2
-
3
-
4
-
5
-
6
-
7
-
8
-
9
-
10
-
11
-
12
-
13
-
14
-
15
-
16
-
17
-
18
-
19
-
20
-
21
-
22
-
23
-
24
-
25
-
26
-
27
-
28
-
29
-
30
-
31
-
32
-
33
-
34
-
35
-
36
-
37
-
38
-
39
-
40
-
41
-
42
-
43
-
44
-
45
-
46
-
47
-
48
-
49
-
50
-
51
-
52
-
53
-
54
-
55
-
56
-
57
-
58
-
59
-
60
-
61
-
62
-
63
-
64
-
65
-
66
-
67
-
68
-
69
-
70
-
71
-
72
-
73
-
74
-
75
-
 76
76 -
 77
77 -
 78
78 -
 79
79 -
 80
80 -
 81
81 -
 82
82 -
 83
83 -
 84
84 -
 85
85 -
 86
86 -
87
-
88
-
89
-
90
-
91
-
92
-
93
-
94
-
95
-
96
-
97
-
98
-
99
-
100
-
101
-
102
-
103
-
104
-
105
-
106
-
107
-
108
-
109
-
110
-
111
-
112
-
113
-
114
-
115
-
116
-
117
-
118
-
119
-
120
-
121
-
122
-
123
 |
 |