Canon DC220 DC220 DC230 Instruction Manual - Page 84
Windows XP: From the Start menu - mydvd software
 |
UPC - 013803079500
View all Canon DC220 manuals
Add to My Manuals
Save this manual to your list of manuals |
Page 84 highlights
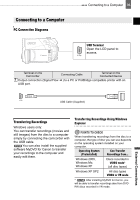
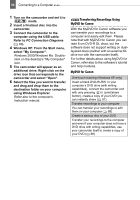
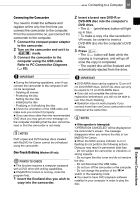
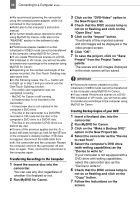
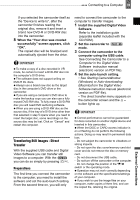
84 Connecting to a Computer 1 Turn on the camcorder and set it to mode. 2 Insert a finalized disc into the camcorder. 3 Connect the camcorder to the computer using the USB cable. Refer to PC Connection Diagrams ( 83). 4 Windows XP: From the Start menu, select "My Computer". Windows 2000/Windows Me: Doubleclick on the desktop's "My Computer" icon. 5 The camcorder will appear as an additional drive. Right-click on the drive icon that corresponds to the camcorder and select "Open". 6 Select the files you want to transfer and drag and drop them to the destination folder on your computer using Windows Explorer. Refer also to the computer's instruction manual. Transferring Recordings Using MyDVD for Canon Transferring Recordings Using MyDVD for Canon With the MyDVD for Canon software you can transfer your recordings to a computer and easily edit them. Please note that with MyDVD for Canon you can read 8 cm DVD-R DL discs, but the software does not support writing on duallayered discs (neither with an external DL drive nor with the camcorder itself). For further details about using MyDVD for Canon, refer also to the software's tutorial and help modules. MyDVD for Canon One-touch dubbing (Windows XP only) Insert a blank DVD-R/-RW in your computer's DVD drive (with writing capabilities), connect the camcorder and with only pressing (print/share button), create a copy of your DVD you can instantly share ( 87). Transfer recordings to your computer You can transfer your recordings to edit them on your computer ( 88). Create a backup disc of your DVD Transfer your recordings to the computer and even if your computer does not have a DVD drive with writing capabilities, use your camcorder itself to create a copy of your DVD ( 88)
-
 1
1 -
2
-
3
-
4
-
5
-
6
-
7
-
8
-
9
-
10
-
11
-
12
-
13
-
14
-
15
-
16
-
17
-
18
-
19
-
20
-
21
-
22
-
23
-
24
-
25
-
26
-
27
-
28
-
29
-
30
-
31
-
32
-
33
-
34
-
35
-
36
-
37
-
38
-
39
-
40
-
41
-
42
-
43
-
44
-
45
-
46
-
47
-
48
-
49
-
50
-
51
-
52
-
53
-
54
-
55
-
56
-
57
-
58
-
59
-
60
-
61
-
62
-
63
-
64
-
65
-
66
-
67
-
68
-
69
-
70
-
71
-
72
-
73
-
74
-
75
-
76
-
77
-
78
-
 79
79 -
 80
80 -
 81
81 -
 82
82 -
 83
83 -
 84
84 -
 85
85 -
 86
86 -
 87
87 -
 88
88 -
 89
89 -
90
-
91
-
92
-
93
-
94
-
95
-
96
-
97
-
98
-
99
-
100
-
101
-
102
-
103
-
104
-
105
-
106
-
107
-
108
-
109
-
110
-
111
-
112
-
113
-
114
-
115
-
116
-
117
-
118
-
119
-
120
-
121
-
122
-
123
 |
 |
