Canon DC220 DC220 DC230 Instruction Manual - Page 82
This camcorder: Select
 |
UPC - 013803079500
View all Canon DC220 manuals
Add to My Manuals
Save this manual to your list of manuals |
Page 82 highlights
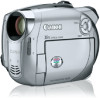
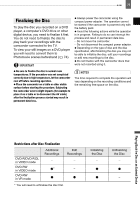
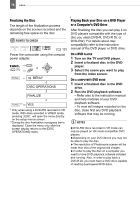
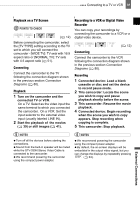
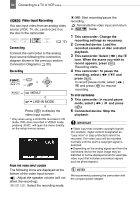
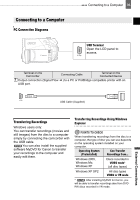
82 Connecting to a TV or VCR Video Input Recording You can input video from an analog video source (VCR, TV, etc.) and record it on the disc in the camcorder. ( 12) Connecting Connect the camcorder to the analog input source following the connection diagram shown in the previous section Connection Diagrams ( 80). Recording FUNC. ( 31) FUNC. MENU* LINE-IN MODE Press ( ) to display the video input screen. * Only when using a DVD-RW recorded in VR mode. With discs recorded in VIDEO mode, pressing FUNC. will open the menu directly on the setup menus screen. FROM THE VIDEO INPUT SCREEN The following icons are displayed at the bottom of the video input screen: : Adjust the speaker volume (will not affect the recording). / / : Select the recording mode. / : Start recording/pause the recording. : Terminate the video input and return to mode. 1 This camcorder: Change the recording settings as necessary. 2 Connected device: Load the recorded cassette or disc and start playback. 3 This camcorder: Select ( ) the icon. When the scene you wish to record appears, press ( ). Recording starts. 4 This camcorder: To pause the recording, select ( ) and press ( ). In record pause mode, select ( ) and press ( ) to resume recording. TO STOP RECORDING 5 This camcorder: In record pause mode, select ( ) and press ( ). 6 Connected device: Stop the playback. IMPORTANT Video input that includes copyright signals (for example, digital content designated as "copy once" or copy protected) cannot be recorded. The video input will be recorded normally until the point a copyright signal is detected. Depending on the analog signal sent from the connected device the input image may be distorted or not be displayed at all (for example, video input that includes anomalous signals such as ghost signals). NOTES We recommend powering the camcorder with the compact power adapter.
-
 1
1 -
2
-
3
-
4
-
5
-
6
-
7
-
8
-
9
-
10
-
11
-
12
-
13
-
14
-
15
-
16
-
17
-
18
-
19
-
20
-
21
-
22
-
23
-
24
-
25
-
26
-
27
-
28
-
29
-
30
-
31
-
32
-
33
-
34
-
35
-
36
-
37
-
38
-
39
-
40
-
41
-
42
-
43
-
44
-
45
-
46
-
47
-
48
-
49
-
50
-
51
-
52
-
53
-
54
-
55
-
56
-
57
-
58
-
59
-
60
-
61
-
62
-
63
-
64
-
65
-
66
-
67
-
68
-
69
-
70
-
71
-
72
-
73
-
74
-
75
-
76
-
 77
77 -
 78
78 -
 79
79 -
 80
80 -
 81
81 -
 82
82 -
 83
83 -
 84
84 -
 85
85 -
 86
86 -
 87
87 -
88
-
89
-
90
-
91
-
92
-
93
-
94
-
95
-
96
-
97
-
98
-
99
-
100
-
101
-
102
-
103
-
104
-
105
-
106
-
107
-
108
-
109
-
110
-
111
-
112
-
113
-
114
-
115
-
116
-
117
-
118
-
119
-
120
-
121
-
122
-
123
 |
 |