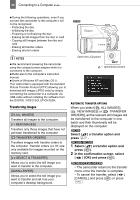
Canon DC220 DC220 DC230 Instruction Manual - Page 91
Transfer Orders
 |
UPC - 013803079500
View all Canon DC220 manuals
Add to My Manuals
Save this manual to your list of manuals |
Page 91 highlights
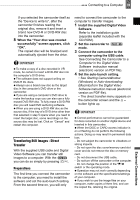
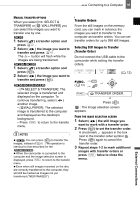
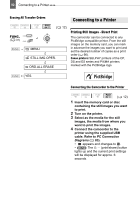
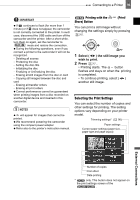
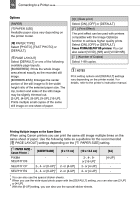
Connecting to a Computer 91 MANUAL TRANSFER OPTIONS When you select [ SELECT & TRANSFER] or [ WALLPAPER] you can select the images you want to transfer one by one. 1 Select ( ) a transfer option and press . 2 Select ( ) the image you want to transfer and press . The button will flash while the images are being transferred. 1 Select ( ) a transfer option and press ( ). 2 Select ( ) the image you want to transfer and press ( ). • [ SELECT & TRANSFER]: The selected image is transferred and displayed on the computer. To continue transferring, select ( ) another image. • [ WALLPAPER]: The selected image is transferred to the computer and displayed as the desktop's background. • Press FUNC. to return to the transfer menu. NOTES You can press ( ) to transfer the images, instead of . The operation is identical to that described for the . When the camcorder is connected to the computer and the image selection screen is displayed, press FUNC. to return to the transfer menu. Even when still images recorded on the disc are correctly transferred to the computer, they will still be marked as images not yet transferred ("NEW IMAGES"). Transfer Orders From the still images on the memory card, you can mark in advance the images you want to transfer to the computer as transfer orders. You can set transfer orders for up to 998 still images. Selecting Still Images to Transfer (Transfer Order) Do not connect the USB cable to the camcorder while setting the transfer orders. ( 12) FUNC. ( 31) FUNC. TRANSFER ORDER Press ( ) : The image selection screen appears. FROM THE IMAGE SELECTION SCREEN 1 Select ( ) the still image you want to mark with a transfer order. 2 Press ( ) to set the transfer order. A checkmark appears in the box next to the transfer order symbol . Press ( ) again to cancel the transfer order. 3 Repeat steps 1-2 to mark additional images with transfer orders or press FUNC. twice to close the menu. External Connections
-
 1
1 -
2
-
3
-
4
-
5
-
6
-
7
-
8
-
9
-
10
-
11
-
12
-
13
-
14
-
15
-
16
-
17
-
18
-
19
-
20
-
21
-
22
-
23
-
24
-
25
-
26
-
27
-
28
-
29
-
30
-
31
-
32
-
33
-
34
-
35
-
36
-
37
-
38
-
39
-
40
-
41
-
42
-
43
-
44
-
45
-
46
-
47
-
48
-
49
-
50
-
51
-
52
-
53
-
54
-
55
-
56
-
57
-
58
-
59
-
60
-
61
-
62
-
63
-
64
-
65
-
66
-
67
-
68
-
69
-
70
-
71
-
72
-
73
-
74
-
75
-
76
-
77
-
78
-
79
-
80
-
81
-
82
-
83
-
84
-
85
-
 86
86 -
 87
87 -
 88
88 -
 89
89 -
 90
90 -
 91
91 -
 92
92 -
 93
93 -
 94
94 -
 95
95 -
 96
96 -
97
-
98
-
99
-
100
-
101
-
102
-
103
-
104
-
105
-
106
-
107
-
108
-
109
-
110
-
111
-
112
-
113
-
114
-
115
-
116
-
117
-
118
-
119
-
120
-
121
-
122
-
123
 |
 |
