Canon DC220 DC220 DC230 Instruction Manual - Page 88
Click on the Make a Backup DVD - user manual
 |
UPC - 013803079500
View all Canon DC220 manuals
Add to My Manuals
Save this manual to your list of manuals |
Page 88 highlights
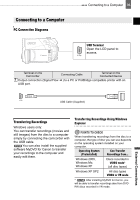
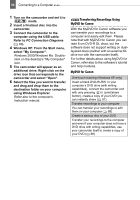
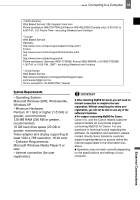
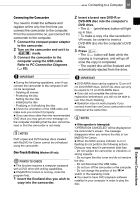
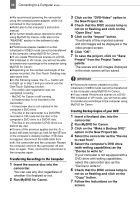
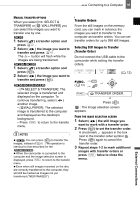
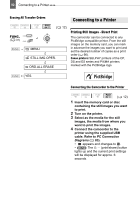
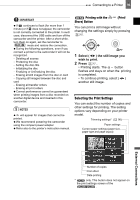
88 Connecting to a Computer We recommend powering the camcorder using the compact power adapter while it is connected to the computer. Refer also to the computer's instruction manual. For further details about restrictions when using MyDVD for Canon, refer also to the "README" section in the software's help modules. Photomovie scenes created on a disc initialized in VIDEO mode cannot be transferred to the computer using MyDVD for Canon. If you create Photomovie scenes on a DVD- RW initialized in VR mode, you will not be able to transfer any recordings to the computer using MyDVD for Canon. Depending on the number and length of the scenes recorded, the One-Touch Dubbing may take some time. In the following cases, the button will not light up in step 2 and you cannot use the One-Touch Dubbing function: - The online user registration was not completed correctly. - MyDVD for Canon is still running. - A finalized disc is not inserted in the camcorder. - A brand new disc is not inserted in the computer's DVD drive. - The disc in the camcorder is a DVD-RW recorded in VR mode but the disc in the computer's DVD drive is a DVD-R disc. - The disc in the computer's DVD-drive is a DVD-R DL disc. If none of the previous applies but the button still does not light up, look for the icon in the computer's desktop toolbar. If does not appear, disconnect the USB cable from both, the camcorder and the computer. Restart the computer and turn the camcorder off and then on again. Then, connect the camcorder to the computer again. Transferring Recordings to the Computer 1 Insert the source disc into the camcorder. You can use any disc regardless of whether it is finalized or not. 2 Run MyDVD for Canon. 3 Click on the "DVD-Video" option in the New Project tab. 4 Check that the DISC access lamp is not on or flashing and click on the "Open Disc" icon. 5 Click on the "Import" button. Thumbnails of the imported scenes and still images will be displayed in the video project screen. 6 Click "OK". 7 To save the project, click on "Save Project" from the Project Tasks palette. The scenes and still images displayed in the main screen will be saved. IMPORTANT Photomovie scenes created on a disc initialized in VIDEO mode cannot be transferred to the computer using MyDVD for Canon. If you create Photomovie scenes on a DVDRW initialized in VR mode, you will not be able to transfer any recordings to the computer using MyDVD for Canon. Creating Backup Copies of your DVD 1 Insert a finalized disc into the camcorder. 2 Run MyDVD for Canon. 3 Click on the "Make a Backup DVD" option in the New Project tab. 4 Select the camcorder as the "Device to read from". 5 Select the computer's DVD drive (with writing capabilities) as the "Device to write to". If your computer is not equipped with a DVD drive with writing capabilities, select the camcorder also as the "Device to write to". 6 Check that the DISC access lamp is not on or flashing and click on the "Copy" button. 7 Follow the indications on the screen.
-
 1
1 -
2
-
3
-
4
-
5
-
6
-
7
-
8
-
9
-
10
-
11
-
12
-
13
-
14
-
15
-
16
-
17
-
18
-
19
-
20
-
21
-
22
-
23
-
24
-
25
-
26
-
27
-
28
-
29
-
30
-
31
-
32
-
33
-
34
-
35
-
36
-
37
-
38
-
39
-
40
-
41
-
42
-
43
-
44
-
45
-
46
-
47
-
48
-
49
-
50
-
51
-
52
-
53
-
54
-
55
-
56
-
57
-
58
-
59
-
60
-
61
-
62
-
63
-
64
-
65
-
66
-
67
-
68
-
69
-
70
-
71
-
72
-
73
-
74
-
75
-
76
-
77
-
78
-
79
-
80
-
81
-
82
-
 83
83 -
 84
84 -
 85
85 -
 86
86 -
 87
87 -
 88
88 -
 89
89 -
 90
90 -
 91
91 -
 92
92 -
 93
93 -
94
-
95
-
96
-
97
-
98
-
99
-
100
-
101
-
102
-
103
-
104
-
105
-
106
-
107
-
108
-
109
-
110
-
111
-
112
-
113
-
114
-
115
-
116
-
117
-
118
-
119
-
120
-
121
-
122
-
123
 |
 |
