Canon DC220 DC220 DC230 Instruction Manual - Page 89
Transferring Still Images - Direct, Transfer - dvd camcorder software download
 |
UPC - 013803079500
View all Canon DC220 manuals
Add to My Manuals
Save this manual to your list of manuals |
Page 89 highlights
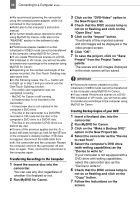
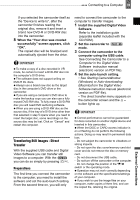
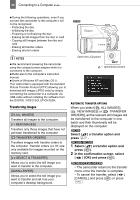
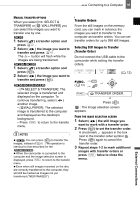
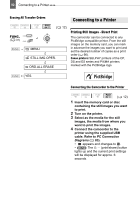
Connecting to a Computer 89 If you selected the camcorder itself as the "Device to write to", after the camcorder finishes reading the original disc, remove it and insert a brand new DVD-R or DVD-RW disc into the camcorder. 8 When the "Your disc was created successfully" screen appears, click "OK". The copied disc will be finalized and automatically ejected from the drive. IMPORTANT To make a copy of a disc recorded in VR mode, be certain to insert a DVD-RW disc into the computer's DVD drive. The software does not support writing on DVD-R DL discs. Always use a brand new disc as the target disc in the computer's DVD drive or the camcorder. If you are using a computer's DVD drive to make the backup copy you can also use a fully erased DVD-RW disc. To fully erase a DVD-RW disc you will need DVD authoring software. When you are using a DVD-RW disc as the source disc, if the tray of a DVD drive other than that selected in step 5 opens when you need to insert the target disc, some recordings on the source disc may be lost. Click on "Cancel" and restart the computer. Transferring Still Images - Direct Transfer With the supplied USB cable and Digital Video Software you can transfer still images to a computer. With the you can do so simply by pressing . Preparations The first time you connect the camcorder to the computer, you need to install the software and set the auto-launch setting. From the second time on, you will only need to connect the camcorder to the computer to transfer images. 1 Install the supplied Digital Video Software. Refer to the installation guide (separate leaflet included with the CD-ROM). 2 Set the camcorder to mode. 3 Connect the camcorder to the computer using the USB cable. See Connecting the Camcorder to a Computer in the Digital Video Software instruction manual (electronic version on PDF file). 4 Set the auto-launch setting. • See Starting CameraWindow (Windows) or Auto-downloading (Macintosh) in the Digital Video Software instruction manual (electronic version on PDF file). • The direct transfer menu appears on the camcorder screen and the button lights up. IMPORTANT Correct performance cannot be guaranteed for discs recorded on another digital device and inserted in this camcorder. When the DISC or CARD access indicator is on or flashing do not perform the following actions. Doing so may result in permanent data loss. - Do not subject the camcorder to vibrations or strong impacts. - Do not open the disc cover/memory card slot cover and do not remove the disc or memory card. - Do not disconnect the USB cable. - Do not turn off the camcorder or the computer. - Do not change the position of the / switch or the operating mode. Operation may not work correctly depending on the software and the specifications/settings of your computer. If you wish to use the image files on your computer, make copies of them first, and use the copied file, retaining the original. External Connections
-
 1
1 -
2
-
3
-
4
-
5
-
6
-
7
-
8
-
9
-
10
-
11
-
12
-
13
-
14
-
15
-
16
-
17
-
18
-
19
-
20
-
21
-
22
-
23
-
24
-
25
-
26
-
27
-
28
-
29
-
30
-
31
-
32
-
33
-
34
-
35
-
36
-
37
-
38
-
39
-
40
-
41
-
42
-
43
-
44
-
45
-
46
-
47
-
48
-
49
-
50
-
51
-
52
-
53
-
54
-
55
-
56
-
57
-
58
-
59
-
60
-
61
-
62
-
63
-
64
-
65
-
66
-
67
-
68
-
69
-
70
-
71
-
72
-
73
-
74
-
75
-
76
-
77
-
78
-
79
-
80
-
81
-
82
-
83
-
 84
84 -
 85
85 -
 86
86 -
 87
87 -
 88
88 -
 89
89 -
 90
90 -
 91
91 -
 92
92 -
 93
93 -
 94
94 -
95
-
96
-
97
-
98
-
99
-
100
-
101
-
102
-
103
-
104
-
105
-
106
-
107
-
108
-
109
-
110
-
111
-
112
-
113
-
114
-
115
-
116
-
117
-
118
-
119
-
120
-
121
-
122
-
123
 |
 |