Canon EOS C300 Instruction Manual - Page 103
Recording GPS Information (Geotagging), Open the GPS [Setting] submenu.
 |
View all Canon EOS C300 manuals
Add to My Manuals
Save this manual to your list of manuals |
Page 103 highlights
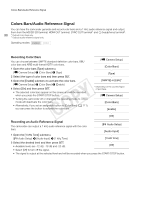
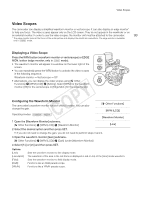
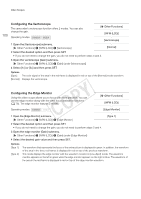
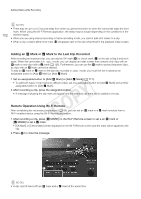
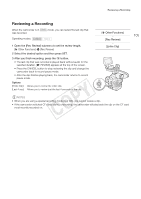
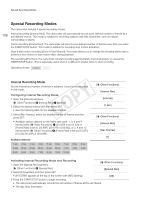
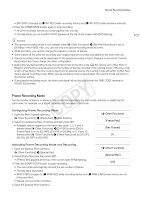
Recording GPS Information (Geotagging) Recording GPS Information (Geotagging) When the optional GP-E1 GPS Receiver is attached to the camcorder's WFT terminal, the camcorder will automatically record the GPS information (latitude, longitude and altitude) in the metadata of each clip recorded (A 96). For details about attaching and configuring the receiver, refer to the GP-E1's instruction manual. 103 Attaching the GPS Receiver Turn off the camcorder and attach the optional GP-E1 GPS Receiver to the camcorder's WFT terminal. ቢ ብ ቧ ባ ቤ ቦ Activating the GPS Receiver Operating modes: 1 Open the GPS [Setting] submenu. [w Other Functions] > [GPS] > [Setting] 2 Select [On] and then press SET. • The icon appears on the right of the screen and will blink as the receiver tries to acquire satellite signals. • When satellite signals are correctly acquired, the icon will stay continuously on. GPS functions will be activated and clips recorded thereafter will be geotagged. [w Other Functions] [GPS] [Setting] [Off] Adjusting the Date/Time Automatically According to GPS Position Setting the [w Other Functions] > [GPS] > [Auto Time Setting] to [On], you can have the camcorder automatically adjust its date and time settings according to the information received from the GPS signal while an optional GP-E1 GPS Receiver is attached to the camcorder. IMPORTANT • In certain countries/regions, the use of GPS may be restricted. Be sure to use the GPS receiver in accordance with local laws and regulations of the country/region where the receiver is used. Be particularly careful when traveling outside of your home country. • Be careful about using the GPS receiver in places where the use of electronic devices is restricted.
-
 1
1 -
2
-
3
-
4
-
5
-
6
-
7
-
8
-
9
-
10
-
11
-
12
-
13
-
14
-
15
-
16
-
17
-
18
-
19
-
20
-
21
-
22
-
23
-
24
-
25
-
26
-
27
-
28
-
29
-
30
-
31
-
32
-
33
-
34
-
35
-
36
-
37
-
38
-
39
-
40
-
41
-
42
-
43
-
44
-
45
-
46
-
47
-
48
-
49
-
50
-
51
-
52
-
53
-
54
-
55
-
56
-
57
-
58
-
59
-
60
-
61
-
62
-
63
-
64
-
65
-
66
-
67
-
68
-
69
-
70
-
71
-
72
-
73
-
74
-
75
-
76
-
77
-
78
-
79
-
80
-
81
-
82
-
83
-
84
-
85
-
86
-
87
-
88
-
89
-
90
-
91
-
92
-
93
-
94
-
95
-
96
-
97
-
 98
98 -
 99
99 -
 100
100 -
 101
101 -
 102
102 -
 103
103 -
 104
104 -
 105
105 -
 106
106 -
 107
107 -
 108
108 -
109
-
110
-
111
-
112
-
113
-
114
-
115
-
116
-
117
-
118
-
119
-
120
-
121
-
122
-
123
-
124
-
125
-
126
-
127
-
128
-
129
-
130
-
131
-
132
-
133
-
134
-
135
-
136
-
137
-
138
-
139
-
140
-
141
-
142
-
143
-
144
-
145
-
146
-
147
-
148
-
149
-
150
-
151
-
152
-
153
-
154
-
155
-
156
-
157
-
158
-
159
-
160
-
161
-
162
-
163
-
164
-
165
-
166
-
167
-
168
-
169
-
170
-
171
-
172
-
173
-
174
-
175
-
176
-
177
-
178
-
179
-
180
-
181
-
182
-
183
-
184
-
185
-
186
-
187
-
188
-
189
-
190
-
191
-
192
-
193
-
194
-
195
-
196
-
197
-
198
-
199
-
200
-
201
-
202
 |
 |
