Canon EOS C300 Instruction Manual - Page 32
Preparing the Camcorder, Preparing the Lens - mark
 |
View all Canon EOS C300 manuals
Add to My Manuals
Save this manual to your list of manuals |
Page 32 highlights
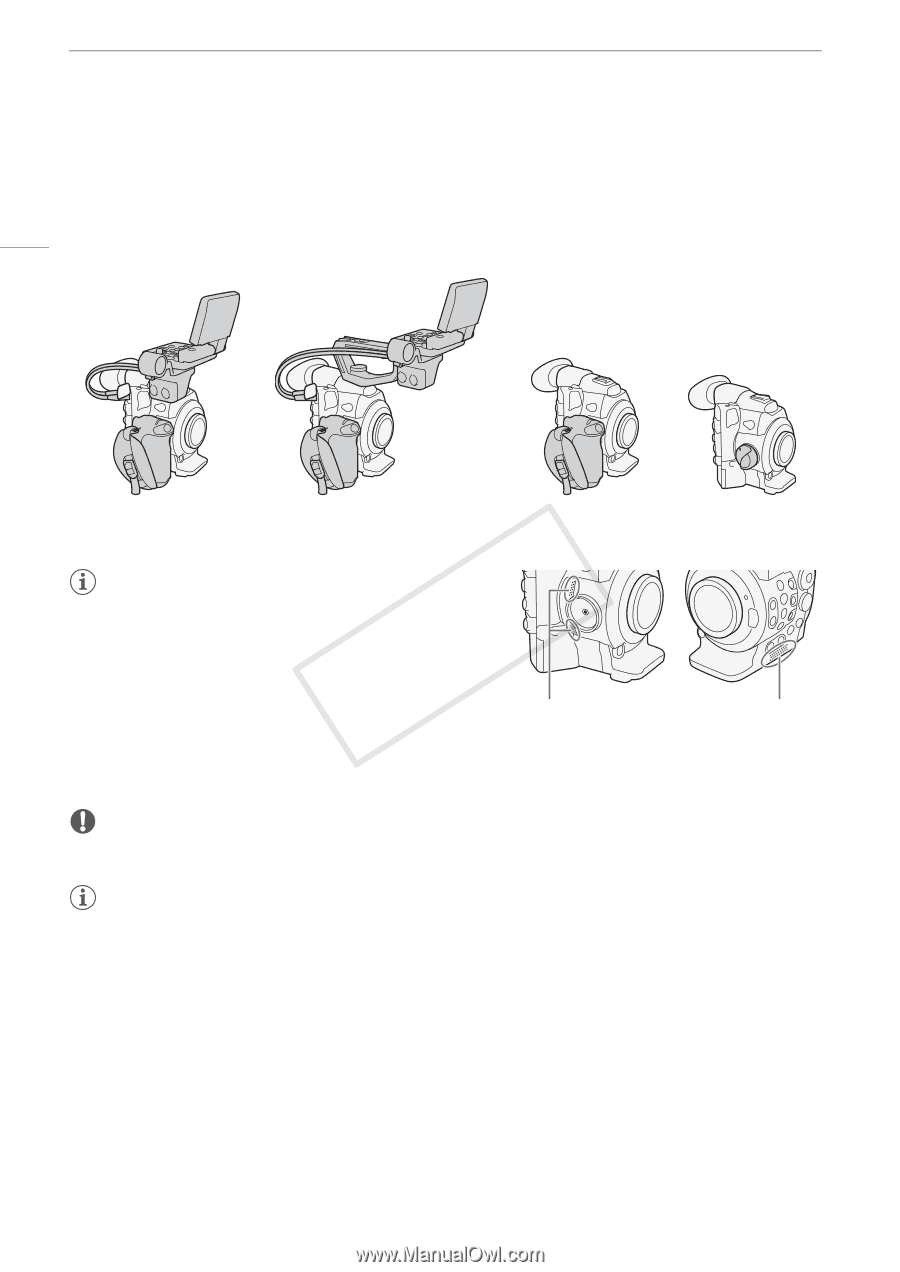
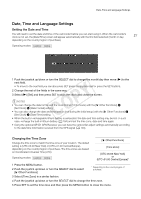
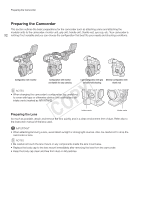
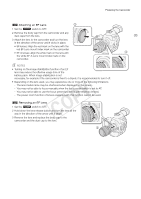
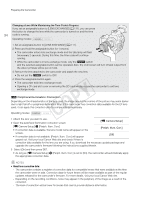
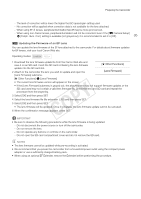
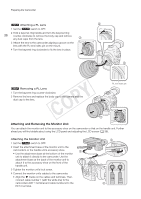
Preparing the Camcorder Preparing the Camcorder This section outlines the basic preparations for the camcorder such as attaching a lens and attaching the modular units to the camcorder: monitor unit, grip unit, handle unit, thumb rest, eye cup, etc. Your camcorder is 32 nothing if not versatile and you can choose the configuration that best fits your needs and shooting conditions. Configuration with monitor Configuration with monitor and handle for easy carrying Light configuration with grip Minimal configuration with for hand-held shooting thumb rest NOTES • When changing the camcorder's configuration, be careful not to cover with tape or otherwise obstruct the cooling fan's air intake vents (marked as AIR INTAKE). Intake vents Intake vents Preparing the Lens As much as possible, attach and remove the lens quickly and in a clean environment free of dust. Refer also to the instruction manual of the lens used. IMPORTANT • When attaching/removing a lens, avoid direct sunlight or strong light sources. Also, be careful not to drop the camcorder or lens. NOTES • Be careful not touch the lens mount or any components inside the lens mount area. • Replace the body cap to the lens mount immediately after removing the lens from the camcorder. • Keep the body cap clean and free from dust or dirt particles.
-
 1
1 -
2
-
3
-
4
-
5
-
6
-
7
-
8
-
9
-
10
-
11
-
12
-
13
-
14
-
15
-
16
-
17
-
18
-
19
-
20
-
21
-
22
-
23
-
24
-
25
-
26
-
 27
27 -
 28
28 -
 29
29 -
 30
30 -
 31
31 -
 32
32 -
 33
33 -
 34
34 -
 35
35 -
 36
36 -
 37
37 -
38
-
39
-
40
-
41
-
42
-
43
-
44
-
45
-
46
-
47
-
48
-
49
-
50
-
51
-
52
-
53
-
54
-
55
-
56
-
57
-
58
-
59
-
60
-
61
-
62
-
63
-
64
-
65
-
66
-
67
-
68
-
69
-
70
-
71
-
72
-
73
-
74
-
75
-
76
-
77
-
78
-
79
-
80
-
81
-
82
-
83
-
84
-
85
-
86
-
87
-
88
-
89
-
90
-
91
-
92
-
93
-
94
-
95
-
96
-
97
-
98
-
99
-
100
-
101
-
102
-
103
-
104
-
105
-
106
-
107
-
108
-
109
-
110
-
111
-
112
-
113
-
114
-
115
-
116
-
117
-
118
-
119
-
120
-
121
-
122
-
123
-
124
-
125
-
126
-
127
-
128
-
129
-
130
-
131
-
132
-
133
-
134
-
135
-
136
-
137
-
138
-
139
-
140
-
141
-
142
-
143
-
144
-
145
-
146
-
147
-
148
-
149
-
150
-
151
-
152
-
153
-
154
-
155
-
156
-
157
-
158
-
159
-
160
-
161
-
162
-
163
-
164
-
165
-
166
-
167
-
168
-
169
-
170
-
171
-
172
-
173
-
174
-
175
-
176
-
177
-
178
-
179
-
180
-
181
-
182
-
183
-
184
-
185
-
186
-
187
-
188
-
189
-
190
-
191
-
192
-
193
-
194
-
195
-
196
-
197
-
198
-
199
-
200
-
201
-
202
 |
 |