Canon EOS C300 Instruction Manual - Page 34
Camera Setup], Periph. Illum. Corr.], About lens correction data
 |
View all Canon EOS C300 manuals
Add to My Manuals
Save this manual to your list of manuals |
Page 34 highlights
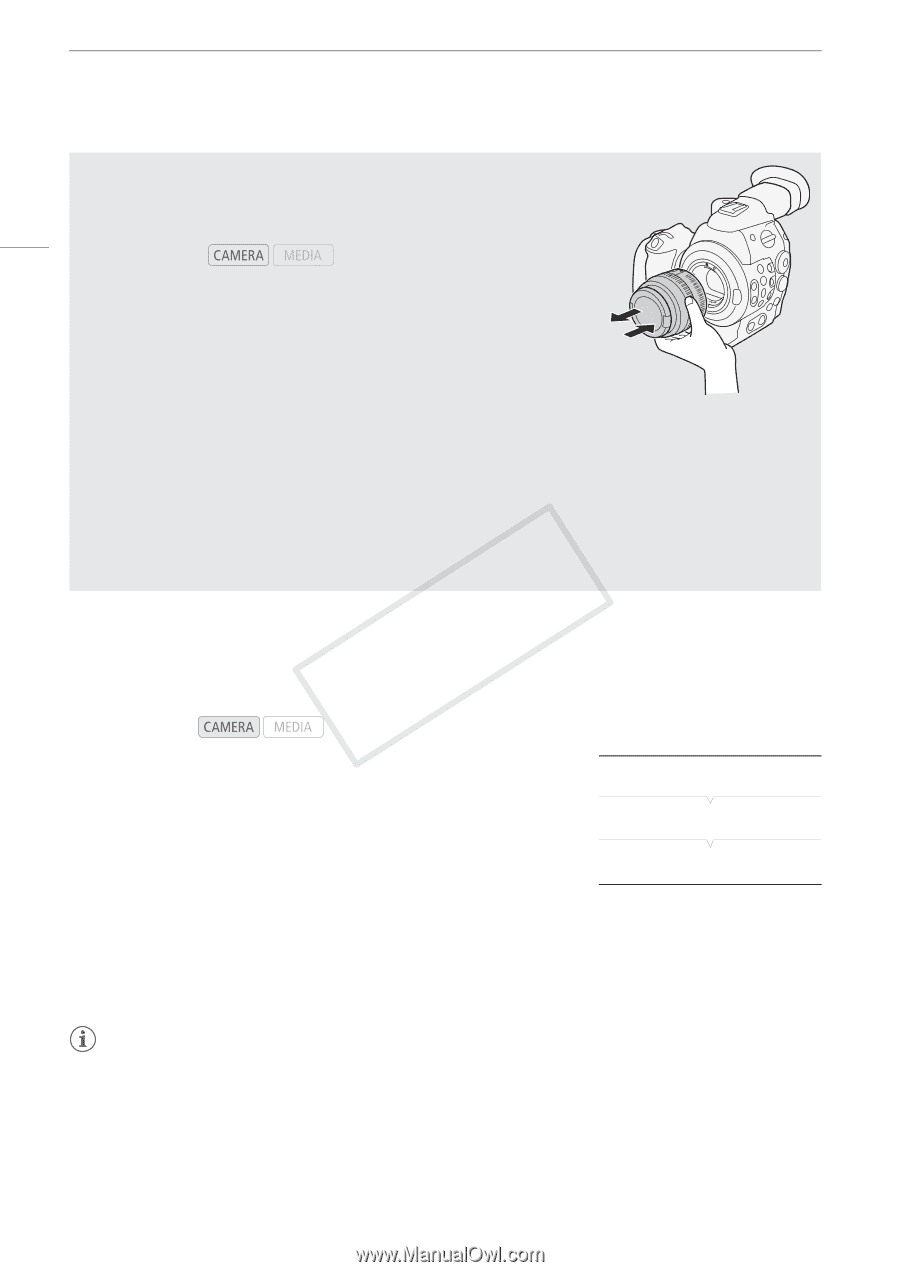
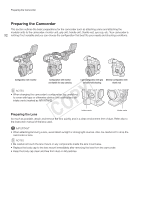
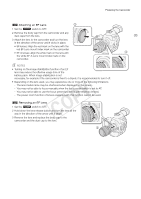
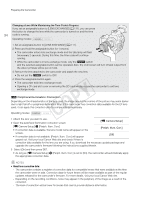
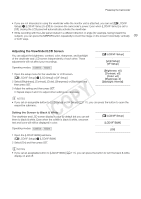
Preparing the Camcorder Changing a Lens While Maintaining the Time Code's Progress If you set an assignable button to [LENS EXCHANGE] (A 111), you can press the button to change the lens while the camcorder is turned on and the time 34 code is running. Operating modes: 1 Set an assignable button to [LENS EXCHANGE] (A 111). 2 Press and hold the assignable button for 1 second. • The camcorder enters lens exchange mode and the tally lamp will flash twice every 2 seconds. During this time, the time code will continue running. • While the camcorder is in lens exchange mode, only the Q switch and the selected assignable button can be operated. Also, the LCD screen will turn off and output from the video terminals will be put on hold. 3 Remove the lens attached to the camcorder and attach the new lens. • Do not set the Q switch to OFF. 4 Press the assignable button again. • The camcorder exits lens exchange mode. • Opening a CF card slot cover or removing the SD card will also cause the camcorder to exit lens exchange mode. # Peripheral Illumination Correction Depending on the characteristics of the lens used, the image around the corners of the picture may seem darker due to light fall-off or peripheral illumination drop. If the camcorder has correction data available for the EF lens used, it can apply this correction data to compensate as necessary. Operating modes: 1 Attach the lens you want to use. 2 Open the peripheral illumination correction screen. [~ Camera Setup] [~ Camera Setup] > [Periph. Illum. Corr.] • If correction data is available, the lens model name will appear on the [Periph. Illum. Corr.] screen. [Off] • If correction data is not available, [Periph. Illum. Corr.] will appear grayed out. Visit your local Canon Web site and check if there is correction data available for the lens you are using. If so, download the necessary update package and upgrade the camcorder's firmware following the instructions supplied therein. 3 Select [On] and then press SET. • As long as [~ Camera Setup] > [Periph. Illum. Corr.] is set to [On], the camcorder will automatically apply the appropriate correction data. NOTES • About lens correction data: - The camcorder contains a register of correction data for compatible lenses that were available at the time the camcorder went on sale. Correction data for future lenses will be made available as part of the regular updates released for the camcorder's firmware. For more details, visit your local Canon Web site. - Depending on the recording conditions, noise may appear in the periphery of the image as a result of the correction. - The level of correction will be lower for lenses that cannot provide distance information.
-
 1
1 -
2
-
3
-
4
-
5
-
6
-
7
-
8
-
9
-
10
-
11
-
12
-
13
-
14
-
15
-
16
-
17
-
18
-
19
-
20
-
21
-
22
-
23
-
24
-
25
-
26
-
27
-
28
-
 29
29 -
 30
30 -
 31
31 -
 32
32 -
 33
33 -
 34
34 -
 35
35 -
 36
36 -
 37
37 -
 38
38 -
 39
39 -
40
-
41
-
42
-
43
-
44
-
45
-
46
-
47
-
48
-
49
-
50
-
51
-
52
-
53
-
54
-
55
-
56
-
57
-
58
-
59
-
60
-
61
-
62
-
63
-
64
-
65
-
66
-
67
-
68
-
69
-
70
-
71
-
72
-
73
-
74
-
75
-
76
-
77
-
78
-
79
-
80
-
81
-
82
-
83
-
84
-
85
-
86
-
87
-
88
-
89
-
90
-
91
-
92
-
93
-
94
-
95
-
96
-
97
-
98
-
99
-
100
-
101
-
102
-
103
-
104
-
105
-
106
-
107
-
108
-
109
-
110
-
111
-
112
-
113
-
114
-
115
-
116
-
117
-
118
-
119
-
120
-
121
-
122
-
123
-
124
-
125
-
126
-
127
-
128
-
129
-
130
-
131
-
132
-
133
-
134
-
135
-
136
-
137
-
138
-
139
-
140
-
141
-
142
-
143
-
144
-
145
-
146
-
147
-
148
-
149
-
150
-
151
-
152
-
153
-
154
-
155
-
156
-
157
-
158
-
159
-
160
-
161
-
162
-
163
-
164
-
165
-
166
-
167
-
168
-
169
-
170
-
171
-
172
-
173
-
174
-
175
-
176
-
177
-
178
-
179
-
180
-
181
-
182
-
183
-
184
-
185
-
186
-
187
-
188
-
189
-
190
-
191
-
192
-
193
-
194
-
195
-
196
-
197
-
198
-
199
-
200
-
201
-
202
 |
 |