Canon EOS C300 Instruction Manual - Page 92
Selecting the Audio Input from the XLR Terminals, Switching Between Microphone and Line Input
 |
View all Canon EOS C300 manuals
Add to My Manuals
Save this manual to your list of manuals |
Page 92 highlights
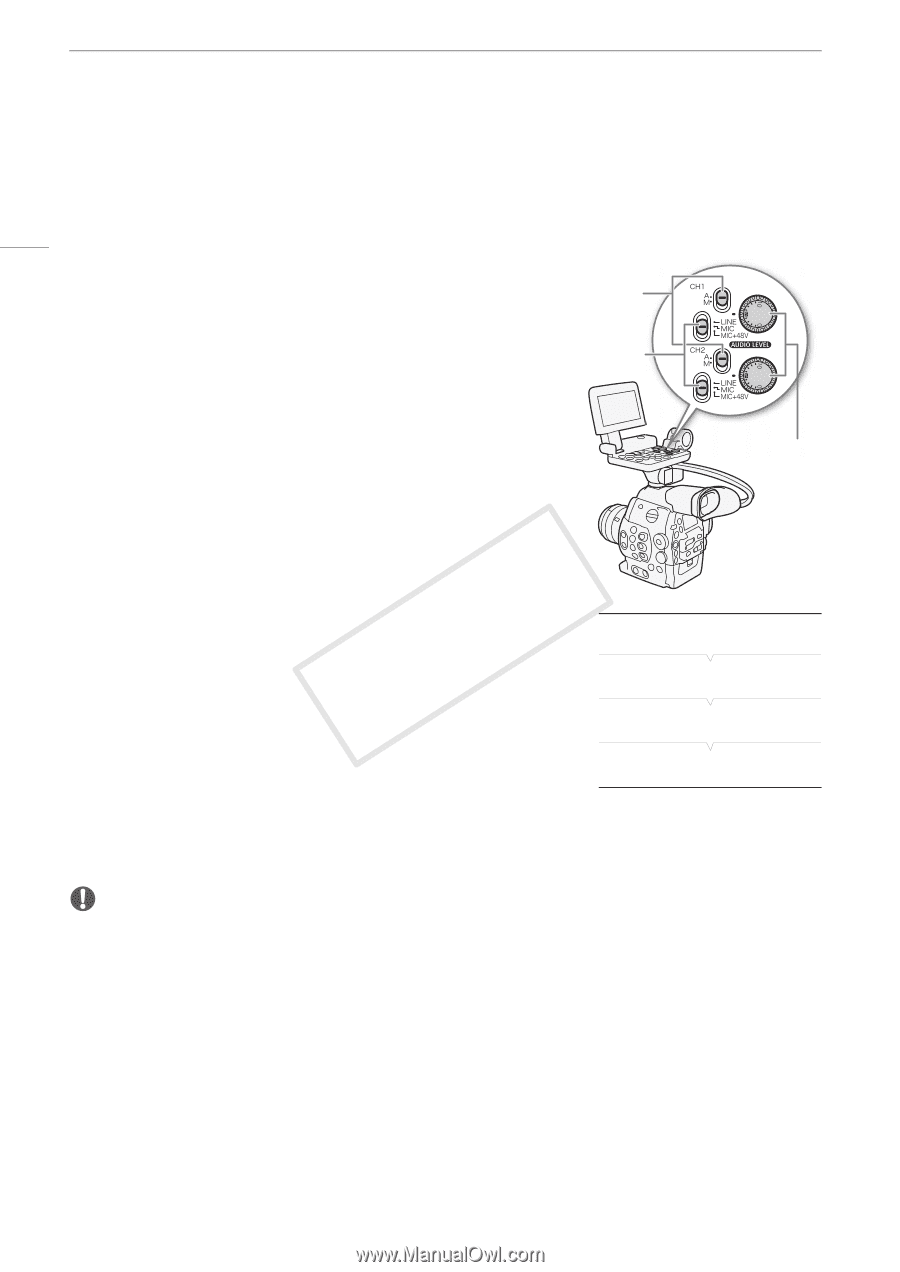
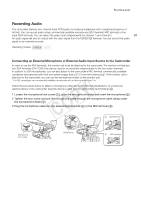
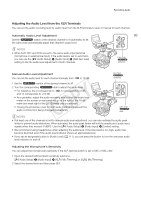
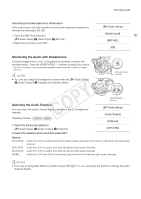
Recording Audio Selecting the Audio Input from the XLR Terminals Using the XLR terminals CH1 and CH2, you can record audio independently to the two audio channels from a microphone or analog audio input source. Note that the camcorder's MIC terminal is given priority over the XLR 92 terminals. To record audio from the XLR terminals, be sure not to connect any microphones to the MIC terminal. Switching Between Microphone and Line Input Set the XLR terminal switch of the desired channel to LINE or MIC. • To supply a microphone with phantom power, set the switch to MIC+48V instead. Make sure to connect the microphone first, before turning the phantom power on. Keep the microphone connected when turning off the phantom power. • When using the XLR terminal to record to only one channel, use the CH1 terminal. CH1/CH2 ã switches XLR terminal switches CH1/CH2 ã dials Selecting the Recording Channel You can select to which channel the camcorder will record audio. 1 Open the [XLR Rec Channel] submenu. [¡ Audio Setup] > [Audio Input] > [XLR Rec Channel] 2 Select the desired option and then press SET. Options [CH1]: [CH1/CH2]: Records audio to each channel separately. Audio input into CH1 is recorded to channel 1, while audio input into CH2 is recorded to channel 2. Audio input into CH1 is recorded to both channels. Audio input into CH2 will not be recorded. [¡ Audio Setup] [Audio Input] [XLR Rec Channel] [CH1] IMPORTANT • When connecting a microphone or device that does not support phantom power, make sure to set the XLR terminal switch to MIC or LINE, respectively. If you set the switch to MIC+48V, the microphone or device may be damaged.
-
 1
1 -
2
-
3
-
4
-
5
-
6
-
7
-
8
-
9
-
10
-
11
-
12
-
13
-
14
-
15
-
16
-
17
-
18
-
19
-
20
-
21
-
22
-
23
-
24
-
25
-
26
-
27
-
28
-
29
-
30
-
31
-
32
-
33
-
34
-
35
-
36
-
37
-
38
-
39
-
40
-
41
-
42
-
43
-
44
-
45
-
46
-
47
-
48
-
49
-
50
-
51
-
52
-
53
-
54
-
55
-
56
-
57
-
58
-
59
-
60
-
61
-
62
-
63
-
64
-
65
-
66
-
67
-
68
-
69
-
70
-
71
-
72
-
73
-
74
-
75
-
76
-
77
-
78
-
79
-
80
-
81
-
82
-
83
-
84
-
85
-
86
-
 87
87 -
 88
88 -
 89
89 -
 90
90 -
 91
91 -
 92
92 -
 93
93 -
 94
94 -
 95
95 -
 96
96 -
 97
97 -
98
-
99
-
100
-
101
-
102
-
103
-
104
-
105
-
106
-
107
-
108
-
109
-
110
-
111
-
112
-
113
-
114
-
115
-
116
-
117
-
118
-
119
-
120
-
121
-
122
-
123
-
124
-
125
-
126
-
127
-
128
-
129
-
130
-
131
-
132
-
133
-
134
-
135
-
136
-
137
-
138
-
139
-
140
-
141
-
142
-
143
-
144
-
145
-
146
-
147
-
148
-
149
-
150
-
151
-
152
-
153
-
154
-
155
-
156
-
157
-
158
-
159
-
160
-
161
-
162
-
163
-
164
-
165
-
166
-
167
-
168
-
169
-
170
-
171
-
172
-
173
-
174
-
175
-
176
-
177
-
178
-
179
-
180
-
181
-
182
-
183
-
184
-
185
-
186
-
187
-
188
-
189
-
190
-
191
-
192
-
193
-
194
-
195
-
196
-
197
-
198
-
199
-
200
-
201
-
202
 |
 |