Canon PowerShot SX740 HS Camera User Guide - Page 92
Press the WPS button., Choose automatic setup., Choose a computer., On the computer, choose the,
 |
View all Canon PowerShot SX740 HS manuals
Add to My Manuals
Save this manual to your list of manuals |
Page 92 highlights
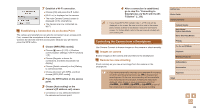
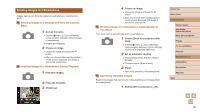
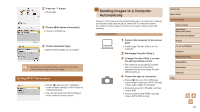
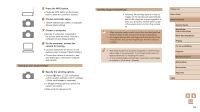
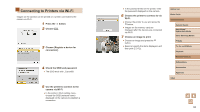
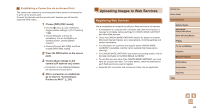
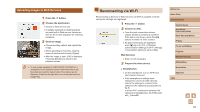
5 Press the WPS button. ●●Press the WPS button on the access point to allow the camera to connect. 6 Choose automatic setup. ●●The [IP address set.] screen is displayed. Choose [Auto setting]. 7 Choose a computer. ●●Names of computers connected to the access point are listed. Choose a computer for auto image transfer. 8 On the computer, choose the camera for pairing. ●●Camera nicknames are shown on the pairing screen in Image Transfer Utility 2. ●●Choose the camera to connect to and click [Pairing] to connect the computer and camera. Setting Up Auto Image Transfer 9 Specify the sending options. ●●Choose [ ] menu (=23) > [Wireless communication settings] > [Wi-Fi settings] > [Auto send images to computer]. ●●In [Image sending options], specify the transfer conditions. ●●Make sure the camera is off. Sending Images Automatically ●●Following the sending options in step 9, images on the camera are automatically sent to the computer you are logged in to when you bring the camera within range of the access point and turn the camera on. ●● When using auto image transfer, ensure that the battery pack has sufficient charge. Power saving on the camera is deactivated. ●● Any images captured after auto image transfer are not sent to the computer then. They are sent automatically when the camera is restarted. ●● Auto image transfer to a computer is triggered by camera startup within range of the access point. If auto image transfer does not begin automatically, try restarting the camera. ●● To stop sending images automatically, choose [Auto send images to computer] > [Auto send] > [Disable]. Before Use Basic Guide Advanced Guide Camera Basics Auto Mode / Hybrid Auto Mode Other Shooting Modes P Mode Tv, Av, and M Mode Playback Wireless Features Setting Menu Accessories Appendix Index 92
-
 1
1 -
2
-
3
-
4
-
5
-
6
-
7
-
8
-
9
-
10
-
11
-
12
-
13
-
14
-
15
-
16
-
17
-
18
-
19
-
20
-
21
-
22
-
23
-
24
-
25
-
26
-
27
-
28
-
29
-
30
-
31
-
32
-
33
-
34
-
35
-
36
-
37
-
38
-
39
-
40
-
41
-
42
-
43
-
44
-
45
-
46
-
47
-
48
-
49
-
50
-
51
-
52
-
53
-
54
-
55
-
56
-
57
-
58
-
59
-
60
-
61
-
62
-
63
-
64
-
65
-
66
-
67
-
68
-
69
-
70
-
71
-
72
-
73
-
74
-
75
-
76
-
77
-
78
-
79
-
80
-
81
-
82
-
83
-
84
-
85
-
86
-
 87
87 -
 88
88 -
 89
89 -
 90
90 -
 91
91 -
 92
92 -
 93
93 -
 94
94 -
 95
95 -
 96
96 -
 97
97 -
98
-
99
-
100
-
101
-
102
-
103
-
104
-
105
-
106
-
107
-
108
-
109
-
110
-
111
-
112
-
113
-
114
-
115
-
116
-
117
-
118
-
119
-
120
-
121
-
122
-
123
-
124
-
125
-
126
-
127
-
128
-
129
-
130
 |
 |
