Canon REALiS LCOS WUX10 Mark II D Multimedia Projector WUX10 MarkII Users Manu - Page 116
Projector Control, Turn ON/OFF the projector
 |
View all Canon REALiS LCOS WUX10 Mark II D manuals
Add to My Manuals
Save this manual to your list of manuals |
Page 116 highlights
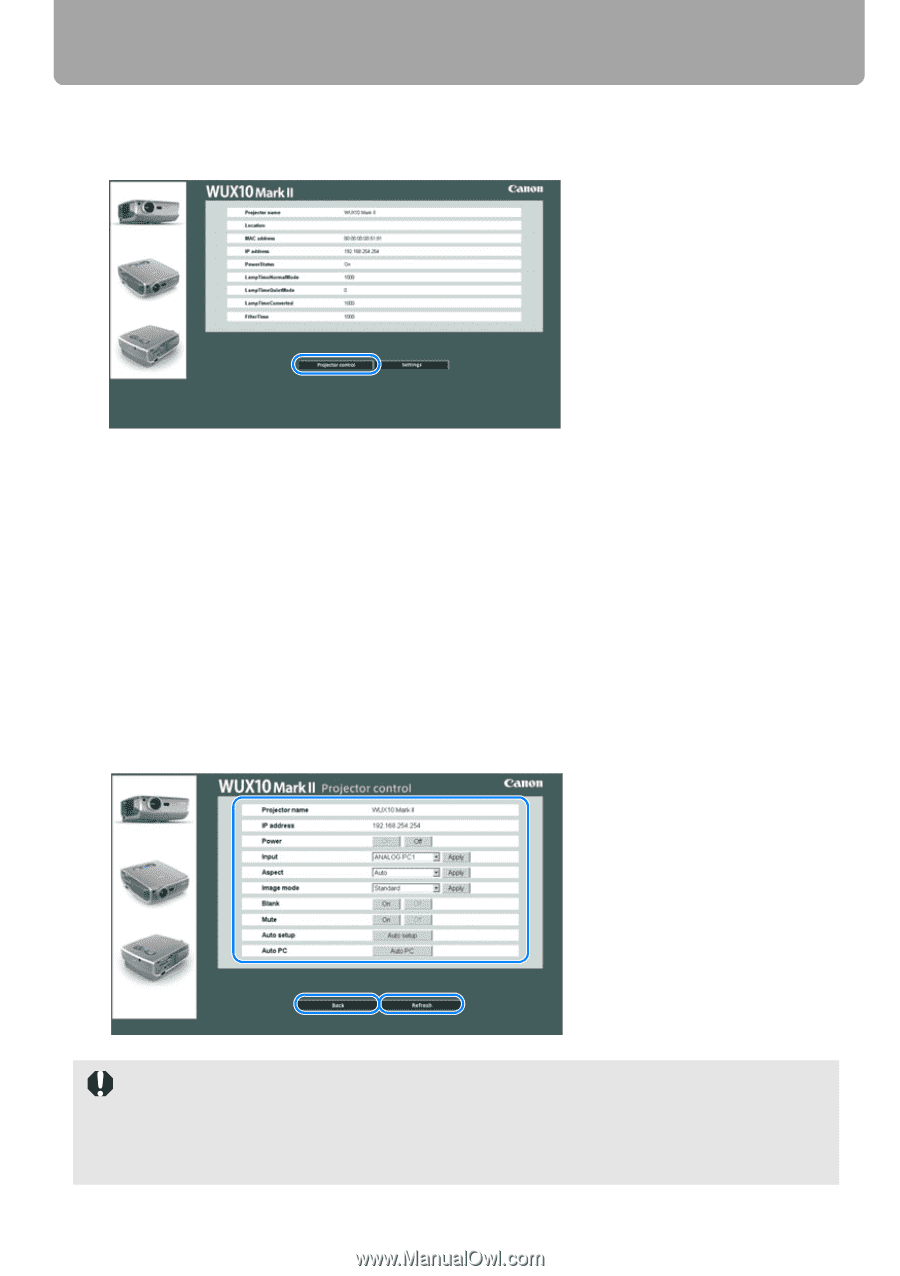
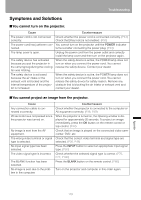
Setting Network ■Projector Control 1 Click the [Projector control] button on the network setting screen. The projector control screen appears. Controlled items: [Power]: Turn ON/OFF the projector (P44, P64) [Input]: Select an input signal (P49) [Aspect]: Select an aspect ratio (P57) [Image mode]: Select an image mode (P63) [Blank]: Blank out the image temporarily (P66) [Mute]: Mute the sound temporarily (P67) [Auto setup]: Perform the auto setup function (P47) [Auto PC]: Perform the auto PC function (P52) • For [Input], [Aspect], and [Image mode], select an item and click the [Apply] button. • Click the [Refresh] button to display the latest information. • Click the [Back] button to return to the network setting screen. • Do not use the [Back], [Forward], or [Refresh] button on your web browser when you control the projector. Using the web browser buttons may cause the projector to be malfunctioned. Be sure to use the buttons on the network setup window. • Before terminating control of the projector, press the [Refresh] button to check whether the new setting is properly updated or not. 116
-
 1
1 -
2
-
3
-
4
-
5
-
6
-
7
-
8
-
9
-
10
-
11
-
12
-
13
-
14
-
15
-
16
-
17
-
18
-
19
-
20
-
21
-
22
-
23
-
24
-
25
-
26
-
27
-
28
-
29
-
30
-
31
-
32
-
33
-
34
-
35
-
36
-
37
-
38
-
39
-
40
-
41
-
42
-
43
-
44
-
45
-
46
-
47
-
48
-
49
-
50
-
51
-
52
-
53
-
54
-
55
-
56
-
57
-
58
-
59
-
60
-
61
-
62
-
63
-
64
-
65
-
66
-
67
-
68
-
69
-
70
-
71
-
72
-
73
-
74
-
75
-
76
-
77
-
78
-
79
-
80
-
81
-
82
-
83
-
84
-
85
-
86
-
87
-
88
-
89
-
90
-
91
-
92
-
93
-
94
-
95
-
96
-
97
-
98
-
99
-
100
-
101
-
102
-
103
-
104
-
105
-
106
-
107
-
108
-
109
-
110
-
 111
111 -
 112
112 -
 113
113 -
 114
114 -
 115
115 -
 116
116 -
 117
117 -
 118
118 -
 119
119 -
 120
120 -
 121
121 -
122
-
123
-
124
-
125
-
126
-
127
-
128
-
129
-
130
-
131
-
132
-
133
-
134
-
135
-
136
-
137
-
138
-
139
-
140
-
141
-
142
-
143
-
144
-
145
-
146
 |
 |