Canon REALiS LCOS WUX10 Mark II D Multimedia Projector WUX10 MarkII Users Manu - Page 30
Preparing the Remote Control, Installing Remote Control Batteries, Remote Control Operating Range
 |
View all Canon REALiS LCOS WUX10 Mark II D manuals
Add to My Manuals
Save this manual to your list of manuals |
Page 30 highlights
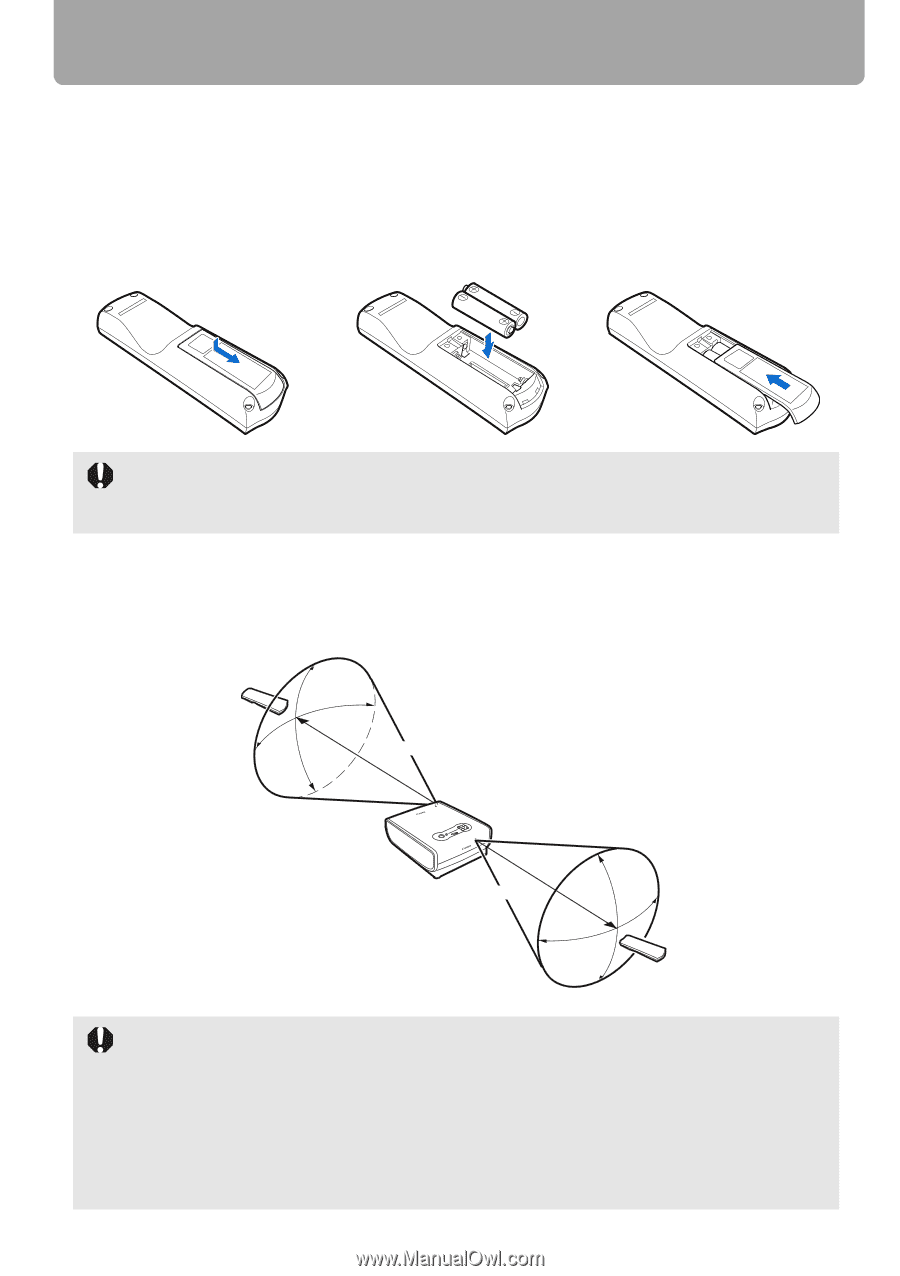
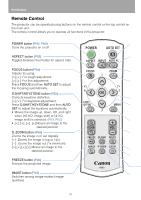
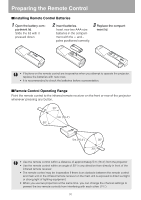
Preparing the Remote Control ■Installing Remote Control Batteries 1 Open the battery com- partment lid. Slide the lid with it pressed down. 2 Insert batteries. Insert new two AAA-size batteries in the compartment with the + and - poles positioned correctly. 3 Replace the compart- ment lid. • If buttons on the remote control are inoperative when you attempt to operate the projector, replace the batteries with new ones. • It is recommended to check the batteries before a presentation. ■Remote Control Operating Range Point the remote control to the infrared remote receiver on the front or rear of the projector whenever pressing any button. 30° 5m (16.4') 30° 5m (16.4') 30° 30° • Use the remote control within a distance of approximately 5 m (16.4') from the projector. • Use the remote control within an angle of 30° in any direction from directly in front of the infrared remote receiver. • The remote control may be inoperative if there is an obstacle between the remote control and main unit or the infrared remote receiver on the main unit is exposed to direct sunlight or strong light of lighting equipment. • When you use two projectors at the same time, you can change the channel settings to prevent the two remote controls from interfering with each other. (P97) 30
-
 1
1 -
2
-
3
-
4
-
5
-
6
-
7
-
8
-
9
-
10
-
11
-
12
-
13
-
14
-
15
-
16
-
17
-
18
-
19
-
20
-
21
-
22
-
23
-
24
-
 25
25 -
 26
26 -
 27
27 -
 28
28 -
 29
29 -
 30
30 -
 31
31 -
 32
32 -
 33
33 -
 34
34 -
 35
35 -
36
-
37
-
38
-
39
-
40
-
41
-
42
-
43
-
44
-
45
-
46
-
47
-
48
-
49
-
50
-
51
-
52
-
53
-
54
-
55
-
56
-
57
-
58
-
59
-
60
-
61
-
62
-
63
-
64
-
65
-
66
-
67
-
68
-
69
-
70
-
71
-
72
-
73
-
74
-
75
-
76
-
77
-
78
-
79
-
80
-
81
-
82
-
83
-
84
-
85
-
86
-
87
-
88
-
89
-
90
-
91
-
92
-
93
-
94
-
95
-
96
-
97
-
98
-
99
-
100
-
101
-
102
-
103
-
104
-
105
-
106
-
107
-
108
-
109
-
110
-
111
-
112
-
113
-
114
-
115
-
116
-
117
-
118
-
119
-
120
-
121
-
122
-
123
-
124
-
125
-
126
-
127
-
128
-
129
-
130
-
131
-
132
-
133
-
134
-
135
-
136
-
137
-
138
-
139
-
140
-
141
-
142
-
143
-
144
-
145
-
146
 |
 |