Canon REALiS LCOS WUX10 Mark II D Multimedia Projector WUX10 MarkII Users Manu - Page 25
Bottom Side, Mounting the Projector on the Ceiling
 |
View all Canon REALiS LCOS WUX10 Mark II D manuals
Add to My Manuals
Save this manual to your list of manuals |
Page 25 highlights
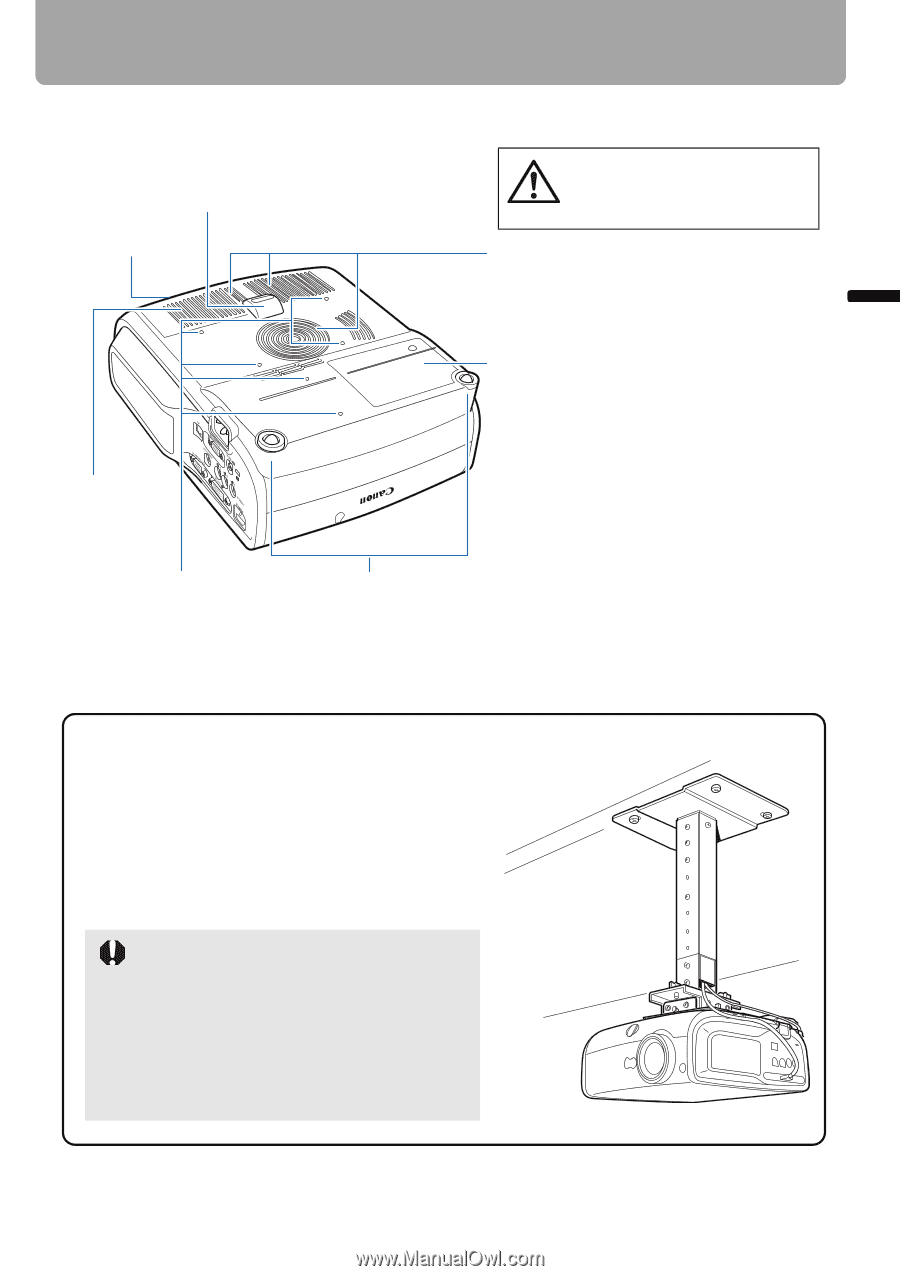
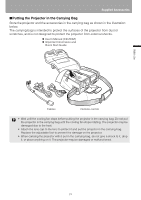
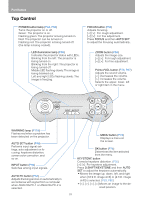
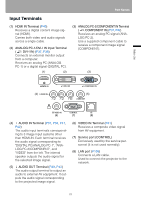
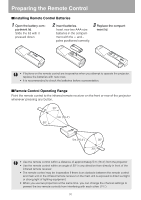
Before Use ■Bottom Side Lens cap strap Adjustable foot (P35) insertion hole (P22) Part Names Caution Do not block the air intake. Failure to do so will result in fire hazards or malfunctions. Air intake vent Lamp cover (P126) Air filter (P124) Screw holes for installation of ceiling-mount hanger (M4x6) (P137) Rear adjustable foot (for fine adjustment) Mounting the Projector on the Ceiling You can mount the projector on the ceiling. You need an optional ceiling-mount hanger (part number: RS-CL07) and an optional ceiling-mount pipe (part number: RS-CL08 or RSCL09) when appropriate. Contact the dealer where you purchased the projector for more detailed information. • Make sure to use the optional ceilingmount hanger. • You should never install the ceilingmount hanger by yourself. • If you mount the projector on the ceiling, you have to invert the projected image by selecting [Image flip H/V] from the menu. (P83) 25
-
 1
1 -
2
-
3
-
4
-
5
-
6
-
7
-
8
-
9
-
10
-
11
-
12
-
13
-
14
-
15
-
16
-
17
-
18
-
19
-
 20
20 -
 21
21 -
 22
22 -
 23
23 -
 24
24 -
 25
25 -
 26
26 -
 27
27 -
 28
28 -
 29
29 -
 30
30 -
31
-
32
-
33
-
34
-
35
-
36
-
37
-
38
-
39
-
40
-
41
-
42
-
43
-
44
-
45
-
46
-
47
-
48
-
49
-
50
-
51
-
52
-
53
-
54
-
55
-
56
-
57
-
58
-
59
-
60
-
61
-
62
-
63
-
64
-
65
-
66
-
67
-
68
-
69
-
70
-
71
-
72
-
73
-
74
-
75
-
76
-
77
-
78
-
79
-
80
-
81
-
82
-
83
-
84
-
85
-
86
-
87
-
88
-
89
-
90
-
91
-
92
-
93
-
94
-
95
-
96
-
97
-
98
-
99
-
100
-
101
-
102
-
103
-
104
-
105
-
106
-
107
-
108
-
109
-
110
-
111
-
112
-
113
-
114
-
115
-
116
-
117
-
118
-
119
-
120
-
121
-
122
-
123
-
124
-
125
-
126
-
127
-
128
-
129
-
130
-
131
-
132
-
133
-
134
-
135
-
136
-
137
-
138
-
139
-
140
-
141
-
142
-
143
-
144
-
145
-
146
 |
 |