Canon VB-S30VE User Manual - Page 125
Adsr
 |
View all Canon VB-S30VE manuals
Add to My Manuals
Save this manual to your list of manuals |
Page 125 highlights
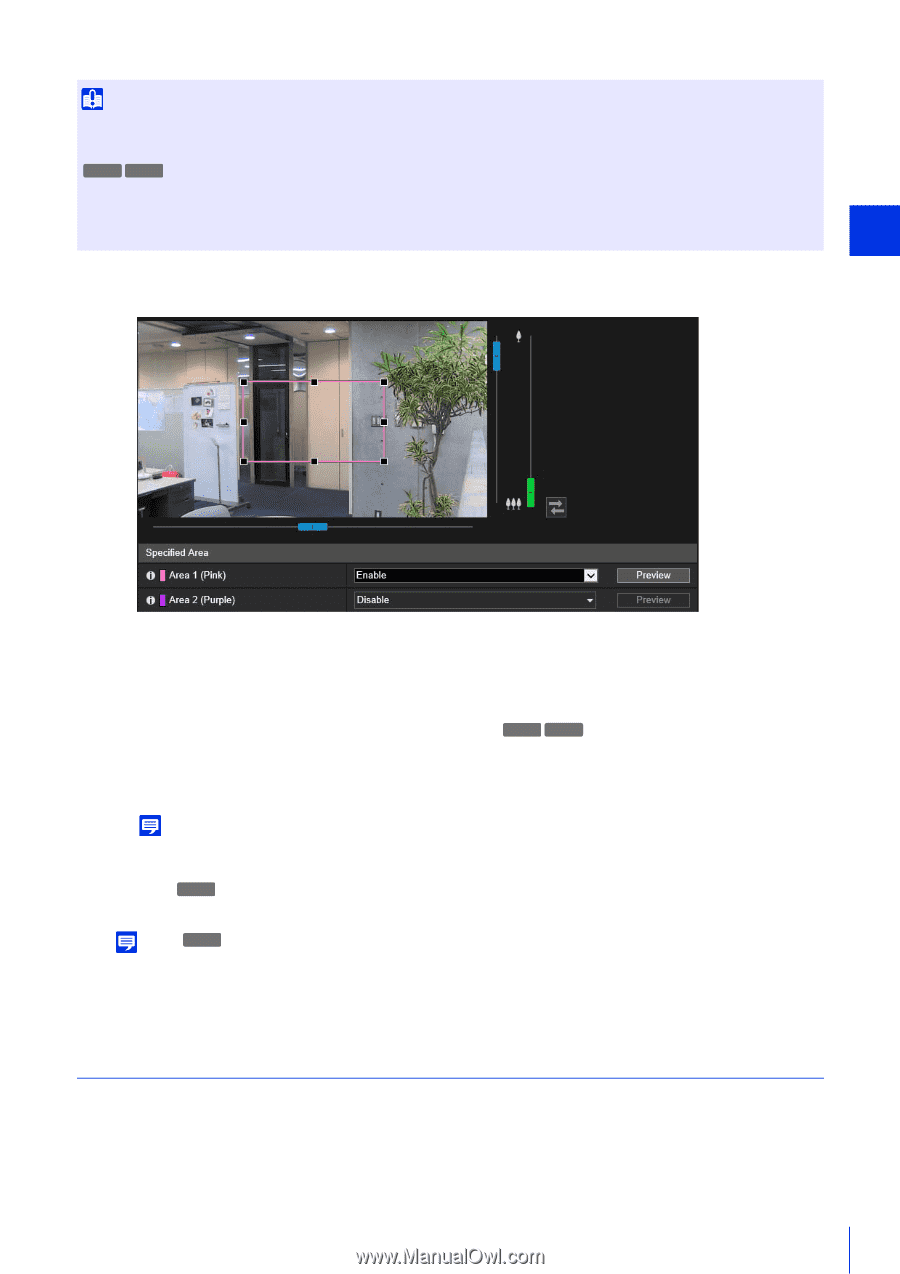
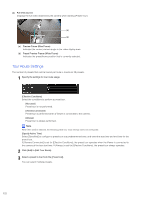
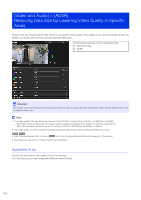
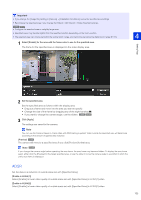
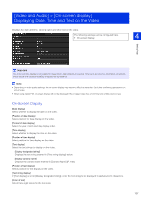
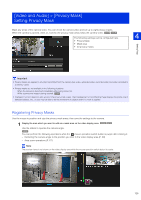
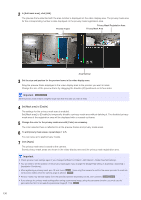
Important • If you change the [Image Flip] setting in [Camera] > [Installation Conditions], review the specified area settings. • Reconfigure the specified area if you change the [Video] > [All Videos] > [Video Size Set] settings. S30VE S910F • Configure the specified area to a slightly larger size. • Specified areas may deviate slightly from the specified position depending on the zoom position. • The selected area can only be set within the optical zoom range, and cannot be set using the digital zoom range (P. 61). 1 Select [Enable] for the area with the frame color to use for the specified area. The frame for the specified area is displayed on the video display area. 4 Setting Page 2 Set the specified area. Set the specified area as follows within the display area. • Drag out a frame and move it to the area you want to specify. • Change the size of the frame by dragging any of the eight handles (■). • If you want to change the camera angle, use the sliders. S30VE S910F 3 Click [Apply]. The settings are saved to the camera. Note You can use the Camera Viewer to check video with ADSR settings applied. Video outside the specified area will deteriorate according to the amount of applied data reduction. [Preview] S30VE The camera will move to a specified area if you click [Preview] for that area. Note S30VE If you change the camera angle before operating the area frame, the area frame may become hidden. To display the area frame again, either click the [Preview] for the target specified area, or use the slider to move the camera angle to a position in which the entire area frame is displayed. ADSR Set the data size reduction of outside areas set with [Specified Area]. [Enable in H.264(1)] Select [Enable] to lower video quality of outside areas set with [Specified Area] in H.264(1) video. [Enable in H.264(2)] Select [Enable] to lower video quality of outside areas set with [Specified Area] in H.264(2) video. 125
-
 1
1 -
2
-
3
-
4
-
5
-
6
-
7
-
8
-
9
-
10
-
11
-
12
-
13
-
14
-
15
-
16
-
17
-
18
-
19
-
20
-
21
-
22
-
23
-
24
-
25
-
26
-
27
-
28
-
29
-
30
-
31
-
32
-
33
-
34
-
35
-
36
-
37
-
38
-
39
-
40
-
41
-
42
-
43
-
44
-
45
-
46
-
47
-
48
-
49
-
50
-
51
-
52
-
53
-
54
-
55
-
56
-
57
-
58
-
59
-
60
-
61
-
62
-
63
-
64
-
65
-
66
-
67
-
68
-
69
-
70
-
71
-
72
-
73
-
74
-
75
-
76
-
77
-
78
-
79
-
80
-
81
-
82
-
83
-
84
-
85
-
86
-
87
-
88
-
89
-
90
-
91
-
92
-
93
-
94
-
95
-
96
-
97
-
98
-
99
-
100
-
101
-
102
-
103
-
104
-
105
-
106
-
107
-
108
-
109
-
110
-
111
-
112
-
113
-
114
-
115
-
116
-
117
-
118
-
119
-
 120
120 -
 121
121 -
 122
122 -
 123
123 -
 124
124 -
 125
125 -
 126
126 -
 127
127 -
 128
128 -
 129
129 -
 130
130 -
131
-
132
-
133
-
134
-
135
-
136
-
137
-
138
-
139
-
140
-
141
-
142
-
143
-
144
-
145
-
146
-
147
-
148
-
149
-
150
-
151
-
152
-
153
-
154
-
155
-
156
-
157
-
158
-
159
-
160
-
161
-
162
-
163
-
164
-
165
-
166
-
167
-
168
-
169
-
170
-
171
-
172
-
173
-
174
-
175
-
176
-
177
-
178
-
179
-
180
-
181
-
182
-
183
-
184
-
185
-
186
-
187
-
188
-
189
-
190
-
191
-
192
-
193
-
194
-
195
-
196
-
197
-
198
-
199
-
200
-
201
-
202
-
203
-
204
-
205
-
206
-
207
-
208
-
209
-
210
-
211
-
212
-
213
-
214
-
215
-
216
-
217
-
218
-
219
-
220
-
221
-
222
-
223
-
224
-
225
-
226
-
227
-
228
-
229
-
230
-
231
-
232
-
233
-
234
-
235
-
236
-
237
-
238
 |
 |