Canon VB-S30VE User Manual - Page 131
Changing/Deleting a Privacy Mask, Privacy Mask Registration Area, Changing Mask Position and Size
 |
View all Canon VB-S30VE manuals
Add to My Manuals
Save this manual to your list of manuals |
Page 131 highlights
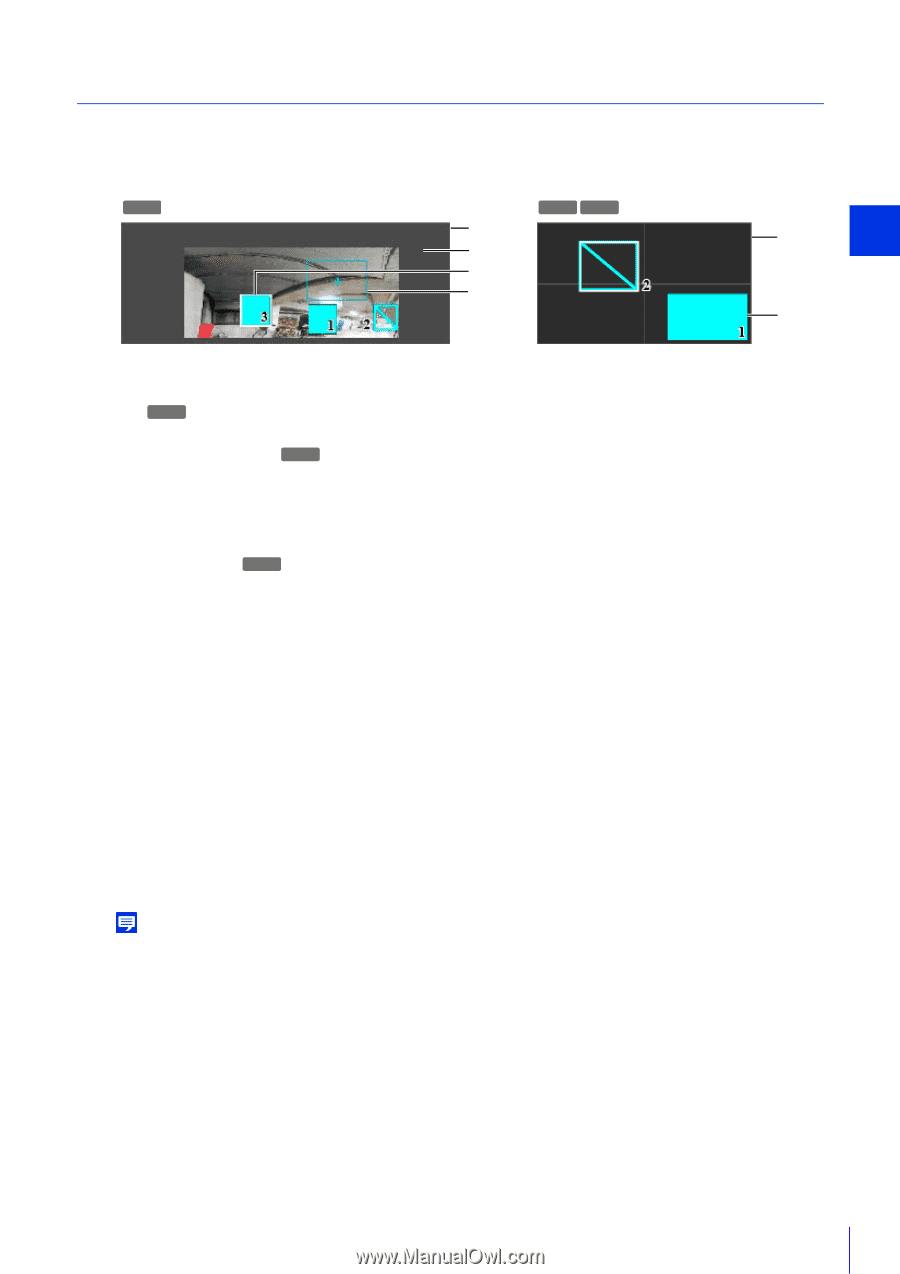
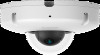
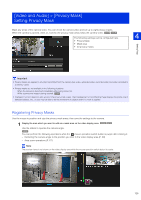
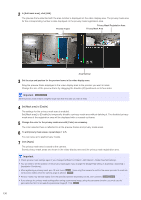
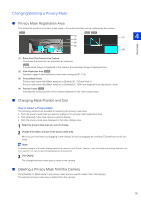
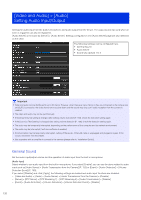
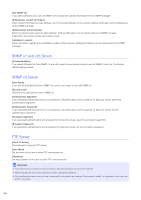
Changing/Deleting a Privacy Mask Privacy Mask Registration Area This shows the positions of privacy mask areas in the entire area that can be captured by the camera. S30VE S800VE S910F (1) (2) (3) (4) (1) 4 (3) Setting Page (1) Entire Area That Camera Can Capture This shows the area that can physically be captured. S30VE If a panorama image is registered in the camera, the panorama image is displayed here. (2) View Restriction Area S30VE Appears in gray if view restrictions have been configured (P. 114). (3) Privacy Mask Areas Privacy mask areas with [Mask area] set to [Enable] (P. 130) are filled in. Privacy mask areas with [Mask area] set to [Disable] (P. 130) have diagonal lines displayed in them. (4) Preview Frame S30VE Indicates the current position of the camera displayed in the video display area. Changing Mask Position and Size How to Select a Privacy Mask The following methods are available for selecting the privacy mask area. • Click the privacy mask area you want to change in the privacy mask registration area. • Click [Preview] in the mask area you want to display. • Click the privacy mark area displayed in the video display area. 1 Select the privacy mask area you want to change. 2 Change the position and size of the privacy mask area. Move the preview frame by dragging it and change its size by dragging the handles () positioned on its four sides. Note To discard changes and restore settings saved to the camera, click [Clear]. However, note that mask area settings that have not been saved in the camera by clicking [Apply] are all discarded. 3 Click [Apply]. The changed privacy mask area is saved to the camera. Deleting a Privacy Mask from the Camera Click [Delete] for [Mask area] in the privacy mask that you want to delete, then click [Apply]. The selected privacy mask area is deleted from the camera. 131
-
 1
1 -
2
-
3
-
4
-
5
-
6
-
7
-
8
-
9
-
10
-
11
-
12
-
13
-
14
-
15
-
16
-
17
-
18
-
19
-
20
-
21
-
22
-
23
-
24
-
25
-
26
-
27
-
28
-
29
-
30
-
31
-
32
-
33
-
34
-
35
-
36
-
37
-
38
-
39
-
40
-
41
-
42
-
43
-
44
-
45
-
46
-
47
-
48
-
49
-
50
-
51
-
52
-
53
-
54
-
55
-
56
-
57
-
58
-
59
-
60
-
61
-
62
-
63
-
64
-
65
-
66
-
67
-
68
-
69
-
70
-
71
-
72
-
73
-
74
-
75
-
76
-
77
-
78
-
79
-
80
-
81
-
82
-
83
-
84
-
85
-
86
-
87
-
88
-
89
-
90
-
91
-
92
-
93
-
94
-
95
-
96
-
97
-
98
-
99
-
100
-
101
-
102
-
103
-
104
-
105
-
106
-
107
-
108
-
109
-
110
-
111
-
112
-
113
-
114
-
115
-
116
-
117
-
118
-
119
-
120
-
121
-
122
-
123
-
124
-
125
-
 126
126 -
 127
127 -
 128
128 -
 129
129 -
 130
130 -
 131
131 -
 132
132 -
 133
133 -
 134
134 -
 135
135 -
 136
136 -
137
-
138
-
139
-
140
-
141
-
142
-
143
-
144
-
145
-
146
-
147
-
148
-
149
-
150
-
151
-
152
-
153
-
154
-
155
-
156
-
157
-
158
-
159
-
160
-
161
-
162
-
163
-
164
-
165
-
166
-
167
-
168
-
169
-
170
-
171
-
172
-
173
-
174
-
175
-
176
-
177
-
178
-
179
-
180
-
181
-
182
-
183
-
184
-
185
-
186
-
187
-
188
-
189
-
190
-
191
-
192
-
193
-
194
-
195
-
196
-
197
-
198
-
199
-
200
-
201
-
202
-
203
-
204
-
205
-
206
-
207
-
208
-
209
-
210
-
211
-
212
-
213
-
214
-
215
-
216
-
217
-
218
-
219
-
220
-
221
-
222
-
223
-
224
-
225
-
226
-
227
-
228
-
229
-
230
-
231
-
232
-
233
-
234
-
235
-
236
-
237
-
238
 |
 |