D-Link DES-3010G Reference Manual - Page 3
Introduction, Accessing The Switch via the Serial Port - user guide
 |
View all D-Link DES-3010G manuals
Add to My Manuals
Save this manual to your list of manuals |
Page 3 highlights
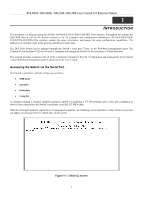
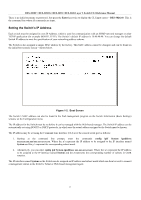
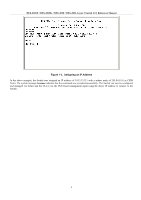
DES-3010F / DES-3010G / DES-3018 / DES-3026 Layer 2 Switch CLI Reference Manual 1 INTRODUCTION This document is a reference guide for all DES-3010F/DES-3010G/DES-3018/DES-3026 switches. Throughout this manual, the DES-3026 Switch will be the Switch referred to for all examples and configuration information. All DES-3010F/DES3010G/DES-3018/DES-3026 switches contain the same information and posses the same configuration capabilities. The difference in switches reside in the port type and the port count only. The DES-3026 Switch can be managed through the Switch's serial port, Telnet, or the Web-based management agent. The Command Line Interface (CLI) can be used to configure and manage the Switch via the serial port or Telnet interfaces. This manual provides a reference for all of the commands contained in the CLI. Configuration and management of the Switch via the Web-based management agent is discussed in the User's Guide. Accessing the Switch via the Serial Port The Switch's serial port's default settings are as follows: • 9600 baud • no parity • 8 data bits • 1 stop bit A computer running a terminal emulation program capable of emulating a VT-100 terminal and a serial port configured as above is then connected to the Switch's serial port via an RS-232 DB-9 cable. With the serial port properly connected to a management computer, the following screen should be visible. If this screen does not appear, try pressing Ctrl+r to refresh the console screen. Figure 1-1. Initial CLI screen 1
-
 1
1 -
 2
2 -
 3
3 -
 4
4 -
 5
5 -
 6
6 -
 7
7 -
 8
8 -
 9
9 -
10
-
11
-
12
-
13
-
14
-
15
-
16
-
17
-
18
-
19
-
20
-
21
-
22
-
23
-
24
-
25
-
26
-
27
-
28
-
29
-
30
-
31
-
32
-
33
-
34
-
35
-
36
-
37
-
38
-
39
-
40
-
41
-
42
-
43
-
44
-
45
-
46
-
47
-
48
-
49
-
50
-
51
-
52
-
53
-
54
-
55
-
56
-
57
-
58
-
59
-
60
-
61
-
62
-
63
-
64
-
65
-
66
-
67
-
68
-
69
-
70
-
71
-
72
-
73
-
74
-
75
-
76
-
77
-
78
-
79
-
80
-
81
-
82
-
83
-
84
-
85
-
86
-
87
-
88
-
89
-
90
-
91
-
92
-
93
-
94
-
95
-
96
-
97
-
98
-
99
-
100
-
101
-
102
-
103
-
104
-
105
-
106
-
107
-
108
-
109
-
110
-
111
-
112
-
113
-
114
-
115
-
116
-
117
-
118
-
119
-
120
-
121
-
122
-
123
-
124
-
125
-
126
-
127
-
128
-
129
-
130
-
131
-
132
-
133
-
134
-
135
-
136
-
137
-
138
-
139
-
140
-
141
-
142
-
143
-
144
-
145
-
146
-
147
 |
 |
