Dell E514dw Dell Color Multifunction Printer Users Guide - Page 175
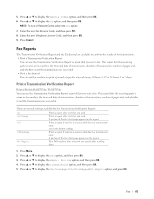
Fax Reports, Print a Transmission Verification Report
 |
View all Dell E514dw manuals
Add to My Manuals
Save this manual to your list of manuals |
Page 175 highlights
5. Press p or q to display the Remote Codes option, and then press OK. 6. Press p or q to display the On option, and then press OK. NOTE: To turn off Remote Codes, select the Off option. 7. Enter the new Fax Receive Code, and then press OK. 8. Enter the new Telephone Answer Code, and then press OK. 9. Press Cancel. Fax Reports The Transmission Verification Report and the Fax Journal are available to confirm the results of fax transmission. • Print a Transmission Verification Report You can use the Transmission Verification Report as proof that you sent a fax. This report lists the receiving party's name or fax number, the time and date of transmission, duration of transmission, number of pages sent, and whether or not the transmission was successful. • Print a Fax Journal You can set the machine to print a journal at specific intervals (every 50 faxes, 6, 12 or 24 hours, 2 or 7 days). Print a Transmission Verification Report Related Models:Dell E515dn / Dell E515dw You can use the Transmission Verification Report as proof that you sent a fax. This report lists the receiving party's name or fax number, the time and date of transmission, duration of transmission, number of pages sent, and whether or not the transmission was successful. There are several settings available for the Transmission Verification Report: On On+Image Off Off+Image No Report Prints a report after every fax you send. Prints a report after every fax you send. A portion of the fax's first page appears on the report. Prints a report if your fax is unsuccessful due to a transmission error. Off is the factory setting. Prints a report if your fax is unsuccessful due to a transmission error. A portion of the fax's first page appears on the report. Your Dell machine does not print any reports after sending faxes. 1. Press Menu. 2. Press p or q to display the Fax option, and then press OK. 3. Press p or q to display the Report Setting option, and then press OK. 4. Press p or q to display the Transmission option, and then press OK. 5. Press p or q to display the On, On+Image, Off, Off+Image, or No Report option, and press OK. Fax 175
-
 1
1 -
2
-
3
-
4
-
5
-
6
-
7
-
8
-
9
-
10
-
11
-
12
-
13
-
14
-
15
-
16
-
17
-
18
-
19
-
20
-
21
-
22
-
23
-
24
-
25
-
26
-
27
-
28
-
29
-
30
-
31
-
32
-
33
-
34
-
35
-
36
-
37
-
38
-
39
-
40
-
41
-
42
-
43
-
44
-
45
-
46
-
47
-
48
-
49
-
50
-
51
-
52
-
53
-
54
-
55
-
56
-
57
-
58
-
59
-
60
-
61
-
62
-
63
-
64
-
65
-
66
-
67
-
68
-
69
-
70
-
71
-
72
-
73
-
74
-
75
-
76
-
77
-
78
-
79
-
80
-
81
-
82
-
83
-
84
-
85
-
86
-
87
-
88
-
89
-
90
-
91
-
92
-
93
-
94
-
95
-
96
-
97
-
98
-
99
-
100
-
101
-
102
-
103
-
104
-
105
-
106
-
107
-
108
-
109
-
110
-
111
-
112
-
113
-
114
-
115
-
116
-
117
-
118
-
119
-
120
-
121
-
122
-
123
-
124
-
125
-
126
-
127
-
128
-
129
-
130
-
131
-
132
-
133
-
134
-
135
-
136
-
137
-
138
-
139
-
140
-
141
-
142
-
143
-
144
-
145
-
146
-
147
-
148
-
149
-
150
-
151
-
152
-
153
-
154
-
155
-
156
-
157
-
158
-
159
-
160
-
161
-
162
-
163
-
164
-
165
-
166
-
167
-
168
-
169
-
 170
170 -
 171
171 -
 172
172 -
 173
173 -
 174
174 -
 175
175 -
 176
176 -
 177
177 -
 178
178 -
 179
179 -
 180
180 -
181
-
182
-
183
-
184
-
185
-
186
-
187
-
188
-
189
-
190
-
191
-
192
-
193
-
194
-
195
-
196
-
197
-
198
-
199
-
200
-
201
-
202
-
203
-
204
-
205
-
206
-
207
-
208
-
209
-
210
-
211
-
212
-
213
-
214
-
215
-
216
-
217
-
218
-
219
-
220
-
221
-
222
-
223
-
224
-
225
-
226
-
227
-
228
-
229
-
230
-
231
-
232
-
233
-
234
-
235
-
236
-
237
-
238
-
239
-
240
-
241
-
242
-
243
-
244
-
245
-
246
-
247
-
248
-
249
-
250
-
251
-
252
-
253
-
254
-
255
-
256
-
257
-
258
-
259
-
260
-
261
-
262
-
263
-
264
-
265
-
266
-
267
-
268
-
269
-
270
-
271
-
272
-
273
-
274
-
275
-
276
-
277
-
278
-
279
-
280
-
281
-
282
-
283
-
284
-
285
-
286
-
287
-
288
-
289
-
290
-
291
-
292
-
293
-
294
-
295
-
296
-
297
-
298
-
299
-
300
-
301
-
302
-
303
-
304
-
305
-
306
-
307
-
308
-
309
-
310
-
311
-
312
-
313
-
314
-
315
-
316
-
317
-
318
-
319
-
320
-
321
-
322
-
323
-
324
-
325
-
326
-
327
-
328
-
329
-
330
-
331
-
332
-
333
-
334
-
335
-
336
-
337
-
338
-
339
-
340
-
341
-
342
-
343
-
344
-
345
-
346
-
347
-
348
-
349
-
350
-
351
-
352
-
353
-
354
-
355
-
356
-
357
-
358
-
359
-
360
-
361
-
362
-
363
-
364
-
365
-
366
-
367
-
368
-
369
-
370
-
371
-
372
-
373
-
374
-
375
-
376
-
377
-
378
-
379
-
380
-
381
-
382
-
383
-
384
-
385
-
386
 |
 |
