Dell E514dw Dell Color Multifunction Printer Users Guide - Page 68
Add a Watermark to the Printed Document (Windows®), Use Image File
 |
View all Dell E514dw manuals
Add to My Manuals
Save this manual to your list of manuals |
Page 68 highlights
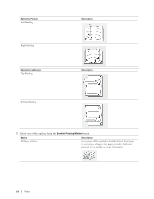
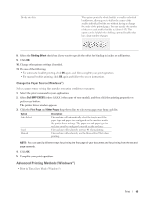
4. Select the Reverse Print check box. 5. Change other printer settings if needed. 6. Click OK. 7. Complete your print operation. Add a Watermark to the Printed Document (Windows®) Print a logo or text onto your document as a watermark. Select one of the preset watermarks, add a new watermark, or use an image file you have created. 1. Select the print command in your application. 2. Select Dell MFP EXXXX (where XXXX is the name of your model), and then click the printing properties or preferences button. The printer driver window appears. 3. Click the Advanced tab. 4. Select the Use Watermark check box, and then click the Settings button. 5. Select the watermark you want to use from the Select Watermark list, or create a new watermark. • To create a new watermark, click Add. a. Select either the Use Text or Use Image File option in the Watermark Style field. b. Type a title for the watermark in the Title field. c. If you select the Use Text option: • Select your Text, Font, Style, Size and Darkness options. d. If you select the Use Image File option: • Type the file name and location of your image in the File field or click the Browse button to search for the file. • Once an image selected, you can scale the size of the image. e. To move the position of the watermark on the page, adjust it in the Position field. • To modify an existing watermark, select the watermark, and then click the Settings button. Bring To Front This option will overlay the watermark on your printed document. In Outline Text Select the In Outline Text check box to print only an outline of the watermark. This feature is available only when using a text watermark. Custom Settings Select where your watermark will print. Include it on all pages, on the first page only, or on all pages except the first page. 6. Click OK. 7. Change other printer settings if needed. 8. Click OK. 9. Complete your print operation. 68 Print
-
 1
1 -
2
-
3
-
4
-
5
-
6
-
7
-
8
-
9
-
10
-
11
-
12
-
13
-
14
-
15
-
16
-
17
-
18
-
19
-
20
-
21
-
22
-
23
-
24
-
25
-
26
-
27
-
28
-
29
-
30
-
31
-
32
-
33
-
34
-
35
-
36
-
37
-
38
-
39
-
40
-
41
-
42
-
43
-
44
-
45
-
46
-
47
-
48
-
49
-
50
-
51
-
52
-
53
-
54
-
55
-
56
-
57
-
58
-
59
-
60
-
61
-
62
-
 63
63 -
 64
64 -
 65
65 -
 66
66 -
 67
67 -
 68
68 -
 69
69 -
 70
70 -
 71
71 -
 72
72 -
 73
73 -
74
-
75
-
76
-
77
-
78
-
79
-
80
-
81
-
82
-
83
-
84
-
85
-
86
-
87
-
88
-
89
-
90
-
91
-
92
-
93
-
94
-
95
-
96
-
97
-
98
-
99
-
100
-
101
-
102
-
103
-
104
-
105
-
106
-
107
-
108
-
109
-
110
-
111
-
112
-
113
-
114
-
115
-
116
-
117
-
118
-
119
-
120
-
121
-
122
-
123
-
124
-
125
-
126
-
127
-
128
-
129
-
130
-
131
-
132
-
133
-
134
-
135
-
136
-
137
-
138
-
139
-
140
-
141
-
142
-
143
-
144
-
145
-
146
-
147
-
148
-
149
-
150
-
151
-
152
-
153
-
154
-
155
-
156
-
157
-
158
-
159
-
160
-
161
-
162
-
163
-
164
-
165
-
166
-
167
-
168
-
169
-
170
-
171
-
172
-
173
-
174
-
175
-
176
-
177
-
178
-
179
-
180
-
181
-
182
-
183
-
184
-
185
-
186
-
187
-
188
-
189
-
190
-
191
-
192
-
193
-
194
-
195
-
196
-
197
-
198
-
199
-
200
-
201
-
202
-
203
-
204
-
205
-
206
-
207
-
208
-
209
-
210
-
211
-
212
-
213
-
214
-
215
-
216
-
217
-
218
-
219
-
220
-
221
-
222
-
223
-
224
-
225
-
226
-
227
-
228
-
229
-
230
-
231
-
232
-
233
-
234
-
235
-
236
-
237
-
238
-
239
-
240
-
241
-
242
-
243
-
244
-
245
-
246
-
247
-
248
-
249
-
250
-
251
-
252
-
253
-
254
-
255
-
256
-
257
-
258
-
259
-
260
-
261
-
262
-
263
-
264
-
265
-
266
-
267
-
268
-
269
-
270
-
271
-
272
-
273
-
274
-
275
-
276
-
277
-
278
-
279
-
280
-
281
-
282
-
283
-
284
-
285
-
286
-
287
-
288
-
289
-
290
-
291
-
292
-
293
-
294
-
295
-
296
-
297
-
298
-
299
-
300
-
301
-
302
-
303
-
304
-
305
-
306
-
307
-
308
-
309
-
310
-
311
-
312
-
313
-
314
-
315
-
316
-
317
-
318
-
319
-
320
-
321
-
322
-
323
-
324
-
325
-
326
-
327
-
328
-
329
-
330
-
331
-
332
-
333
-
334
-
335
-
336
-
337
-
338
-
339
-
340
-
341
-
342
-
343
-
344
-
345
-
346
-
347
-
348
-
349
-
350
-
351
-
352
-
353
-
354
-
355
-
356
-
357
-
358
-
359
-
360
-
361
-
362
-
363
-
364
-
365
-
366
-
367
-
368
-
369
-
370
-
371
-
372
-
373
-
374
-
375
-
376
-
377
-
378
-
379
-
380
-
381
-
382
-
383
-
384
-
385
-
386
 |
 |
