Dell E514dw Dell Color Multifunction Printer Users Guide - Page 225
Enable Send Notifications for TX Verification Mail, to display
 |
View all Dell E514dw manuals
Add to My Manuals
Save this manual to your list of manuals |
Page 225 highlights
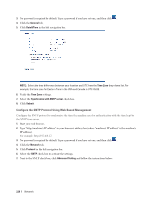
Enable Send Notifications for TX Verification Mail Related Models:Dell E515dn / Dell E515dw 1. Press Menu. 2. Press p or q to display the Network option, and then press OK. 3. Press p or q to display the E-mail/IFAX option, and then press OK. 4. Press p or q to display the Setup Mail TX option, and then press OK. 5. Press p or q to display the Notification option, and then press OK. 6. Select On or Off to enable or disable the Send Notification feature. When Send Notification is On, the fax includes an additional field, named Message Disposition Notification (MDN), that contains message delivery information. NOTE: Your fax recipient's machine must support the MDN field in order to send a notification report. 7. Press Cancel. Enable Receive Notification for TX Verification Mail Related Models:Dell E515dn / Dell E515dw 1. Press Menu. 2. Press p or q to display the Network option, and then press OK. 3. Press p or q to display the E-mail/IFAX option, and then press OK. 4. Press p or q to display the Setup Mail RX option, and then press OK. 5. Press p or q to display the Notification option, and then press OK. 6. Press one of the three possible settings: Option Receive Notification On Receive Notification MDN Receive Notification Off Description When Receive Notification is On, a template is sent back to the sender to indicate successful reception and processing of the message. These templates depend on the operation requested by the sender. Example: SUCCESS: Received From When Receive Notification is MDN, a report to indicate successful reception and processing is sent back to the sender if the originating station sent a request confirmation to the MDN (Message Disposition Notification) field. When Receive Notification is Off, all forms of receive notification are disabled and no message is sent back to the sender regardless of the request. NOTE: To send TX verification mail, the Sender must configure these settings: • Switch Notification in Setup Mail TX to On. • Switch Header in Setup Mail RX to All or Subject+From+To. NOTE: To receive TX verification mail, the Receiver must configure these settings: • Switch Notification in Setup Mail RX to On. 7. Press Cancel. Network 225
-
 1
1 -
2
-
3
-
4
-
5
-
6
-
7
-
8
-
9
-
10
-
11
-
12
-
13
-
14
-
15
-
16
-
17
-
18
-
19
-
20
-
21
-
22
-
23
-
24
-
25
-
26
-
27
-
28
-
29
-
30
-
31
-
32
-
33
-
34
-
35
-
36
-
37
-
38
-
39
-
40
-
41
-
42
-
43
-
44
-
45
-
46
-
47
-
48
-
49
-
50
-
51
-
52
-
53
-
54
-
55
-
56
-
57
-
58
-
59
-
60
-
61
-
62
-
63
-
64
-
65
-
66
-
67
-
68
-
69
-
70
-
71
-
72
-
73
-
74
-
75
-
76
-
77
-
78
-
79
-
80
-
81
-
82
-
83
-
84
-
85
-
86
-
87
-
88
-
89
-
90
-
91
-
92
-
93
-
94
-
95
-
96
-
97
-
98
-
99
-
100
-
101
-
102
-
103
-
104
-
105
-
106
-
107
-
108
-
109
-
110
-
111
-
112
-
113
-
114
-
115
-
116
-
117
-
118
-
119
-
120
-
121
-
122
-
123
-
124
-
125
-
126
-
127
-
128
-
129
-
130
-
131
-
132
-
133
-
134
-
135
-
136
-
137
-
138
-
139
-
140
-
141
-
142
-
143
-
144
-
145
-
146
-
147
-
148
-
149
-
150
-
151
-
152
-
153
-
154
-
155
-
156
-
157
-
158
-
159
-
160
-
161
-
162
-
163
-
164
-
165
-
166
-
167
-
168
-
169
-
170
-
171
-
172
-
173
-
174
-
175
-
176
-
177
-
178
-
179
-
180
-
181
-
182
-
183
-
184
-
185
-
186
-
187
-
188
-
189
-
190
-
191
-
192
-
193
-
194
-
195
-
196
-
197
-
198
-
199
-
200
-
201
-
202
-
203
-
204
-
205
-
206
-
207
-
208
-
209
-
210
-
211
-
212
-
213
-
214
-
215
-
216
-
217
-
218
-
219
-
 220
220 -
 221
221 -
 222
222 -
 223
223 -
 224
224 -
 225
225 -
 226
226 -
 227
227 -
 228
228 -
 229
229 -
 230
230 -
231
-
232
-
233
-
234
-
235
-
236
-
237
-
238
-
239
-
240
-
241
-
242
-
243
-
244
-
245
-
246
-
247
-
248
-
249
-
250
-
251
-
252
-
253
-
254
-
255
-
256
-
257
-
258
-
259
-
260
-
261
-
262
-
263
-
264
-
265
-
266
-
267
-
268
-
269
-
270
-
271
-
272
-
273
-
274
-
275
-
276
-
277
-
278
-
279
-
280
-
281
-
282
-
283
-
284
-
285
-
286
-
287
-
288
-
289
-
290
-
291
-
292
-
293
-
294
-
295
-
296
-
297
-
298
-
299
-
300
-
301
-
302
-
303
-
304
-
305
-
306
-
307
-
308
-
309
-
310
-
311
-
312
-
313
-
314
-
315
-
316
-
317
-
318
-
319
-
320
-
321
-
322
-
323
-
324
-
325
-
326
-
327
-
328
-
329
-
330
-
331
-
332
-
333
-
334
-
335
-
336
-
337
-
338
-
339
-
340
-
341
-
342
-
343
-
344
-
345
-
346
-
347
-
348
-
349
-
350
-
351
-
352
-
353
-
354
-
355
-
356
-
357
-
358
-
359
-
360
-
361
-
362
-
363
-
364
-
365
-
366
-
367
-
368
-
369
-
370
-
371
-
372
-
373
-
374
-
375
-
376
-
377
-
378
-
379
-
380
-
381
-
382
-
383
-
384
-
385
-
386
 |
 |
