Dell IP4700 Service Guide - Page 68
Replacing or Adding a Disk Module, CAUTION
 |
View all Dell IP4700 manuals
Add to My Manuals
Save this manual to your list of manuals |
Page 68 highlights
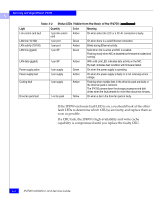
Servicing and Upgrading an IP4700 3 Replacing or Adding a Disk Module ! CAUTION Disk drive modules are extremely sensitive electrical components. When replacing or adding a disk module, observe the following: • Remove or install disk modules only while the storage system is powered up. • Do not move a disk module that is part of an existing file system to another slot in the storage system. If you do, you risk destroying the storage system beyond recovery, or, at the very least, experiencing data loss. Each disk module has file system identifying information assigned to it when it is bound. Moving it to another slot can make the information stored on the disk module from the original file system inaccessible. • A disk module must be inserted all the way or removed entirely. Do not leave a disk module partially removed except for periods when you are allowing it to spin down. A partially removed adjacent module may damage a disk module being inserted or removed. • Handle a disk module gently and use an ESD wristband. Do not remove a faulty disk module until you have a replacement module (with the same part number) or a filler module available. The part number (PN005xxxxxx) appears on the top or bottom of the module. A replacement disk module should have the same format (520-bytes-per- sector format is required for arrays) and the same capacity (size and speed) as the disk it is replacing. An add-on can be any capacity but must be the 520-bytes-per-sector format. Volumes should be created using disk modules of equal size and speed. Refer to the IP4700 Administrator's Guide for information on creating volumes. • Do not remove more than one disk at a time from the storage system. When removing or installing multiple disk modules, wait for the activity lights on all other disk modules to resume a steady flicker before removing or installing the next disk module. The activity lights show that the system software has rediscovered the Fibre Channel loop. 3-8 IP4700 Installation and Service Guide
-
 1
1 -
2
-
3
-
4
-
5
-
6
-
7
-
8
-
9
-
10
-
11
-
12
-
13
-
14
-
15
-
16
-
17
-
18
-
19
-
20
-
21
-
22
-
23
-
24
-
25
-
26
-
27
-
28
-
29
-
30
-
31
-
32
-
33
-
34
-
35
-
36
-
37
-
38
-
39
-
40
-
41
-
42
-
43
-
44
-
45
-
46
-
47
-
48
-
49
-
50
-
51
-
52
-
53
-
54
-
55
-
56
-
57
-
58
-
59
-
60
-
61
-
62
-
 63
63 -
 64
64 -
 65
65 -
 66
66 -
 67
67 -
 68
68 -
 69
69 -
 70
70 -
 71
71 -
 72
72 -
 73
73 -
74
-
75
-
76
-
77
-
78
-
79
-
80
-
81
-
82
-
83
-
84
-
85
-
86
-
87
-
88
-
89
-
90
-
91
-
92
-
93
-
94
-
95
-
96
-
97
-
98
-
99
-
100
-
101
-
102
-
103
-
104
-
105
-
106
-
107
-
108
-
109
-
110
-
111
-
112
-
113
-
114
-
115
-
116
-
117
-
118
-
119
-
120
-
121
-
122
-
123
-
124
-
125
-
126
 |
 |