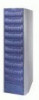
Dell IP4700 Service Guide - Page 83
Replacing a Power Supply Module, remove a power supply until you have a replacement supply or
 |
View all Dell IP4700 manuals
Add to My Manuals
Save this manual to your list of manuals |
Page 83 highlights
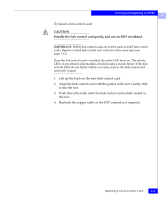
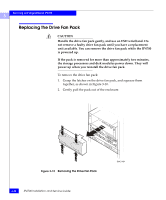
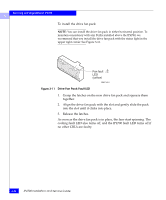
Servicing and Upgrading an IP4700 3 Replacing a Power Supply Module ! CAUTION To access a power supply module, you must remove the drive fan pack. If the drive fan pack is removed for more than 2 minutes, the storage processors and disk modules power down. They will power up when you reinstall the drive fan pack. Handle a power supply gently, and use an ESD wristband. Do not remove a power supply until you have a replacement supply or filler module available. Turn off the power supply before unplugging the ac line cord from the supply or removing the supply from the enclosure. IMPORTANT: If one power supply is off and the other is on, do not turn one on and immediately turn the other off. Instead, turn one on and wait five seconds before turning the other off. Replace the failed power supply with the same type of power supply (as shown in the power supply section of Chapter 1). Be sure to correctly identify the correct power supply - PS A or PS B. If the wrong power supply is shut off, the system will power down. To remove a power-supply module: 1. Remove the drive fan pack. See Replacing the Drive Fan Pack on page 3-20. 2. Set the power supply's power switch to the off (0) position. 3. Unplug the ac power cord from the power supply's ac inlet. 4. Remove the power cord from the enclosure. 5. If you are removing the top power supply, push the latch up and to the right as far as possible. If you are removing the bottom power supply, push the latch up and to the left as far as possible. See Figures 3-12 and 3-14. 6. Grasp the power supply handle with one hand. Gently pull the power supply from the enclosure, while supporting it with your other hand. See Figures 3-13 and 3-15. Replacing a Power Supply Module 3-23
-
 1
1 -
2
-
3
-
4
-
5
-
6
-
7
-
8
-
9
-
10
-
11
-
12
-
13
-
14
-
15
-
16
-
17
-
18
-
19
-
20
-
21
-
22
-
23
-
24
-
25
-
26
-
27
-
28
-
29
-
30
-
31
-
32
-
33
-
34
-
35
-
36
-
37
-
38
-
39
-
40
-
41
-
42
-
43
-
44
-
45
-
46
-
47
-
48
-
49
-
50
-
51
-
52
-
53
-
54
-
55
-
56
-
57
-
58
-
59
-
60
-
61
-
62
-
63
-
64
-
65
-
66
-
67
-
68
-
69
-
70
-
71
-
72
-
73
-
74
-
75
-
76
-
77
-
 78
78 -
 79
79 -
 80
80 -
 81
81 -
 82
82 -
 83
83 -
 84
84 -
 85
85 -
 86
86 -
 87
87 -
 88
88 -
89
-
90
-
91
-
92
-
93
-
94
-
95
-
96
-
97
-
98
-
99
-
100
-
101
-
102
-
103
-
104
-
105
-
106
-
107
-
108
-
109
-
110
-
111
-
112
-
113
-
114
-
115
-
116
-
117
-
118
-
119
-
120
-
121
-
122
-
123
-
124
-
125
-
126
 |
 |
