Dell PowerEdge C4140 EMC Installation and Service Manual - Page 114
SXM2 Graphics processing unit, Removing the NVLink Air Shroud
 |
View all Dell PowerEdge C4140 manuals
Add to My Manuals
Save this manual to your list of manuals |
Page 114 highlights
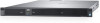
3. GPU 6 power cable 5. GPU 7signal cable 7. GPU 4 and 5 cables on the system board 9. GPU 4 power cable 4. system board 6. GPU 6 and 7 cables on the system board 8. GPU 4 signal cable 10. GPU 5 power cable SXM2 Graphics processing unit The following are the high-level steps that you must perform to replace the SXM2 GPUs: 1. Remove the NVLink air shroud. 2. Remove the SXM2 heat sink. 3. Remove the SXM2 GPU. 4. Remove the NVLink Board. 5. Install the NVLink Board. 6. Install the SXM2 GPU. 7. Install the SXM2 heat sink. 8. Install the NVLink air shroud. Removing the NVLink Air Shroud Prerequisites 1. Follow the safety guidelines listed in the Safety instructions section. 2. Follow the procedure listed in Before working inside your system. Steps Lift and remove the NVLink air shroud from the NVLink board. Figure 85. Removing NVLink air shroud 114 PowerEdge C4140 installing and removing system components
-
 1
1 -
2
-
3
-
4
-
5
-
6
-
7
-
8
-
9
-
10
-
11
-
12
-
13
-
14
-
15
-
16
-
17
-
18
-
19
-
20
-
21
-
22
-
23
-
24
-
25
-
26
-
27
-
28
-
29
-
30
-
31
-
32
-
33
-
34
-
35
-
36
-
37
-
38
-
39
-
40
-
41
-
42
-
43
-
44
-
45
-
46
-
47
-
48
-
49
-
50
-
51
-
52
-
53
-
54
-
55
-
56
-
57
-
58
-
59
-
60
-
61
-
62
-
63
-
64
-
65
-
66
-
67
-
68
-
69
-
70
-
71
-
72
-
73
-
74
-
75
-
76
-
77
-
78
-
79
-
80
-
81
-
82
-
83
-
84
-
85
-
86
-
87
-
88
-
89
-
90
-
91
-
92
-
93
-
94
-
95
-
96
-
97
-
98
-
99
-
100
-
101
-
102
-
103
-
104
-
105
-
106
-
107
-
108
-
 109
109 -
 110
110 -
 111
111 -
 112
112 -
 113
113 -
 114
114 -
 115
115 -
 116
116 -
 117
117 -
 118
118 -
 119
119 -
120
-
121
-
122
-
123
-
124
-
125
-
126
-
127
-
128
-
129
-
130
-
131
-
132
-
133
-
134
-
135
-
136
-
137
-
138
-
139
-
140
-
141
 |
 |
