Dell PowerEdge C4140 EMC Installation and Service Manual - Page 58
Before working inside your system, Recommended tools, System cover, Removing the front system cover
 |
View all Dell PowerEdge C4140 manuals
Add to My Manuals
Save this manual to your list of manuals |
Page 58 highlights
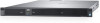
Before working inside your system Prerequisites Follow the safety guidelines listed in Safety instructions on page 57. Steps 1. Power off the system and all attached peripherals. 2. Disconnect the system from the electrical outlet and disconnect the peripherals. 3. If applicable, remove the system from the rack. For more information, see the Rack Installation Guide at For additional information about environmental certifications, please refer to the Product Environmental Datasheet located with the Manuals & Documents on www.dell.com/poweredgemanuals. 4. Remove the front system cover. 5. Remove the rear system cover. After working inside your system Prerequisites Follow the safety guidelines listed in Safety instructions on page 57. Steps 1. Install the rear system cover. 2. Install the front system cover. 3. If applicable, install the system into the rack. For more information, see the Rack Installation Guide at For additional information about environmental certifications, please refer to the Product Environmental Datasheet located with the Manuals & Documents on www.dell.com/poweredgemanuals. 4. Reconnect the peripherals and connect the system to the electrical outlet. 5. Turn on the attached peripherals and then turn on the system. Recommended tools You need the following tools to perform the removal and installation procedures: • Phillips #1 screwdriver • Phillips #2 screwdriver • Torx #T30 screwdriver • Plastic scribe • 1/4 inch flat blade screwdriver • Wrist grounding strap connected to the ground • ESD mat System cover Removing the front system cover Prerequisites CAUTION: Do not operate the system without the system cover. This can result in overheating and cause component damage. 1. Follow the safety guidelines listed in the Safety instructions section. 2. Power off the system and all attached peripherals. 58 PowerEdge C4140 installing and removing system components
-
 1
1 -
2
-
3
-
4
-
5
-
6
-
7
-
8
-
9
-
10
-
11
-
12
-
13
-
14
-
15
-
16
-
17
-
18
-
19
-
20
-
21
-
22
-
23
-
24
-
25
-
26
-
27
-
28
-
29
-
30
-
31
-
32
-
33
-
34
-
35
-
36
-
37
-
38
-
39
-
40
-
41
-
42
-
43
-
44
-
45
-
46
-
47
-
48
-
49
-
50
-
51
-
52
-
 53
53 -
 54
54 -
 55
55 -
 56
56 -
 57
57 -
 58
58 -
 59
59 -
 60
60 -
 61
61 -
 62
62 -
 63
63 -
64
-
65
-
66
-
67
-
68
-
69
-
70
-
71
-
72
-
73
-
74
-
75
-
76
-
77
-
78
-
79
-
80
-
81
-
82
-
83
-
84
-
85
-
86
-
87
-
88
-
89
-
90
-
91
-
92
-
93
-
94
-
95
-
96
-
97
-
98
-
99
-
100
-
101
-
102
-
103
-
104
-
105
-
106
-
107
-
108
-
109
-
110
-
111
-
112
-
113
-
114
-
115
-
116
-
117
-
118
-
119
-
120
-
121
-
122
-
123
-
124
-
125
-
126
-
127
-
128
-
129
-
130
-
131
-
132
-
133
-
134
-
135
-
136
-
137
-
138
-
139
-
140
-
141
 |
 |
