Dell PowerVault LTO4-120HH Dell DR Series System Administrator's Guide - Page 122
Resetting the Boot LUN Setting in H700 BIOS After Running RM, Dell DR
 |
View all Dell PowerVault LTO4-120HH manuals
Add to My Manuals
Save this manual to your list of manuals |
Page 122 highlights
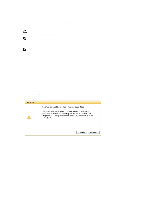
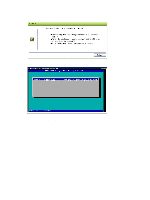
5. After a few minutes, Restore Manager loads and displays its main screen. 6. Select the desired Restore mode (either Recover Appliance or Factory Reset). 7. Enter the confirmation string, and press to proceed. CAUTION: The Factory Reset mode deletes all DR Series data. The Factory Reset mode should only be used when the container data is no longer needed. NOTE: After Restore Manager completes, only the administrator account will remain enabled. To re-enable the root or service accounts, see the DR Series system CLI user --enable --user command in the Dell DR Series System Command Line Reference Guide. NOTE: If you had previously joined the DR Series system to any Active Directory Services (ADS) domain before running Restore Manager, after it completes you will need to manually rejoin the desired ADS domain. For information about joining an ADS domain, see Configuring Active Directory Settings. Resetting the Boot LUN Setting in H700 BIOS After Running RM In the event that both of the 2.5-inch 300 GB 10K RPM 6 GB/s SAS internal drives (OS) in RAID1 are replaced, you need to be able to run the Dell Restore Manager (RM) utility to recover the DR Series system OS drives. Following the RM recovery process, the boot logical unit number (LUN) has to be reset to VD0 RAID1. The DR Series system unsuccessfully attempts to boot from RAID6 instead of RAID1. To resolve this issue, reset the H700 BIOS to revise the proper boot order setting to configure the proper boot LUN to be RAID1. To reset the proper LUN boot order, complete the following steps: 1. Start Restore Manager. 2. Select Option 1 → Recover My Appliance. The OS Virtual Disk is created: Warning Code 2002 dialog is displayed. 3. Click Proceed. 122
-
 1
1 -
2
-
3
-
4
-
5
-
6
-
7
-
8
-
9
-
10
-
11
-
12
-
13
-
14
-
15
-
16
-
17
-
18
-
19
-
20
-
21
-
22
-
23
-
24
-
25
-
26
-
27
-
28
-
29
-
30
-
31
-
32
-
33
-
34
-
35
-
36
-
37
-
38
-
39
-
40
-
41
-
42
-
43
-
44
-
45
-
46
-
47
-
48
-
49
-
50
-
51
-
52
-
53
-
54
-
55
-
56
-
57
-
58
-
59
-
60
-
61
-
62
-
63
-
64
-
65
-
66
-
67
-
68
-
69
-
70
-
71
-
72
-
73
-
74
-
75
-
76
-
77
-
78
-
79
-
80
-
81
-
82
-
83
-
84
-
85
-
86
-
87
-
88
-
89
-
90
-
91
-
92
-
93
-
94
-
95
-
96
-
97
-
98
-
99
-
100
-
101
-
102
-
103
-
104
-
105
-
106
-
107
-
108
-
109
-
110
-
111
-
112
-
113
-
114
-
115
-
116
-
 117
117 -
 118
118 -
 119
119 -
 120
120 -
 121
121 -
 122
122 -
 123
123 -
 124
124 -
 125
125 -
 126
126 -
 127
127 -
128
-
129
-
130
-
131
-
132
-
133
-
134
-
135
-
136
-
137
-
138
-
139
-
140
-
141
-
142
-
143
-
144
-
145
-
146
-
147
-
148
-
149
-
150
-
151
-
152
-
153
-
154
-
155
-
156
-
157
-
158
-
159
-
160
-
161
-
162
-
163
-
164
-
165
-
166
-
167
-
168
-
169
-
170
-
171
-
172
-
173
-
174
-
175
-
176
 |
 |
