Dell XPS Gen 2 Owner's Manual - Page 94
into place to secure the heat sink., When the heat sink is secured
 |
View all Dell XPS Gen 2 manuals
Add to My Manuals
Save this manual to your list of manuals |
Page 94 highlights
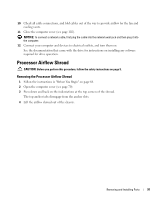
www.dell.com | support.dell.com pin-1 corners of processor and socket aligned socket lever processor processor socket 8 Install the heat sink: a Insert the notched end of the heat sink onto the end of the retention base that is opposite the hinge. b Lower the heat sink until it fits securely in the base. c When the heat sink is secured, pivot the rentention module clip back until the tab snaps into place to secure the heat sink. 9 If you installed a processor replacement kit from Dell, return the original heat sink assembly and processor to Dell in the same package in which your replacement kit was sent. 10 Replace the airflow shroud (see page 92). 11 Close the computer cover (see page 102). NOTICE: To connect a network cable, first plug the cable into the network wall jack and then plug it into the computer. 12 Connect your computer and devices to electrical outlets, and turn them on. 94 Removing and Installing Parts
-
 1
1 -
2
-
3
-
4
-
5
-
6
-
7
-
8
-
9
-
10
-
11
-
12
-
13
-
14
-
15
-
16
-
17
-
18
-
19
-
20
-
21
-
22
-
23
-
24
-
25
-
26
-
27
-
28
-
29
-
30
-
31
-
32
-
33
-
34
-
35
-
36
-
37
-
38
-
39
-
40
-
41
-
42
-
43
-
44
-
45
-
46
-
47
-
48
-
49
-
50
-
51
-
52
-
53
-
54
-
55
-
56
-
57
-
58
-
59
-
60
-
61
-
62
-
63
-
64
-
65
-
66
-
67
-
68
-
69
-
70
-
71
-
72
-
73
-
74
-
75
-
76
-
77
-
78
-
79
-
80
-
81
-
82
-
83
-
84
-
85
-
86
-
87
-
88
-
 89
89 -
 90
90 -
 91
91 -
 92
92 -
 93
93 -
 94
94 -
 95
95 -
 96
96 -
 97
97 -
 98
98 -
 99
99 -
100
-
101
-
102
-
103
-
104
-
105
-
106
-
107
-
108
-
109
-
110
-
111
-
112
-
113
-
114
-
115
-
116
-
117
-
118
-
119
-
120
-
121
-
122
-
123
-
124
-
125
-
126
-
127
-
128
-
129
-
130
-
131
-
132
-
133
-
134
-
135
-
136
-
137
-
138
-
139
-
140
-
141
-
142
 |
 |
