Dell XPS Gen 2 Owner's Manual - Page 96
Front Panel, Removing the Front Panel
 |
View all Dell XPS Gen 2 manuals
Add to My Manuals
Save this manual to your list of manuals |
Page 96 highlights
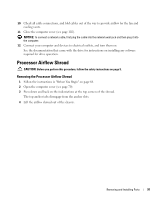
www.dell.com | support.dell.com release lever processor socket 6 Remove the processor from the socket. If you are replacing the processor, leave the release lever extended in the release position so that the socket is ready for the new processor and go to "Installing the Processor" on page 93. 7 Replace the airflow shroud (see page 92). 8 Close the computer cover (see page 102). NOTICE: To connect a network cable, first plug the cable into the network wall jack and then plug it into the computer. 9 Connect your computer and devices to electrical outlets, and turn them on. Front Panel CAUTION: Before you begin any of the procedures in this section, follow the safety instructions on page 9. Removing the Front Panel 1 Follow the instructions in "Before You Begin" on page 68. 2 Open the computer cover (see page 70). 3 Disconnect and remove all disk drives (see "Drives" on page 81). 4 Release the front panel by pressing each of the front-panel release tabs. There are seven release tabs. 96 Removing and Installing Parts
-
 1
1 -
2
-
3
-
4
-
5
-
6
-
7
-
8
-
9
-
10
-
11
-
12
-
13
-
14
-
15
-
16
-
17
-
18
-
19
-
20
-
21
-
22
-
23
-
24
-
25
-
26
-
27
-
28
-
29
-
30
-
31
-
32
-
33
-
34
-
35
-
36
-
37
-
38
-
39
-
40
-
41
-
42
-
43
-
44
-
45
-
46
-
47
-
48
-
49
-
50
-
51
-
52
-
53
-
54
-
55
-
56
-
57
-
58
-
59
-
60
-
61
-
62
-
63
-
64
-
65
-
66
-
67
-
68
-
69
-
70
-
71
-
72
-
73
-
74
-
75
-
76
-
77
-
78
-
79
-
80
-
81
-
82
-
83
-
84
-
85
-
86
-
87
-
88
-
89
-
90
-
 91
91 -
 92
92 -
 93
93 -
 94
94 -
 95
95 -
 96
96 -
 97
97 -
 98
98 -
 99
99 -
 100
100 -
 101
101 -
102
-
103
-
104
-
105
-
106
-
107
-
108
-
109
-
110
-
111
-
112
-
113
-
114
-
115
-
116
-
117
-
118
-
119
-
120
-
121
-
122
-
123
-
124
-
125
-
126
-
127
-
128
-
129
-
130
-
131
-
132
-
133
-
134
-
135
-
136
-
137
-
138
-
139
-
140
-
141
-
142
 |
 |
