Epson ActionPrinter 5000 User Manual - Page 38
Continuous Paper, Installing in the pull-tractor position, Paper Handling
 |
View all Epson ActionPrinter 5000 manuals
Add to My Manuals
Save this manual to your list of manuals |
Page 38 highlights
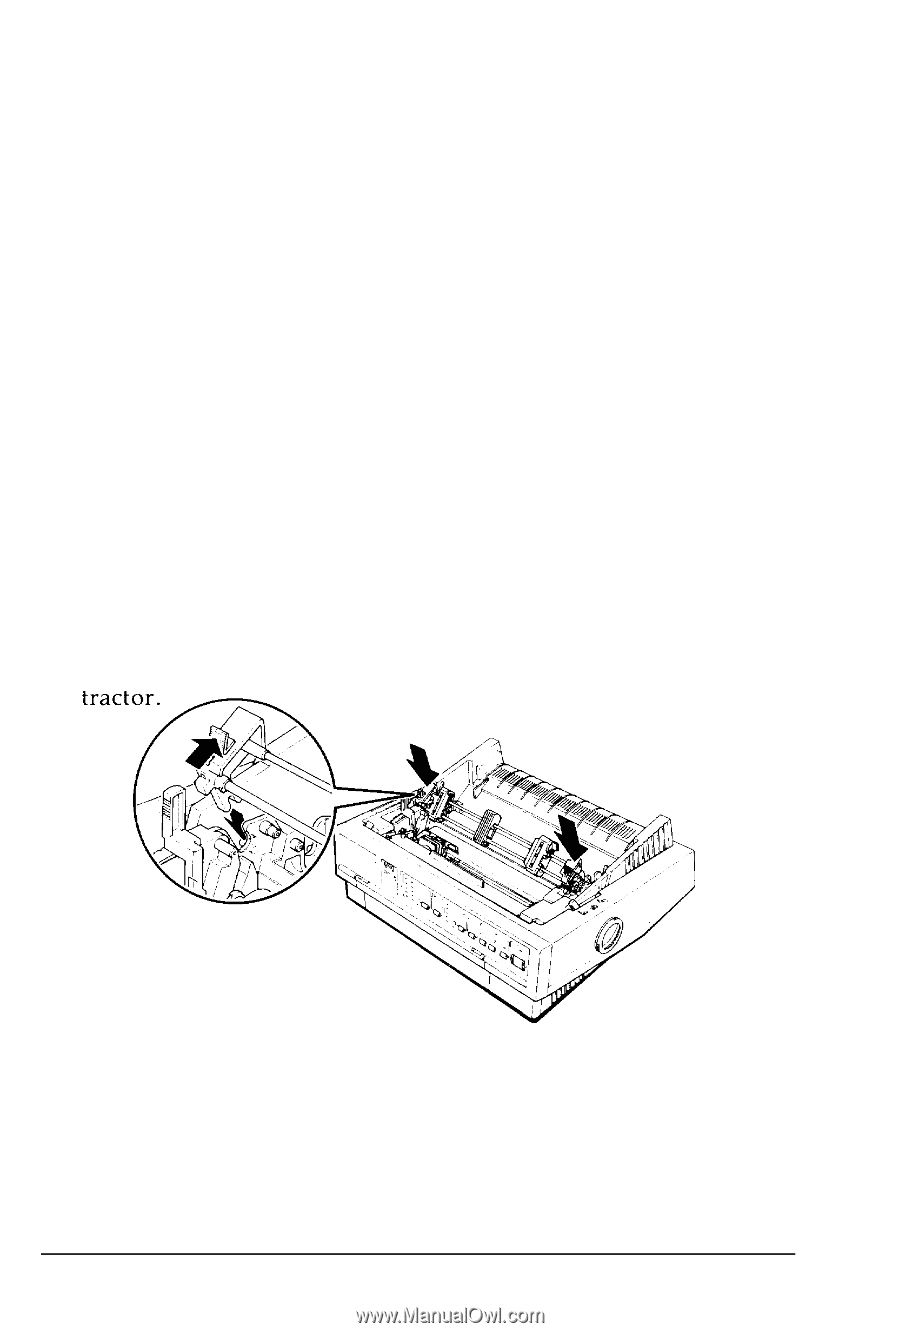
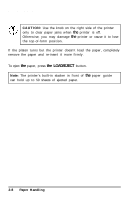
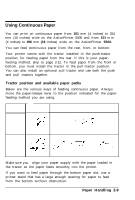
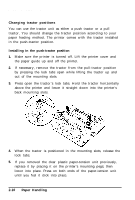
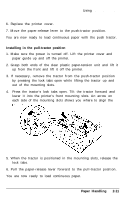
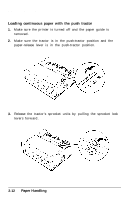
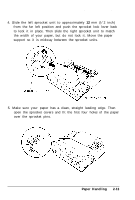
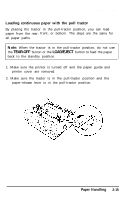
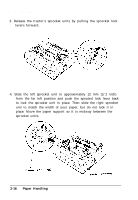
Using Continuous Paper 6. Replace the printer cover. 7. Move the paper-release lever to the push-tractor position. You are now ready to load continuous paper with the push tractor. Installing in the pull-tractor position 1. Make sure the power is turned off. Lift the printer cover and paper guide up and off the printer. 2. Grasp both ends of the clear plastic paper-tension unit and lift it up from the front and lift it off the printer. 3. If necessary, remove the tractor from the push-tractor position by pressing the lock tabs open while lifting the tractor up and out of the mounting slots. 4. Press the tractor's lock tabs open. Tilt the tractor forward and lower it into the printer's front mounting slots. An arrow on each side of the mounting slots shows you where to align the 5. When the tractor is positioned in the mounting slots, release the lock tabs. 6. Pull the paper-release lever forward to the pull-tractor position. You are now ready to load continuous paper. Paper Handling 2-11
-
 1
1 -
2
-
3
-
4
-
5
-
6
-
7
-
8
-
9
-
10
-
11
-
12
-
13
-
14
-
15
-
16
-
17
-
18
-
19
-
20
-
21
-
22
-
23
-
24
-
25
-
26
-
27
-
28
-
29
-
30
-
31
-
32
-
 33
33 -
 34
34 -
 35
35 -
 36
36 -
 37
37 -
 38
38 -
 39
39 -
 40
40 -
 41
41 -
 42
42 -
 43
43 -
44
-
45
-
46
-
47
-
48
-
49
-
50
-
51
-
52
-
53
-
54
-
55
-
56
-
57
-
58
-
59
-
60
-
61
-
62
-
63
-
64
-
65
-
66
-
67
-
68
-
69
-
70
-
71
-
72
-
73
-
74
-
75
-
76
-
77
-
78
-
79
-
80
-
81
-
82
-
83
-
84
-
85
-
86
-
87
-
88
-
89
-
90
-
91
-
92
-
93
-
94
-
95
-
96
-
97
-
98
-
99
-
100
-
101
-
102
-
103
-
104
-
105
-
106
-
107
-
108
-
109
-
110
-
111
-
112
-
113
-
114
-
115
-
116
-
117
-
118
-
119
-
120
-
121
-
122
-
123
-
124
-
125
-
126
-
127
-
128
-
129
-
130
-
131
-
132
-
133
-
134
-
135
-
136
-
137
-
138
-
139
-
140
-
141
-
142
-
143
-
144
-
145
-
146
-
147
-
148
-
149
-
150
-
151
-
152
-
153
-
154
 |
 |