Epson ActionPrinter 5000 User Manual - Page 71
Adjusting the tear-off position - + manual
 |
View all Epson ActionPrinter 5000 manuals
Add to My Manuals
Save this manual to your list of manuals |
Page 71 highlights
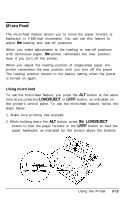
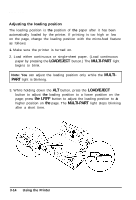
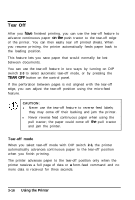
Tear Off Adjusting the tear-off position If the perforation is not aligned with the tear-off edge, adjust the tear-off position by following the steps below: 1. Make sure the paper is in the tear-off position and the TEAR OFF light is on. 2. While holding down the ALT button, press the LOAD/EJECT button to adjust the tear-off position to a lower position on the page or press the LF/FF button to adjust the tear-off position to a higher position on the page. The printer remembers the new tear-off position. 3. Tear off any printed pages. 4. When you begin printing, the printer automatically feeds the paper back to the loading position and begins printing. (You can also manually feed the paper back to the loading position by pressing the LOAD/EJECT or TEAR OFF button.) Note: l The printer has a minimum and maximum tear-off position. If you try to advance the loading position beyond these limits, the printer beeps and the paper stops moving. l When the paper reaches the factory-set tear-off position, the printer beeps and paper feeding pauses briefly. Use the factory setting as a reference point when adjusting the tear-off position. 3-18 Using the Printer
-
 1
1 -
2
-
3
-
4
-
5
-
6
-
7
-
8
-
9
-
10
-
11
-
12
-
13
-
14
-
15
-
16
-
17
-
18
-
19
-
20
-
21
-
22
-
23
-
24
-
25
-
26
-
27
-
28
-
29
-
30
-
31
-
32
-
33
-
34
-
35
-
36
-
37
-
38
-
39
-
40
-
41
-
42
-
43
-
44
-
45
-
46
-
47
-
48
-
49
-
50
-
51
-
52
-
53
-
54
-
55
-
56
-
57
-
58
-
59
-
60
-
61
-
62
-
63
-
64
-
65
-
 66
66 -
 67
67 -
 68
68 -
 69
69 -
 70
70 -
 71
71 -
 72
72 -
 73
73 -
 74
74 -
 75
75 -
 76
76 -
77
-
78
-
79
-
80
-
81
-
82
-
83
-
84
-
85
-
86
-
87
-
88
-
89
-
90
-
91
-
92
-
93
-
94
-
95
-
96
-
97
-
98
-
99
-
100
-
101
-
102
-
103
-
104
-
105
-
106
-
107
-
108
-
109
-
110
-
111
-
112
-
113
-
114
-
115
-
116
-
117
-
118
-
119
-
120
-
121
-
122
-
123
-
124
-
125
-
126
-
127
-
128
-
129
-
130
-
131
-
132
-
133
-
134
-
135
-
136
-
137
-
138
-
139
-
140
-
141
-
142
-
143
-
144
-
145
-
146
-
147
-
148
-
149
-
150
-
151
-
152
-
153
-
154
 |
 |
