Epson ActionPrinter 5000 User Manual - Page 89
Pull Tractor, Loading paper with the push tractor and the optional pull, tractor
 |
View all Epson ActionPrinter 5000 manuals
Add to My Manuals
Save this manual to your list of manuals |
Page 89 highlights
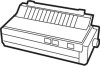
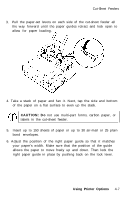
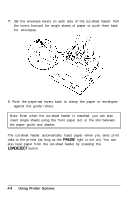
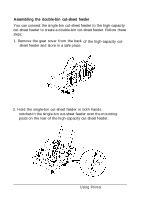
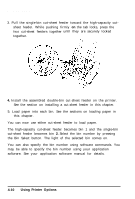
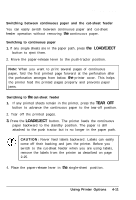
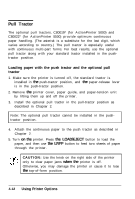
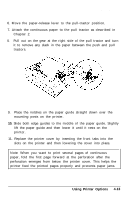
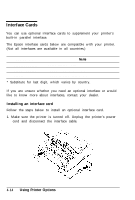
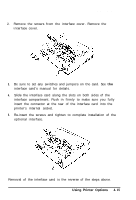
Pull Tractor The optional pull tractors, C80019* (for ActionPrinter 5000) and C80022* (for ActionPrinter 5500) provide optimum continuous paper handling. (The asterisk is a substitute for the last digit, which varies according to country.) The pull tractor is especially useful with continuous multi-part forms. For best results, use the optional pull tractor along with your standard tractor installed in the pushtractor position. Loading paper with the push tractor and the optional pull tractor 1. Make sure the printer is turned off, the standard tractor is installed in the push-tractor position, and the paper-release lever is in the push-tractor position. 2. Remove the printer cover, paper guide, and paper-tension unit by lifting them up and off the printer. 3. Install the optional pull tractor in the pull-tractor position as described in Chapter 2. Note: The optional pull tractor cannot be installed in the pushtractor position. 4. Attach the continuous paper to the push tractor as described in Chapter 2. 5. Turn on the printer. Press the LOAD/EJECT button to load the paper, and then use the LF/FF button to feed two sheets of paper through the printer. CAUTION: Use the knob on the right side of the printer only to clear paper jams when the printer is off. Otherwise, you may damage the printer or cause it to lose the top-of-form position. 4-12 Using Printer Options
-
 1
1 -
2
-
3
-
4
-
5
-
6
-
7
-
8
-
9
-
10
-
11
-
12
-
13
-
14
-
15
-
16
-
17
-
18
-
19
-
20
-
21
-
22
-
23
-
24
-
25
-
26
-
27
-
28
-
29
-
30
-
31
-
32
-
33
-
34
-
35
-
36
-
37
-
38
-
39
-
40
-
41
-
42
-
43
-
44
-
45
-
46
-
47
-
48
-
49
-
50
-
51
-
52
-
53
-
54
-
55
-
56
-
57
-
58
-
59
-
60
-
61
-
62
-
63
-
64
-
65
-
66
-
67
-
68
-
69
-
70
-
71
-
72
-
73
-
74
-
75
-
76
-
77
-
78
-
79
-
80
-
81
-
82
-
83
-
 84
84 -
 85
85 -
 86
86 -
 87
87 -
 88
88 -
 89
89 -
 90
90 -
 91
91 -
 92
92 -
 93
93 -
 94
94 -
95
-
96
-
97
-
98
-
99
-
100
-
101
-
102
-
103
-
104
-
105
-
106
-
107
-
108
-
109
-
110
-
111
-
112
-
113
-
114
-
115
-
116
-
117
-
118
-
119
-
120
-
121
-
122
-
123
-
124
-
125
-
126
-
127
-
128
-
129
-
130
-
131
-
132
-
133
-
134
-
135
-
136
-
137
-
138
-
139
-
140
-
141
-
142
-
143
-
144
-
145
-
146
-
147
-
148
-
149
-
150
-
151
-
152
-
153
-
154
 |
 |
