Epson Stylus Photo R300M User Manual - Page 23
Printing an Index, buttons to highlight
 |
View all Epson Stylus Photo R300M manuals
Add to My Manuals
Save this manual to your list of manuals |
Page 23 highlights
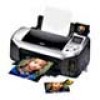
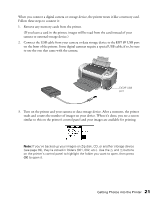
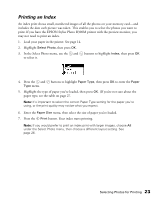
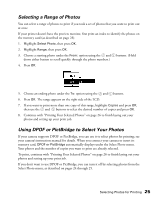
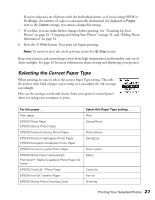
Printing an Index An index print shows small, numbered images of all the photos on your memory card-and includes the date each picture was taken. This enables you to select the photos you want to print. If you have the EPSON Stylus Photo R300M printer with the preview monitor, you may not need to print an index. 1. Load your paper in the printer. See page 14. 2. Highlight Select Photo, then press OK. 3. In the Select Photo menu, use the and buttons to highlight Index, then press OK to select it. 4. Press the and buttons to highlight Paper Type, then press OK to enter the Paper Type menu. 5. Highlight the type of paper you've loaded, then press OK. (If you're not sure about the paper type, see the table on page 27. Note: It's important to select the correct Paper Type setting for the paper you're using, or the print quality may not be what you expect. 6. Enter the Paper Size menu, then select the size of paper you've loaded. 7. Press the Print button. Your index starts printing. Note: If you would prefer to print an index print with larger images, choose All under the Select Photo menu, then choose a different layout setting. See page 26. Selecting Photos for Printing 23
-
 1
1 -
2
-
3
-
4
-
5
-
6
-
7
-
8
-
9
-
10
-
11
-
12
-
13
-
14
-
15
-
16
-
17
-
 18
18 -
 19
19 -
 20
20 -
 21
21 -
 22
22 -
 23
23 -
 24
24 -
 25
25 -
 26
26 -
 27
27 -
 28
28 -
29
-
30
-
31
-
32
-
33
-
34
-
35
-
36
-
37
-
38
-
39
-
40
-
41
-
42
-
43
-
44
-
45
-
46
-
47
-
48
-
49
-
50
-
51
-
52
-
53
-
54
-
55
-
56
-
57
-
58
-
59
-
60
-
61
-
62
-
63
-
64
-
65
-
66
-
67
-
68
-
69
-
70
-
71
-
72
-
73
-
74
-
75
-
76
-
77
-
78
-
79
-
80
-
81
-
82
-
83
-
84
-
85
-
86
-
87
-
88
-
89
-
90
-
91
-
92
-
93
-
94
-
95
-
96
-
97
-
98
-
99
-
100
-
101
-
102
-
103
-
104
-
105
-
106
-
107
-
108
-
109
-
110
-
111
-
112
-
113
-
114
-
115
-
116
-
117
-
118
-
119
-
120
-
121
-
122
-
123
-
124
 |
 |
