Epson Stylus Photo R300M User Manual - Page 70
Inserting a CD or DVD, If you want to check the print position or color
 |
View all Epson Stylus Photo R300M manuals
Add to My Manuals
Save this manual to your list of manuals |
Page 70 highlights
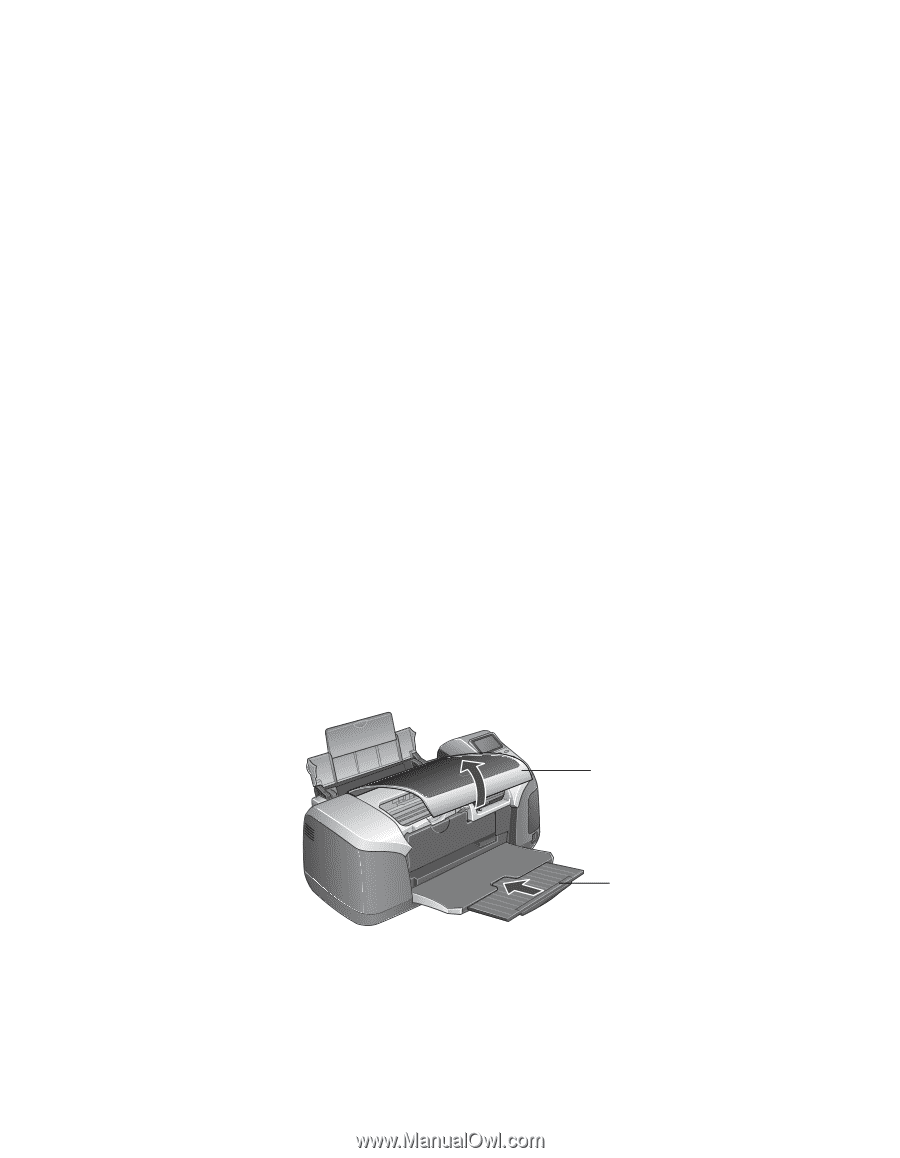
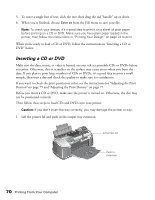
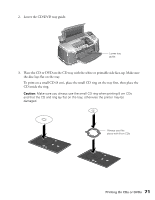
5. To curve a single line of text, click the text, then drag the red "handle" up or down. 6. When you're finished, choose Save as from the File menu to save your file. Note: To check your design, it's a good idea to print it on a sheet of plain paper before printing on a CD or DVD. Make sure you have plain paper loaded in the printer, then follow the instructions in "Printing Your Design" on page 72 to print. When you're ready to load a CD or DVD, follow the instructions in "Inserting a CD or DVD" below. Inserting a CD or DVD Make sure the data, music, or video is burned on your ink-jet printable CDs or DVDs before you print. Otherwise, dirt or scratches on the surface may cause errors when you burn the data. If you plan to print large numbers of CDs or DVDs, it's a good idea to print a small sample, then wait a day and check the quality to make sure it is satisfactory. If you want to check the print position or color, see the instructions for "Adjusting the Print Position" on page 75 and "Adjusting the Print Density" on page 77. Before you insert a CD or DVD, make sure the printer is turned on. Otherwise, the disc may not be positioned correctly. Then follow these steps to load CDs and DVDs into your printer: Caution: If you don't insert the tray correctly, you may damage the printer or tray. 1. Lift the printer lid and push in the output tray extension. Lift printer lid Push in extension 70 Printing From Your Computer
-
 1
1 -
2
-
3
-
4
-
5
-
6
-
7
-
8
-
9
-
10
-
11
-
12
-
13
-
14
-
15
-
16
-
17
-
18
-
19
-
20
-
21
-
22
-
23
-
24
-
25
-
26
-
27
-
28
-
29
-
30
-
31
-
32
-
33
-
34
-
35
-
36
-
37
-
38
-
39
-
40
-
41
-
42
-
43
-
44
-
45
-
46
-
47
-
48
-
49
-
50
-
51
-
52
-
53
-
54
-
55
-
56
-
57
-
58
-
59
-
60
-
61
-
62
-
63
-
64
-
 65
65 -
 66
66 -
 67
67 -
 68
68 -
 69
69 -
 70
70 -
 71
71 -
 72
72 -
 73
73 -
 74
74 -
 75
75 -
76
-
77
-
78
-
79
-
80
-
81
-
82
-
83
-
84
-
85
-
86
-
87
-
88
-
89
-
90
-
91
-
92
-
93
-
94
-
95
-
96
-
97
-
98
-
99
-
100
-
101
-
102
-
103
-
104
-
105
-
106
-
107
-
108
-
109
-
110
-
111
-
112
-
113
-
114
-
115
-
116
-
117
-
118
-
119
-
120
-
121
-
122
-
123
-
124
 |
 |