Epson Stylus Photo R300M User Manual - Page 38
When printing is complete, slide the CD/DVD tray out from the printer and carefully
 |
View all Epson Stylus Photo R300M manuals
Add to My Manuals
Save this manual to your list of manuals |
Page 38 highlights
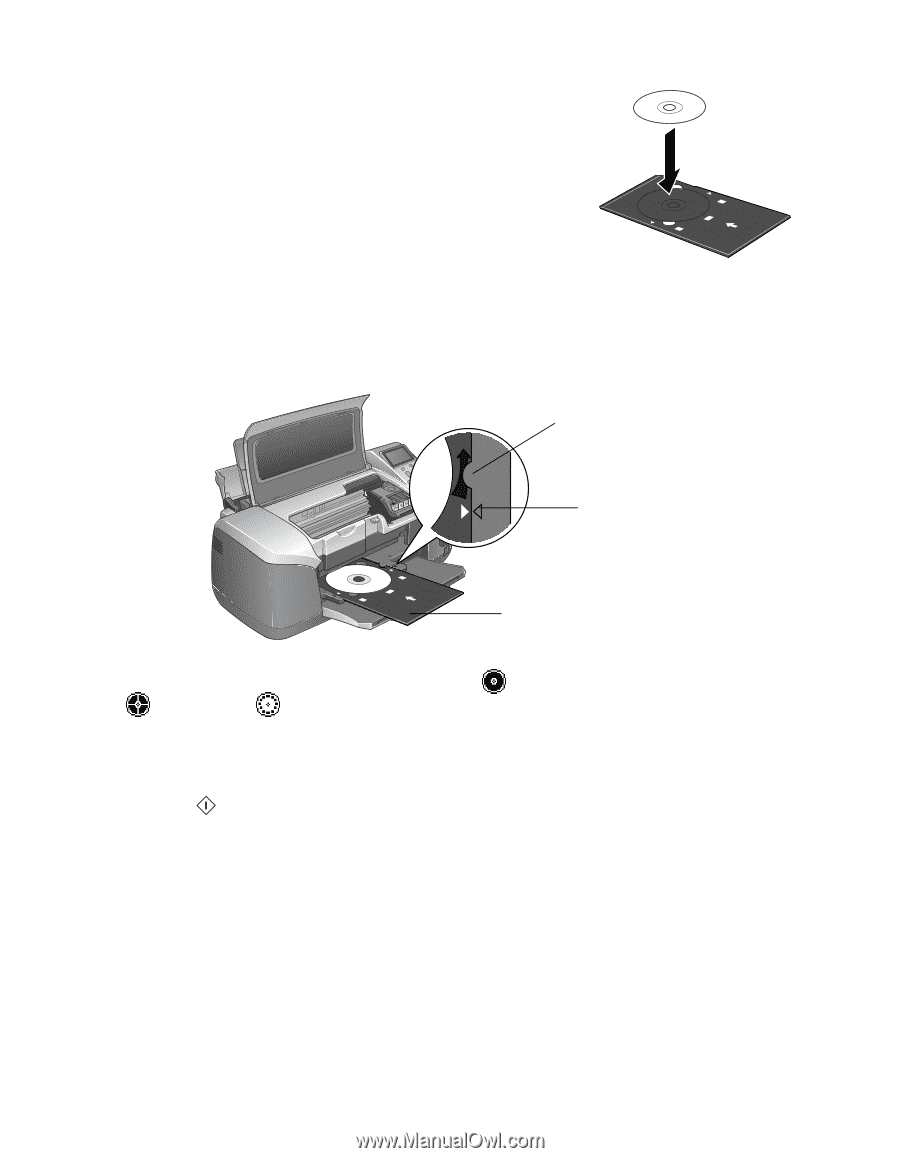
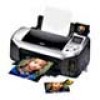
4. Place a standard-size CD or DVD on the CD tray with the white or printable side face-up. Make sure the disc lays flat in the tray. Caution: Printing on small CDs (8 cm) is not supported when printing without a computer and may cause damage to the printer. See page 67 for instructions on printing on small CDs. 5. Insert the tray carefully, making sure it is level, not tilted up or down. Push the tray under the tab and the two rollers. Don't push the tray in too far; line up the arrows exactly. Load tray under tab Line up arrows Keep tray level 6. Highlight Layout and press OK. Choose from 1 photo across the whole disc, 4 photos, or 12 mini-photos. 7. Highlight Select Photo and press OK. 8. Select the photo or photos to print on your disc. 9. Press the Print button when you are ready to print. Your CD or DVD prints. 10. When printing is complete, slide the CD/DVD tray out from the printer and carefully remove the CD or DVD, holding it by the edges. Don't touch the surface of the disc. 11. Set the CD or DVD aside and let it dry for 24 hours. 12. Close the CD/DVD tray guide when you are done printing, and close the printer cover. Note: If your CDs are not aligned correctly, use the CD/DVD Print Position Up/Down or Left/Right options in the CD/DVD Print Settings menu on your control panel and choose how far your CD needs to shift. Use the CD position check paper to test the position. 38 Printing Without a Computer
-
 1
1 -
2
-
3
-
4
-
5
-
6
-
7
-
8
-
9
-
10
-
11
-
12
-
13
-
14
-
15
-
16
-
17
-
18
-
19
-
20
-
21
-
22
-
23
-
24
-
25
-
26
-
27
-
28
-
29
-
30
-
31
-
32
-
 33
33 -
 34
34 -
 35
35 -
 36
36 -
 37
37 -
 38
38 -
 39
39 -
 40
40 -
 41
41 -
 42
42 -
 43
43 -
44
-
45
-
46
-
47
-
48
-
49
-
50
-
51
-
52
-
53
-
54
-
55
-
56
-
57
-
58
-
59
-
60
-
61
-
62
-
63
-
64
-
65
-
66
-
67
-
68
-
69
-
70
-
71
-
72
-
73
-
74
-
75
-
76
-
77
-
78
-
79
-
80
-
81
-
82
-
83
-
84
-
85
-
86
-
87
-
88
-
89
-
90
-
91
-
92
-
93
-
94
-
95
-
96
-
97
-
98
-
99
-
100
-
101
-
102
-
103
-
104
-
105
-
106
-
107
-
108
-
109
-
110
-
111
-
112
-
113
-
114
-
115
-
116
-
117
-
118
-
119
-
120
-
121
-
122
-
123
-
124
 |
 |