Epson SureColor T3270 User Manual - Page 73
Loading Documents, Creating and Editing the Address, Notes on Loading Documents in the, Scanner
 |
View all Epson SureColor T3270 manuals
Add to My Manuals
Save this manual to your list of manuals |
Page 73 highlights
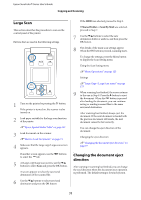
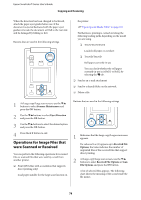
Epson SureColor T-Series User's Guide Copying and Scanning The following procedure describes how to start Copy Center. 1 Start a web browser on a tablet terminal or computer connected to the printer via the network. 2 Enter the IP address specified on the printer in the address bar, and then press the Enter key or the return key. 3 In the displayed screen, click Remote Manager. 4 Select the Step tab screen, and then click Mail in the menu on the left of the screen. See the help for more details on Remote Manager. Creating and Editing the Address Book Use Copy Center to create and edit the address book. 1 Start Copy Center. 2 In the upper part of the screen, click the Settings icon. See the help for more details on Copy Center. Loading Documents Notes on Loading Documents in the Scanner This section describes the document widths and paper types that can be loaded and documents that cannot be loaded. c Important: If a document covered in dust is loaded, the dust may adhere inside the Multifunction Scanner and decline the quality of copied or scanned images. Before loading a document in the scanner, remove any dust from the document. Width of documents that can be loaded 152 to 914 mm (6 to 36 inches) Document paper types that can be loaded O Plain Paper O Recycled paper O Tracing paper O Matte film O Blueprint copy O Matte paper for ink jet printers O Synthetic paper O Newspaper O Advertisement paper O Photopaper * When loading a thin document, we recommend placing it between clear holders or other similar objects. Documents that cannot be loaded Do not load the following documents. Failure to observe this precaution could cause paper jams or damage the scanner. O Documents with creases or wrinkles O Documents with bindings O Documents with curls O Documents with carbon backing O Documents with staples, paper clips, or glue attached O Documents with many holes, such as loose leaf paper O Documents with irregular shapes or not cut at right angles O Documents with photos, stickers, or labels attached O Transparent documents O Glossy documents O Deteriorated documents 73
-
 1
1 -
2
-
3
-
4
-
5
-
6
-
7
-
8
-
9
-
10
-
11
-
12
-
13
-
14
-
15
-
16
-
17
-
18
-
19
-
20
-
21
-
22
-
23
-
24
-
25
-
26
-
27
-
28
-
29
-
30
-
31
-
32
-
33
-
34
-
35
-
36
-
37
-
38
-
39
-
40
-
41
-
42
-
43
-
44
-
45
-
46
-
47
-
48
-
49
-
50
-
51
-
52
-
53
-
54
-
55
-
56
-
57
-
58
-
59
-
60
-
61
-
62
-
63
-
64
-
65
-
66
-
67
-
 68
68 -
 69
69 -
 70
70 -
 71
71 -
 72
72 -
 73
73 -
 74
74 -
 75
75 -
 76
76 -
 77
77 -
 78
78 -
79
-
80
-
81
-
82
-
83
-
84
-
85
-
86
-
87
-
88
-
89
-
90
-
91
-
92
-
93
-
94
-
95
-
96
-
97
-
98
-
99
-
100
-
101
-
102
-
103
-
104
-
105
-
106
-
107
-
108
-
109
-
110
-
111
-
112
-
113
-
114
-
115
-
116
-
117
-
118
-
119
-
120
-
121
-
122
-
123
-
124
-
125
-
126
-
127
-
128
-
129
-
130
-
131
-
132
-
133
-
134
-
135
-
136
-
137
-
138
-
139
-
140
-
141
-
142
-
143
-
144
-
145
-
146
-
147
-
148
-
149
-
150
-
151
-
152
-
153
-
154
-
155
-
156
-
157
-
158
-
159
-
160
-
161
-
162
-
163
-
164
-
165
-
166
-
167
-
168
-
169
-
170
-
171
-
172
-
173
-
174
-
175
-
176
-
177
-
178
-
179
-
180
-
181
-
182
-
183
-
184
-
185
-
186
-
187
-
188
-
189
-
190
-
191
-
192
-
193
-
194
-
195
-
196
-
197
-
198
-
199
-
200
-
201
-
202
-
203
-
204
-
205
-
206
-
207
-
208
-
209
-
210
-
211
-
212
-
213
 |
 |