HP 3030 HP LaserJet 3020 and 3030 All-in-One - User Guide - Page 66
Changing the copy-collation setting, To change the copy-collation setting for the current job
 |
UPC - 829160074764
View all HP 3030 manuals
Add to My Manuals
Save this manual to your list of manuals |
Page 66 highlights
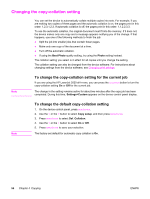
Changing the copy-collation setting You can set the device to automatically collate multiple copies into sets. For example, if you are making two copies of three pages and the automatic collation is on, the pages print in this order: 1,2,3,1,2,3. If automatic collation is off, the pages print in this order: 1,1,2,2,3,3. To use the automatic collation, the original document must fit into the memory. If it does not, the device makes only one copy and a message appears notifying you of the change. If that happens, use one of the following methods to finish the job: ● Split the job into smaller jobs that contain fewer pages. ● Make only one copy of the document at a time. ● Turn off the automatic collation. ● If using the Best Photo quality setting, try using the Photo setting instead. The collation setting you select is in effect for all copies until you change the setting. The collation setting can also be changed from the device software. For instructions about changing settings from the device software, see Changing print settings. Note To change the copy-collation setting for the current job If you are using the HP LaserJet 3020 all-in-one, you can press the COLLATION button to turn the copy-collation setting On or Off for the current job. The change in the setting remains active for about two minutes after the copy job has been completed. During this time, Settings=Custom appears on the device control panel display. Note To change the default copy-collation setting 1. On the device control panel, press MENU/ENTER. 2. Use the < or the > button to select Copy setup, and then press MENU/ENTER. 3. Press MENU/ENTER to select Def. Collation. 4. Use the < or the > button to select On or Off. 5. Press MENU/ENTER to save your selection. The factory-set default for automatic copy collation is On. 56 Chapter 4 Copying ENWW
-
 1
1 -
2
-
3
-
4
-
5
-
6
-
7
-
8
-
9
-
10
-
11
-
12
-
13
-
14
-
15
-
16
-
17
-
18
-
19
-
20
-
21
-
22
-
23
-
24
-
25
-
26
-
27
-
28
-
29
-
30
-
31
-
32
-
33
-
34
-
35
-
36
-
37
-
38
-
39
-
40
-
41
-
42
-
43
-
44
-
45
-
46
-
47
-
48
-
49
-
50
-
51
-
52
-
53
-
54
-
55
-
56
-
57
-
58
-
59
-
60
-
 61
61 -
 62
62 -
 63
63 -
 64
64 -
 65
65 -
 66
66 -
 67
67 -
 68
68 -
 69
69 -
 70
70 -
 71
71 -
72
-
73
-
74
-
75
-
76
-
77
-
78
-
79
-
80
-
81
-
82
-
83
-
84
-
85
-
86
-
87
-
88
-
89
-
90
-
91
-
92
-
93
-
94
-
95
-
96
-
97
-
98
-
99
-
100
-
101
-
102
-
103
-
104
-
105
-
106
-
107
-
108
-
109
-
110
-
111
-
112
-
113
-
114
-
115
-
116
-
117
-
118
-
119
-
120
-
121
-
122
-
123
-
124
-
125
-
126
-
127
-
128
-
129
-
130
-
131
-
132
-
133
-
134
-
135
-
136
-
137
-
138
-
139
-
140
-
141
-
142
-
143
-
144
-
145
-
146
-
147
-
148
-
149
-
150
-
151
-
152
-
153
-
154
-
155
-
156
-
157
-
158
-
159
-
160
-
161
-
162
-
163
-
164
-
165
-
166
-
167
-
168
-
169
-
170
-
171
-
172
-
173
-
174
-
175
-
176
-
177
-
178
-
179
-
180
-
181
-
182
 |
 |