HP Brocade 8/12c Fabric Watch Administrator's Guide v6.4.0 (53-1001770-01, Jun - Page 96
Port fencing configuration using DCFM, Enabling port fencing
 |
View all HP Brocade 8/12c manuals
Add to My Manuals
Save this manual to your list of manuals |
Page 96 highlights
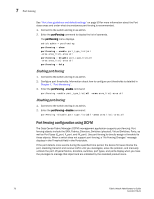
7 Port fencing See "Port class guidelines and default settings" on page 59 for more information about the Port class areas and under what circumstances port fencing is recommended. 1. Connect to the switch and log in as admin. 2. Enter the portFencing command to display the list of operands. The portFencing menu displays. switch:admin > portfencing portfencing --show portfencing --enable port_type_list|all -area area_list|-area all portfencing --disable port_type_list|all -area area_list|-area all portfencing --help Enabling port fencing 1. Connect to the switch and log in as admin. 2. Configure port thresholds. Information about how to configure port thresholds is detailed in Chapter 7, "Port Monitoring". 3. Enter the portFencing --enable command: portFencing --enable port_type_list|all -area area_list|-area all Disabling port fencing 1. Connect to the switch and log in as admin. 2. Enter the portFencing --disable command: portFencing --disable port_type_list|all -area area_list|-area all Port fencing configuration using DCFM The Data Center Fabric Manager (DCFM) management application supports port fencing. Port fencing objects include the SAN, Fabrics, Directors, Switches (physical), Virtual Switches, Ports, as well as Port Types (E_port, F_port, and FX_port). Use port fencing to directly assign a threshold to these objects. When a switch does not support port fencing, a "No Fencing Changes" message displays in the Threshold field in the Ports table. If the port detects more events during the specified time period, the device firmware blocks the port, disabling transmit and receive traffic until you investigate, solve the problem, and manually unblock the port. Physical fabrics, directors, switches, port types, and ports display when you have the privileges to manage that object and are indicated by the standard product icons. 76 Fabric Watch Administrator's Guide 53-1001770-01
-
 1
1 -
2
-
3
-
4
-
5
-
6
-
7
-
8
-
9
-
10
-
11
-
12
-
13
-
14
-
15
-
16
-
17
-
18
-
19
-
20
-
21
-
22
-
23
-
24
-
25
-
26
-
27
-
28
-
29
-
30
-
31
-
32
-
33
-
34
-
35
-
36
-
37
-
38
-
39
-
40
-
41
-
42
-
43
-
44
-
45
-
46
-
47
-
48
-
49
-
50
-
51
-
52
-
53
-
54
-
55
-
56
-
57
-
58
-
59
-
60
-
61
-
62
-
63
-
64
-
65
-
66
-
67
-
68
-
69
-
70
-
71
-
72
-
73
-
74
-
75
-
76
-
77
-
78
-
79
-
80
-
81
-
82
-
83
-
84
-
85
-
86
-
87
-
88
-
89
-
90
-
 91
91 -
 92
92 -
 93
93 -
 94
94 -
 95
95 -
 96
96 -
 97
97 -
 98
98 -
 99
99 -
 100
100 -
 101
101 -
102
-
103
-
104
-
105
-
106
-
107
-
108
-
109
-
110
-
111
-
112
-
113
-
114
-
115
-
116
-
117
-
118
-
119
-
120
-
121
-
122
-
123
-
124
-
125
-
126
-
127
-
128
-
129
-
130
-
131
-
132
-
133
-
134
-
135
-
136
-
137
-
138
-
139
-
140
-
141
-
142
-
143
-
144
 |
 |