HP Carrier-grade cc3300 User Information and Service Guide - HP Carrier-Grade - Page 58
LAN Alert Filters
 |
View all HP Carrier-grade cc3300 manuals
Add to My Manuals
Save this manual to your list of manuals |
Page 58 highlights
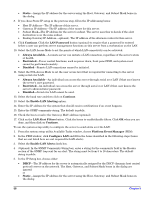
• Static-Assign the IP address for the server using the Host, Gateway, and Subnet Mask boxes in the dialog. 8. If you chose Static IP setup in the previous step, fill in the IP addressing boxes: • Host IP Address-The IP address of this server. • Gateway IP Address-The IP address of the router for this server. • Subnet Mask-The IP address for the server's subnet. The server uses this to decide if the alert destination is on the same subnet. • Backup Gateway IP Address-optional). The IP address of the alternate router for this server. 9. Click Continue. Click the LAN Password button (optional) to require that a password be entered before a user can perform server management functions on this server from a workstation on the LAN. 10. Select the LAN Access Mode to set the points at which LAN connectivity can be activated: • Always Available-A remote server can initiate a LAN connection, regardless of the server's state or health. • Restricted-Power control functions, such as power down, front panel NMI, and system reset cannot be performed remotely. • Disabled-Remote LAN connections cannot be initiated. 11. Select the SOL Access Mode to set the user access level that is required for connecting to the server using serial over LAN. • Always Available-An individual can access the server through serial over LAN if that user knows the server's user password. • Restricted-An individual can access the server through serial over LAN if that user knows the server's administrator password. • Disabled-Serial over LAN cannot be used. 12. Select the baud rate and then click on Continue. 13. Select the Enable LAN Alerting option. 14. Enter the IP address for the system that should receive notifications if an event happens. 15. Enter the SNMP community string. The default is public. 16. Check the box to resolve the Gateway MAC address (optional). 17. Click on the LAN Alert Filters button. Click the boxes to enable/disable filters. Click OK when you are done, and then click on Continue. To use the system setup utility to configure the server to send alerts over the LAN: 1. From the system setup utility Available Tasks window, choose Platform Event Manager (PEM). 2. In the PEM window, click Configure LAN and fill in the boxes described in the following steps (boxes that are not listed here are not required for LAN alerts). 3. Select the Enable LAN Alerts check box. 4. (Optional) In the SNMP Community String box, enter a string for the community field in the Header section of the SNMP trap sent for an alert. The string must be from 5 to 16 characters. The default string is public. 5. In the IP Setup box, choose either: • DHCP-The IP address for the server is automatically assigned by the DHCP (dynamic host control protocol) server on the network. The Host, Gateway, and Subnet Mask boxes in the dialog are ignored. or • Static-Assign the IP address for the server using the Host, Gateway, and Subnet Mask boxes in the dialog. 58 Chapter 5
-
 1
1 -
2
-
3
-
4
-
5
-
6
-
7
-
8
-
9
-
10
-
11
-
12
-
13
-
14
-
15
-
16
-
17
-
18
-
19
-
20
-
21
-
22
-
23
-
24
-
25
-
26
-
27
-
28
-
29
-
30
-
31
-
32
-
33
-
34
-
35
-
36
-
37
-
38
-
39
-
40
-
41
-
42
-
43
-
44
-
45
-
46
-
47
-
48
-
49
-
50
-
51
-
52
-
 53
53 -
 54
54 -
 55
55 -
 56
56 -
 57
57 -
 58
58 -
 59
59 -
 60
60 -
 61
61 -
 62
62 -
 63
63 -
64
-
65
-
66
-
67
-
68
-
69
-
70
-
71
-
72
-
73
-
74
-
75
-
76
-
77
-
78
-
79
-
80
-
81
-
82
-
83
-
84
-
85
-
86
-
87
-
88
-
89
-
90
-
91
-
92
-
93
-
94
-
95
-
96
-
97
-
98
-
99
-
100
-
101
-
102
-
103
-
104
-
105
-
106
-
107
-
108
-
109
-
110
-
111
-
112
-
113
-
114
-
115
-
116
-
117
-
118
-
119
-
120
-
121
-
122
-
123
-
124
-
125
 |
 |
