HP Color LaserJet Pro MFP M177 User Guide
HP Color LaserJet Pro MFP M177 Manual
 |
View all HP Color LaserJet Pro MFP M177 manuals
Add to My Manuals
Save this manual to your list of manuals |
HP Color LaserJet Pro MFP M177 manual content summary:
- HP Color LaserJet Pro MFP M177 | User Guide - Page 1
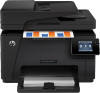
COLOR LASERJET PRO MFP User Guide OK X M176 M177 - HP Color LaserJet Pro MFP M177 | User Guide - Page 2
- HP Color LaserJet Pro MFP M177 | User Guide - Page 3
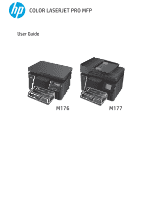
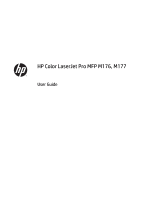
HP Color LaserJet Pro MFP M176, M177 User Guide - HP Color LaserJet Pro MFP M177 | User Guide - Page 4
HP products and services are set forth in the express warranty statements accompanying such products and services. Nothing herein should be construed as constituting an additional warranty. HP a trademark owned by its proprietor and used by HP Company under license. Microsoft®, Windows®, Windows® XP - HP Color LaserJet Pro MFP M177 | User Guide - Page 5
M176n model 6 Touchscreen control-panel layout (M177fw model 7 Control-panel Home screen ...8 2 Paper trays ...11 Supported paper sizes and types ...12 Supported paper sizes ...12 Supported OS X) ...27 How to print (Mac OS X) ...27 Manually print on both sides (Mac OS X 27 Print multiple pages - HP Color LaserJet Pro MFP M177 | User Guide - Page 6
the HP Fax software (Windows, optional 45 Send a fax ...46 Send a fax by dialing manually from the product control panel 46 Send a fax from the HP HP Web Services applications (touchscreen models only 51 HP Device Toolbox (Windows) ...52 HP Utility for Mac OS X ...54 Open the HP Utility ...54 HP - HP Color LaserJet Pro MFP M177 | User Guide - Page 7
the colors 84 Print a cleaning page ...84 Perform additional print quality troubleshooting 85 Print the print quality page 85 Interpret the print quality page 85 Inspect the toner cartridge for damage 86 Check the paper and printing environment 86 Use paper that meets HP specifications 86 - HP Color LaserJet Pro MFP M177 | User Guide - Page 8
with the product 96 The product is using incorrect link and duplex settings for the network 97 New software programs might be causing compatibility problems 97 The computer or workstation might be set up incorrectly 97 The product is disabled, or other network settings are incorrect 97 Solve - HP Color LaserJet Pro MFP M177 | User Guide - Page 9
Accessories ...106 Index ...107 ENWW vii - HP Color LaserJet Pro MFP M177 | User Guide - Page 10
viii ENWW - HP Color LaserJet Pro MFP M177 | User Guide - Page 11
comparison ● Product views ● Control panel overview Go to www.hp.com/support/ljMFPM176series or www.hp.com/support/ljMFPM177series for HP's all-inclusive help for your product: ● Solve problems. ● Download software updates. ● Join support forums. ● Find warranty and regulatory information. You can - HP Color LaserJet Pro MFP M177 | User Guide - Page 12
Product comparison Paper handling Supported operating systems Supported print drivers Connectivity Memory Control-panel display Print Copy Scan Tray 1 (150-sheet capacity) Standard output bin (50-sheet capacity) Manual duplex printing Windows 8, 32-bit Windows XP, 32-bit Windows Vista, 32-bit and - HP Color LaserJet Pro MFP M177 | User Guide - Page 13
M176n M177fw CF547A CZ165A Document feeder speed is 7.4 ppm Fax V.34 with two RJ-11 fax ports Approximately 500 pages of fax storage, with four days of powerfail recovery ENWW Product comparison 3 - HP Color LaserJet Pro MFP M177 | User Guide - Page 14
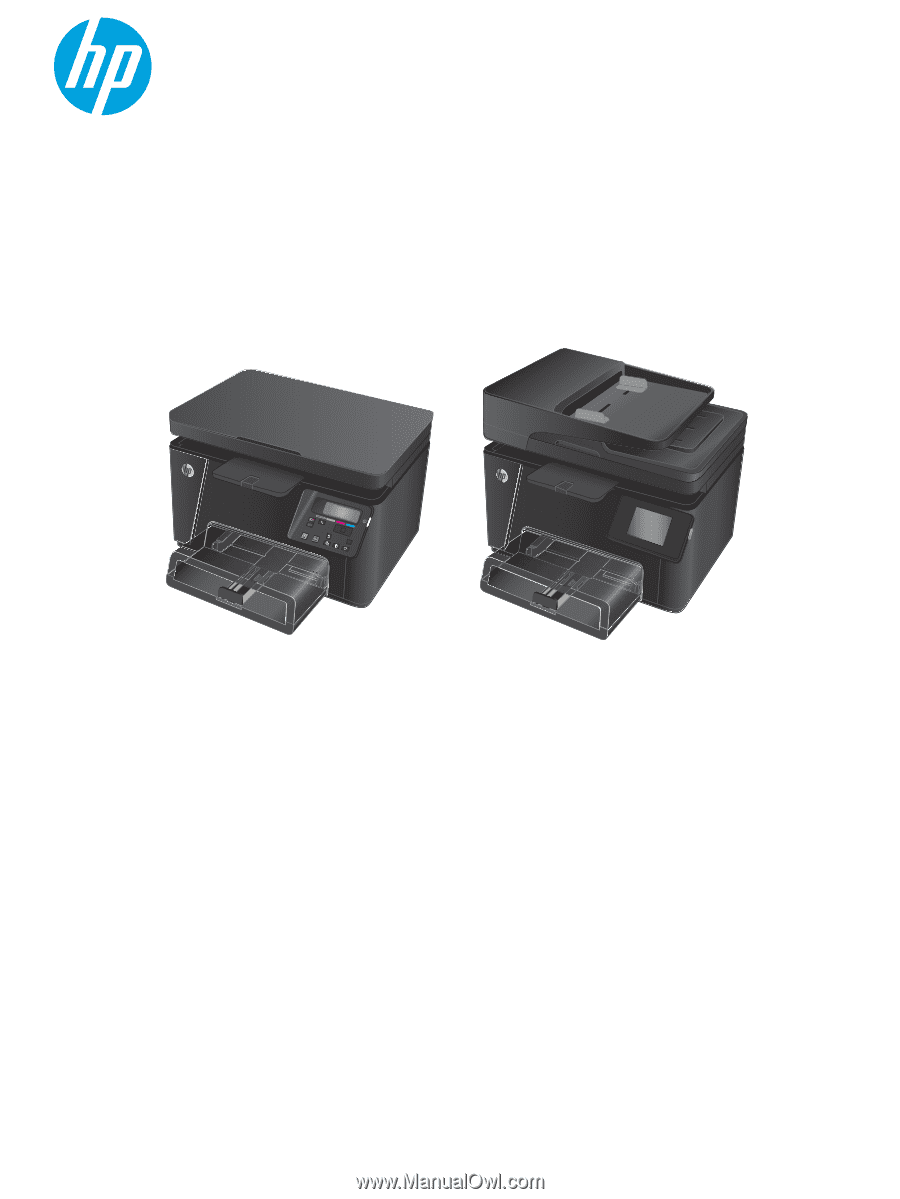
Product views Product front view 2 7 1 OK X 3 4 5 6 1 Output bin 2 Scanner 3 Power on/off button 4 Control panel 5 Dust cover 6 Input tray 7 Document feeder 4 Chapter 1 Product introduction ENWW - HP Color LaserJet Pro MFP M177 | User Guide - Page 15
Product back view 1 5 2 4 3 6 7 1 Hi-Speed USB 2.0 2 Ethernet port 3 Power connection 4 Rear door (provides access for clearing jams) 5 Slot for cable-type security lock 6 Fax "line in" port for attaching the fax phone line to the product 7 Telephone "line out" port for - HP Color LaserJet Pro MFP M177 | User Guide - Page 16
Sets the number of copies for the current copy job 9 Back button Returns to the previous screen 10 Color copy button Starts a color copy job 11 Black and white copy button 12 ePrint button Starts a black and white copy job Opens the Web Services menu 13 Rotate toner cartridges button - HP Color LaserJet Pro MFP M177 | User Guide - Page 17
Touchscreen control-panel layout (M177fw model) 1 2 3 9 8 7 4 6 5 1 Touchscreen display Provides access to the product features and indicates the current status of the product 2 Help button and light Provides access to the control-panel help system 3 Power On/Off button Turns the - HP Color LaserJet Pro MFP M177 | User Guide - Page 18
Home screen can vary. The layout might also be reversed for some languages. 1 2 3 45 6 10 7 9 8 1 Web Services button Provides quick access to HP Web Services features, including HP ePrint HP ePrint is a tool that prints documents by using any email enabled device to send them to the - HP Color LaserJet Pro MFP M177 | User Guide - Page 19
status 9 Fax button 10 Copy button Provides access to the Apps menu to print directly from Web applications that you have downloaded from the HP Connected Web site at www.hpconnected.com Indicates whether the product is ready or is processing a job Provides access to the fax features Provides - HP Color LaserJet Pro MFP M177 | User Guide - Page 20
10 Chapter 1 Product introduction ENWW - HP Color LaserJet Pro MFP M177 | User Guide - Page 21
paper sizes and types ● Load the input tray Go to www.hp.com/support/ljMFPM176series or www.hp.com/support/ljMFPM177series for HP's all-inclusive help for your product: ● Solve problems. ● Download software updates. ● Join support forums. ● Find warranty and regulatory information. You can also go - HP Color LaserJet Pro MFP M177 | User Guide - Page 22
paper sizes and types ● Supported paper sizes ● Supported paper types Supported paper sizes NOTE: To obtain the best results, select the correct paper size and type in the print driver before printing. Size Letter Legal Executive Oficio 8.5 x 13 4x6 5x8 A4 A5 A6 B5 (JIS) 10x15cm 16K 16K 16K - HP Color LaserJet Pro MFP M177 | User Guide - Page 23
supports the following paper types: NOTE: To obtain the best results, select the correct paper size and type in the print driver before printing. ● Plain ● Labels ● Letterhead ● Envelope ● Preprinted ● Prepunched ● Colored ● Bond ● Recycled ● Rough ● HP EcoSMART Lite ● HP LaserJet 90g ● HP Color - HP Color LaserJet Pro MFP M177 | User Guide - Page 24
● Mid-Weight Glossy 96-110g ● Heavy Glossy 111-130g ● Extra Heavy Glossy 131-175g ● Card Glossy 176-220g ● Color Laser Transparency ● Heavy Envelope ● Heavy Rough ● HP Tough Paper 14 Chapter 2 Paper trays ENWW - HP Color LaserJet Pro MFP M177 | User Guide - Page 25
Load the input tray NOTE: The input tray has a maximum capacity of 150 sheets. 1. Remove the dust cover from the tray. 2. Load the paper into the tray. Make sure that the paper fits under the tabs and below the maximum-height indicators. NOTE: For information about the paper orientation for - HP Color LaserJet Pro MFP M177 | User Guide - Page 26
3. Adjust the paper guides so that they lightly touch the paper stack but do not bend the paper. 4. Reinstall the dust cover on the tray. Table 2-1 Input tray paper - HP Color LaserJet Pro MFP M177 | User Guide - Page 27
Table 2-1 Input tray paper orientation (continued) Paper type Duplex mode Paper size 2-sided printing Any compatible paper size Image orientation Portrait How to load paper Face-down Top edge leading into the product Prepunched 1- or 2-sided printing Any compatible paper size Portrait - HP Color LaserJet Pro MFP M177 | User Guide - Page 28
18 Chapter 2 Paper trays ENWW - HP Color LaserJet Pro MFP M177 | User Guide - Page 29
Direct Printing (touchscreen models only) Go to www.hp.com/support/ljMFPM176series or www.hp.com/support/ljMFPM177series for HP's all-inclusive help for your product: ● Solve problems. ● Download software updates. ● Join support forums. ● Find warranty and regulatory information. You can also - HP Color LaserJet Pro MFP M177 | User Guide - Page 30
the Properties or Preferences button to open the print driver. NOTE: The name of the button varies for different software programs. 3. Click or to the Print dialog box. Select the number of copies to print from this screen. 5. Click or tap the OK button to print the job. Manually print on both sides (Windows) 1. - HP Color LaserJet Pro MFP M177 | User Guide - Page 31
3. Click or tap the Layout tab. 4. Select the appropriate duplex option from the Print on Both Sides Manually drop-down list, and then click or tap the OK button. 5. In the Print dialog box, click the OK button to print the job. The - HP Color LaserJet Pro MFP M177 | User Guide - Page 32
the Print option. 2. Select the product from the list of printers, and then click or tap the Properties or Preferences button to open the print driver. NOTE: The name of the button varies for different software programs. 22 Chapter 3 Print ENWW - HP Color LaserJet Pro MFP M177 | User Guide - Page 33
3. Click or tap the Layout tab. 4. Select the correct Orientation option from the drop-down list. 5. Select the correct number of pages per sheet from the Pages per sheet drop-down list, and then click or tap the Advanced button. ENWW Print tasks (Windows) 23 - HP Color LaserJet Pro MFP M177 | User Guide - Page 34
6. Select the correct Pages per Sheet Layout option from the drop-down list. 7. Select the correct Page Borders option from the drop-down list, click or tap the OK button to close the Advanced Options dialog box, and then click or tap the OK button to close the Properties or Preferences dialog box. - HP Color LaserJet Pro MFP M177 | User Guide - Page 35
the Print option. 2. Select the product from the list of printers, and then click or tap the Properties or Preferences button to open the print driver. NOTE: The name of the button varies for different software programs. 3. Click or tap the Paper/Quality tab. ENWW Print tasks (Windows) 25 - HP Color LaserJet Pro MFP M177 | User Guide - Page 36
dialog box, click the OK button to print the job. Additional printing information Go to www.hp.com/support to visit the support Web site for this product and for details about performing specific print tasks, such as the following: ● Select the paper size ● Select the page orientation ● Create - HP Color LaserJet Pro MFP M177 | User Guide - Page 37
click Show Details, and then select other menus to adjust the print settings. 4. Click the Print button. Manually print on both sides (Mac OS X) NOTE: This feature is available if you install the HP print driver. It might not be available if you are using AirPrint. 1. Click the File menu, and then - HP Color LaserJet Pro MFP M177 | User Guide - Page 38
Layout menu. 4. From the Pages per Sheet drop-down list, select the number of pages that you want to print on each sheet. 5. In the Layout printing information Go to www.hp.com/support to visit the support Web site for this product and for details about performing specific print tasks, such as the - HP Color LaserJet Pro MFP M177 | User Guide - Page 39
shortcuts or presets ● Select the paper size, or use a custom paper size ● Select the page orientation ● Create a booklet ● Scale a document to fit a specific paper size ● Print the first or last pages of the document on different paper ● Print watermarks on a document ENWW Print tasks (Mac OS - HP Color LaserJet Pro MFP M177 | User Guide - Page 40
Web Services, and then prints an information page. The information page contains the printer code that you use to register your HP product at HP Connected. 3. Go to www.hpconnected.com to create an HP ePrint account and complete the setup process. For more information, go to www.hp.com/support to - HP Color LaserJet Pro MFP M177 | User Guide - Page 41
LAN or WAN) to supported PostScript® products. Go to www.hp.com/go/eprintsoftware for drivers and information. NOTE: The HP ePrint software is a PDF workflow utility for Mac, and is not technically a print driver. HP ePrint software for Mac supports print paths only through HP Connected and does not - HP Color LaserJet Pro MFP M177 | User Guide - Page 42
& Biz application ● Any wireless capable computer with any operating system. For more information on HP Wireless Direct, go to www.hp.com/go/wirelessprinting, and then click HP Wireless Direct. To set up HP Wireless Direct from the control panel, complete the following steps: 1. From the Home screen - HP Color LaserJet Pro MFP M177 | User Guide - Page 43
on both sides (duplex) ● Optimize copy quality Go to www.hp.com/support/ljMFPM176series or www.hp.com/support/ljMFPM177series for HP's all-inclusive help for your product: ● Solve problems. ● Download software updates. ● Join support forums. ● Find warranty and regulatory information. You can also - HP Color LaserJet Pro MFP M177 | User Guide - Page 44
the indicators on the product. 2. Close the scanner. 3. At the product control panel, press the Number of Copies button. 4. Select the number of copies. 5. Press either the Black Start Copy button or the Color Start Copy button to start copying. Touchscreen control panel 1. Load the document on the - HP Color LaserJet Pro MFP M177 | User Guide - Page 45
. button or ● Touchscreen control panel: From the Home screen on the product control panel, touch the Copy button, select the number of copies, and then touch the Black or Color button. 4. Retrieve the printed page from the output bin, and place it with the printed-side facing down, top edge first - HP Color LaserJet Pro MFP M177 | User Guide - Page 46
buttons to scroll through the options, and then press the OK button to select it. 6. Press either the Black Start Copy button or the Color Start Copy button to start copying. Touchscreen control panel 1. Load the document on the scanner glass according to the indicators on the product. 2. Close - HP Color LaserJet Pro MFP M177 | User Guide - Page 47
to www.hp.com/support/ljMFPM176series or www.hp.com/support/ljMFPM177series for HP's all-inclusive help for your product: ● Solve problems. ● Download software updates. ● Join support forums. ● Find warranty and regulatory information. You can also go to www.hp.com/support for Worldwide support and - HP Color LaserJet Pro MFP M177 | User Guide - Page 48
the left side of the scanner glass. 2. Click Start, and then click Programs (or All Programs in Windows XP). 3. Click HP, and then select your product. 4. Click HP Scan, select a scanning shortcut, and then adjust the settings if necessary. 5. Click Scan. NOTE: Click Advanced Settings to gain access - HP Color LaserJet Pro MFP M177 | User Guide - Page 49
) with the long edge of the paper along the left side of the scanner glass. 2. Open the HP Scan software, which is located in the HP folder inside the Applications folder. 3. Follow the on-screen instructions to scan the document. 4. When you have scanned all the pages, click the Done button to save - HP Color LaserJet Pro MFP M177 | User Guide - Page 50
40 Chapter 5 Scan ENWW - HP Color LaserJet Pro MFP M177 | User Guide - Page 51
● Create, edit, and delete speed-dial entries Go to www.hp.com/support/ljMFPM176series or www.hp.com/support/ljMFPM177series for HP's all-inclusive help for your product: ● Solve problems. ● Download software updates. ● Join support forums. ● Find warranty and regulatory information. You can also go - HP Color LaserJet Pro MFP M177 | User Guide - Page 52
and configure the product for fax ● Connect the product ● Configure the product ● Install the HP Fax software (Windows, optional) Connect the product The product is an analog device. HP recommends using the product on a dedicated analog telephone line. NOTE: Some countries/regions might require - HP Color LaserJet Pro MFP M177 | User Guide - Page 53
any time by using the product control panel or the HP Fax Setup Wizard. ● Control panel ● HP Fax Setup Wizard (Windows) Control panel 1. From the 9. Use the keypad to enter your fax number, and then select OK. NOTE: The maximum number of characters for the fax number is 20. 10. Use the keypad to - HP Color LaserJet Pro MFP M177 | User Guide - Page 54
click Programs. 2. Click HP, click the name of the product, and then click Fax Setup Wizard. 3. Follow the on-screen instructions to configure the fax settings for each question. NOTE: The maximum number of characters for the fax number is 20. The maximum number of characters for the fax header is - HP Color LaserJet Pro MFP M177 | User Guide - Page 55
service Time. 10. Select the number of seconds after which the product instructions. ● Download from the Web: Go to www.hp.com/support, click Drivers & Software, and then follow the onscreen instructions to download the latest HP software. NOTE: When prompted by the software installer, make sure that HP - HP Color LaserJet Pro MFP M177 | User Guide - Page 56
pages face-up, and then adjust the paper guides until they are snug against the paper. NOTE: fax number. NOTE: To use access codes, credit cards, or calling cards, you must dial the fax number manually to and load additional pages. Send a fax from the HP software (Windows) 1. Load the document. ● If - HP Color LaserJet Pro MFP M177 | User Guide - Page 57
screen on the product control panel, touch the Fax button. 2. Touch Fax Menu, and then touch Phone Book Setup. 3. Touch Individual Setup. 4. Select an unassigned number from the list. 5. Use the keypad to enter a name for the entry, and then touch the OK button. 6. Use the keypad to enter the fax - HP Color LaserJet Pro MFP M177 | User Guide - Page 58
48 Chapter 6 Fax ENWW - HP Color LaserJet Pro MFP M177 | User Guide - Page 59
is low or cartridge is very low message displays on the product control panel ● Replace the toner cartridge ● Replace the imaging drum Go to www.hp.com/support/ljMFPM176series or www.hp.com/support/ljMFPM177series for HP's all-inclusive help for your product: ● Solve problems. ● Download - HP Color LaserJet Pro MFP M177 | User Guide - Page 60
connection type (Windows) If you are already using the product and you wish to change the way it is connected, use the Reconfigure your HP Device shortcut on your computer desktop to change the connection. For example, you can reconfigure the product to use a different wireless address, to connect - HP Color LaserJet Pro MFP M177 | User Guide - Page 61
must be enabled on the product. 1. From the Home screen on the product control panel, touch the Web Services button. 2. Touch the Enable Web Services button. After you download an application from the HP Connected Web site, it is available in the Apps menu on the product control panel. This process - HP Color LaserJet Pro MFP M177 | User Guide - Page 62
from your computer. This tool opens the HP Embedded Web Server for the product. NOTE: Setup: Change the system defaults for the product. ● Service: Perform the cleaning procedure on the product. ● Change the default product print settings, such as number of copies and paper orientation. These are - HP Color LaserJet Pro MFP M177 | User Guide - Page 63
Fax tab Networking tab Provides the ability to change network settings from your computer. HP Web Services tab Description ● Phone Book: Add or delete entries in the fax phone book. ● Junk Fax List: Set fax numbers to block from sending faxes to the product. ● Fax Activity Log: Review recent fax - HP Color LaserJet Pro MFP M177 | User Guide - Page 64
Support Item Supplies Status Device Information Description Show the product supplies status and provides links for ordering supplies online. Show information about the currently selected product, including the product Service ID (if assigned), the firmware version (FW Version), the Serial Number - HP Color LaserJet Pro MFP M177 | User Guide - Page 65
types of files: ● HP LaserJet printer command language (.PRN) ● Portable document format (.PDF) ● Text (.TXT) Access the HP Connected Web site. Display for each of the trays. Open the HP Embedded Web Server (EWS) for the product. NOTE: USB connections are not supported. Set up the fields in the fax - HP Color LaserJet Pro MFP M177 | User Guide - Page 66
Product security features The product supports security standards and recommended protocols that help you keep the product secure, protect critical information on your network, and simplify the way you monitor and maintain the product. For in-depth information about HP's secure imaging and printing - HP Color LaserJet Pro MFP M177 | User Guide - Page 67
Lock the product 1. You can attach a security cable to the slot on the back of the product. ENWW Product security features 57 - HP Color LaserJet Pro MFP M177 | User Guide - Page 68
cartridge. If print quality begins to degrade and is no longer acceptable, consider replacing the toner cartridge. NOTE: If this option is not available in your print driver, you can set it using the HP Embedded Web Server. 1. From the software program, select the Print option. 2. Select the product - HP Color LaserJet Pro MFP M177 | User Guide - Page 69
Touchscreen control panel 1. From the Home screen on the product control panel, touch the Setup button. 2. Open the following menus: ● System Setup ● Energy Settings ● Sleep/Auto Off After 3. Select the time for the Sleep/Auto Off delay. NOTE: The default value is 15 Minutes. 4. The product - HP Color LaserJet Pro MFP M177 | User Guide - Page 70
unacceptable. Once an HP toner cartridge has reached "very low", HP's Premium Protection Warranty on that toner cartridge has ended. You Open the following menus: ● System Setup ● Supply Settings ● Black Cartridge or Color Cartridge ● Very Low Setting 3. Select one of the following options, and then - HP Color LaserJet Pro MFP M177 | User Guide - Page 71
cartridge is used in Continue at very low mode will not be considered to be defects in materials or workmanship in the toner cartridge under the HP Print Cartridge Warranty Statement. ENWW A cartridge is low or cartridge is very low message displays on the product control panel 61 - HP Color LaserJet Pro MFP M177 | User Guide - Page 72
the end of useful life, you are prompted to order a replacement. You can continue printing with the current cartridge until redistributing the toner no longer yields acceptable print quality. 1. Rotate the cartridges to access the cartridge that needs replacement. ● LCD Control panel: Press the - HP Color LaserJet Pro MFP M177 | User Guide - Page 73
cartridge in the bag for recycling. 6. Grasp both sides of the toner cartridge and distribute the toner by gently rocking the cartridge. 7. Grasp the toner cartridge by the center handle, and then pull the protective plastic shield straight off the cartridge. CAUTION: Do not touch the shutter or - HP Color LaserJet Pro MFP M177 | User Guide - Page 74
cartridge with the tracks inside the product, and then insert the toner cartridge until it is firmly seated. NOTE: Compare the color label on the toner cartridge to the color label in the carousel slot to make sure the toner cartridge color matches the carousel position. 10. Close the top cover. 11 - HP Color LaserJet Pro MFP M177 | User Guide - Page 75
Supply icon for the cartridge that needs replacement. The cartridges rotate to the cartridge you select. Repeat this process until you have finished replacing toner cartridges. NOTE: The top cover must be closed to rotate the cartridges. 12. When the cartridges have been replaced, close the scanner - HP Color LaserJet Pro MFP M177 | User Guide - Page 76
Replace the imaging drum 1. Lift the scanner assembly. 2. Open the top cover. 3. Remove the dust cover from the tray. 66 Chapter 7 Manage the product ENWW - HP Color LaserJet Pro MFP M177 | User Guide - Page 77
4. Open the front cover. 5. Lift the two levers that hold the imaging drum. 6. Remove the old imaging drum. ENWW Replace the imaging drum 67 - HP Color LaserJet Pro MFP M177 | User Guide - Page 78
imaging drum to light. Cover it with a piece of paper. Do not touch the green roller. Fingerprints on the imaging drum can cause print-quality problems. 9. Insert the new imaging drum in the product. 10. Lower the two levers that hold the imaging drum. 68 Chapter 7 Manage the product ENWW - HP Color LaserJet Pro MFP M177 | User Guide - Page 79
11. Close the front cover. 12. Reinstall the dust cover on the tray. ENWW Replace the imaging drum 69 - HP Color LaserJet Pro MFP M177 | User Guide - Page 80
13. Close the top cover. 14. Close the scanner assembly. 70 Chapter 7 Manage the product ENWW - HP Color LaserJet Pro MFP M177 | User Guide - Page 81
● Solve wired network problems ● Solve wireless network problems ● Solve fax problems Go to www.hp.com/support/ljMFPM176series or www.hp.com/support/ljMFPM177series for HP's all-inclusive help for your product: ● Solve problems. ● Download software updates. ● Join support forums. ● Find warranty - HP Color LaserJet Pro MFP M177 | User Guide - Page 82
menu where you can search for specific topics. You can browse through the menu structure by menu. Some Help screens include animations that guide you through procedures, such as clearing jams. problem. The message also contains instructions to help solve the problem. 72 Chapter 8 Solve - HP Color LaserJet Pro MFP M177 | User Guide - Page 83
also deletes any pages that are stored in the memory. 1. On the product control panel, press or touch the Setup button. 2. Open the Service menu. 3. Select the Restore Defaults option, and then press or touch the OK button. The product automatically restarts. ENWW Restore the factory-set defaults - HP Color LaserJet Pro MFP M177 | User Guide - Page 84
to the tray. 2. Use only paper that meets HP specifications for this product. 3. Use paper that is not guides to the appropriate indentation in the tray. 6. Make sure the printing environment is within recommended specifications. Frequent or recurring paper jams Follow these steps to solve problems - HP Color LaserJet Pro MFP M177 | User Guide - Page 85
Report button. If none of these steps resolves the problem, the product might need service. Contact HP customer support. Prevent paper jams To reduce the number of paper jams, try these solutions. 1. Use only paper that meets HP specifications for this product. 2. Use paper that is not wrinkled - HP Color LaserJet Pro MFP M177 | User Guide - Page 86
. 3. Remove any jammed paper visible in the input tray area. Use both hands to remove jammed paper to avoid tearing the paper. 76 Chapter 8 Solve problems ENWW - HP Color LaserJet Pro MFP M177 | User Guide - Page 87
4. Reload paper in the input tray. Make sure that the paper fits under the tabs and below the maximum-height indicators. 5. Reinstall the dust cover on the tray. ENWW Clear jams from the input tray 77 - HP Color LaserJet Pro MFP M177 | User Guide - Page 88
Clear jams in the output bin A Jam in output bin message displays on the product control panel. 1. If paper is visible in the output bin, grasp the leading edge with both hands and slowly remove it. 2. Open the rear door to check for jammed paper. 78 Chapter 8 Solve problems ENWW - HP Color LaserJet Pro MFP M177 | User Guide - Page 89
3. Remove any jammed paper. Use both hands to pull out the paper to avoid tearing. 4. Close the rear door. ENWW Clear jams in the output bin 79 - HP Color LaserJet Pro MFP M177 | User Guide - Page 90
, grasp the leading edge with both hands and slowly remove it. 2. Lift the document feeder input tray. 3. Lift the jam-access cover. 80 Chapter 8 Solve problems ENWW - HP Color LaserJet Pro MFP M177 | User Guide - Page 91
4. Remove any jammed paper. Use both hands to pull out the paper to avoid tearing. 5. Close the jam-access cover. 6. Close the document-feeder input tray. ENWW Clear jams in the document feeder 81 - HP Color LaserJet Pro MFP M177 | User Guide - Page 92
troubleshooting ● Inspect the toner cartridge for damage ● Check the paper and printing environment ● Check the EconoMode settings ● Adjust color settings (Windows) Print from a different software program Try printing from a different software program. If the page prints correctly, the problem - HP Color LaserJet Pro MFP M177 | User Guide - Page 93
option. 2. In the Printer menu, select the product. 3. By default, the print driver displays the Copies & Pages menu. Open the menus drop-down list, and then click remaining ● Approximate pages remaining ● Part numbers for HP toner cartridges ● Number of pages printed Use the following procedures - HP Color LaserJet Pro MFP M177 | User Guide - Page 94
the color alignment. If the blocks of color on System Setup ● Print Quality ● Calibrate Color 3. Select the Calibrate Now option, ● System Setup ● Print Quality ● Color Calibration 3. Select the Calibrate now option , press the Setup button. 2. Open the Service menu. 3. Select the Cleaning mode option, - HP Color LaserJet Pro MFP M177 | User Guide - Page 95
that prints. Perform additional print quality troubleshooting Print the print quality page LCD control color, which are divided into four groups as indicated in the following illustration. By examining each group, you can isolate the problem to a particular toner cartridge. Section 1 2 3 4 Toner - HP Color LaserJet Pro MFP M177 | User Guide - Page 96
. 6. If the roller does not appear to be damaged, rock the toner cartridges gently several times and reinstall them. Print a few pages to see if the problem has resolved. Check the paper and printing environment Use paper that meets HP specifications Use different paper if you are having any of the - HP Color LaserJet Pro MFP M177 | User Guide - Page 97
specifications listed in the product Warranty and Legal Guide. Check the EconoMode settings HP does not recommend the full-time use of EconoMode. If EconoMode is used full-time, the toner OK button to print the job. Adjust color settings (Windows) Change the color theme 1. From the software program, - HP Color LaserJet Pro MFP M177 | User Guide - Page 98
Document Properties dialog box. In the Print dialog box, click the OK button to print the job. Change the color options 1. From the software program, select the Print option. 2. Select the product, and then click the box, click the OK button to print the job. 88 Chapter 8 Solve problems ENWW - HP Color LaserJet Pro MFP M177 | User Guide - Page 99
Improve copy and scan quality Check the scanner glass for dirt and smudges Over time, specks of debris might collect on the scanner glass and white plastic backing, which can affect performance. Use the following procedure to clean the scanner. 1. Press the power button to turn the product off, and - HP Color LaserJet Pro MFP M177 | User Guide - Page 100
darkest areas of the image. ● Sharpen: Adjusts clarity of text characters. ● Color Balance: Adjusts the red, green, and blue color hues. LCD control panel 1. On the product control panel, press the Copy Menu , press the Copy Menu button. 3. Select the Optimize menu. 90 Chapter 8 Solve problems ENWW - HP Color LaserJet Pro MFP M177 | User Guide - Page 101
to select it. 4. Touch the Back button, and then touch the Black or Color button to start copying. Edge-to-edge copying The product cannot print fully edge- pad in the document feeder If the document feeder experiences paper-handling problems, such as jams or multiple-page feeds, clean the document- - HP Color LaserJet Pro MFP M177 | User Guide - Page 102
not place liquids directly on the glass or platen. They might seep and damage the product. 3. Close the document-feeder input tray. 92 Chapter 8 Solve problems ENWW - HP Color LaserJet Pro MFP M177 | User Guide - Page 103
Improve fax image quality ● Check the scanner glass for dirt or smudges ● Check the send-fax resolution setting ● Check the lightness/darkness setting ● Check the Error Correction setting ● Check the Fit-to-Page setting ● Clean the pickup rollers and separation pad in the document feeder ● Send to a - HP Color LaserJet Pro MFP M177 | User Guide - Page 104
off error correction only if you are having trouble sending or receiving a fax, and you are , touch the Setup button. 2. Select Service, and then select Fax Service. 3. Select Error Correction, and then If the document feeder experiences paper-handling problems, such as jams or multiple-page feeds - HP Color LaserJet Pro MFP M177 | User Guide - Page 105
2. Use a moist, lint-free cloth to wipe both pickup rollers and the separation pad to remove dirt. CAUTION: Do not use abrasives, acetone, benzene, ammonia, ethyl alcohol, or carbon tetrachloride on any part of the product; these can damage the product. Do not place liquids directly on the glass or - HP Color LaserJet Pro MFP M177 | User Guide - Page 106
compatibility problems ● The computer or workstation might be set up incorrectly ● The product is disabled, or other network settings are incorrect NOTE: HP does not support peer-to-peer networking, as the feature is a function of Microsoft operating systems and not of the HP print drivers. For - HP Color LaserJet Pro MFP M177 | User Guide - Page 107
The product is using incorrect link and duplex settings for the network HP recommends leaving these settings in automatic mode (the default setting). If causing compatibility problems Verify that any new software programs are correctly installed and that they use the correct print driver. The - HP Color LaserJet Pro MFP M177 | User Guide - Page 108
problems in the product is turned on. ● Verify that the service set identifier (SSID) is correct. Print a configuration page the product. Make sure poles, walls, or support columns containing metal or concrete do not separate devices. ● Verify that the print driver is installed on the computer. ● - HP Color LaserJet Pro MFP M177 | User Guide - Page 109
, restart the computer. 5. Verify that you can open the product HP Embedded Web Server from a computer on the network. The product does the service set identifier (SSID) on the configuration page to the SSID in the printer configuration for the computer. 4. If the numbers are not network problems 99 - HP Color LaserJet Pro MFP M177 | User Guide - Page 110
Print a configuration page. b. Compare the service set identifier (SSID) on the configuration report to the SSID in the printer configuration for the computer. c. If the numbers are not the same, the devices tips can reduce interference in a wireless network: 100 Chapter 8 Solve problems ENWW - HP Color LaserJet Pro MFP M177 | User Guide - Page 111
lower signal strength. ● Position the wireless router in a central location in line of sight with the wireless products on the network. ENWW Solve wireless network problems 101 - HP Color LaserJet Pro MFP M177 | User Guide - Page 112
Go to www.hp.com/support. b. Click Drivers & Software, type your product number in the window HP LaserJet Firmware Update Utility. e. Click Download. f. When the download is complete, follow the on-screen instructions to install and run the utility. The utility checks for firmware updates for your HP - HP Color LaserJet Pro MFP M177 | User Guide - Page 113
5. Verify that the telephone service supports analog fax. NOTE: HP products are designed specifically for use with analog phone services. ● If using ISDN or digital PBX, contact your service provider for information about configuring to an analog fax line. ● If using a VoIP service, change the Fax - HP Color LaserJet Pro MFP M177 | User Guide - Page 114
product control panel, touch the Setup button. 2. Select Service, and then select Fax Service. 3. Select Error Correction, and then select On. ● Check the toner cartridges and replace a cartridge if necessary. ● Ask the a Legal-size original prints on two pages. 104 Chapter 8 Solve problems ENWW - HP Color LaserJet Pro MFP M177 | User Guide - Page 115
supplies ● Customer self-repair parts ● Accessories Go to www.hp.com/support/ljMFPM176series or www.hp.com/support/ljMFPM177series for HP's all-inclusive help for your product: ● Solve problems. ● Download software updates. ● Join support forums. ● Find warranty and regulatory information. You can - HP Color LaserJet Pro MFP M177 | User Guide - Page 116
support is not provided under the HP product warranty. ● Parts listed as Optional self-replacement can be installed by HP service personnel at your request for no additional charge during the product warranty period. Item HP 130A Black LaserJet Toner Cartridge HP 130A Cyan LaserJet Toner number - HP Color LaserJet Pro MFP M177 | User Guide - Page 117
H hardware setup fax troubleshooting 102 help, control panel 72 Home screen, control panel 8 HP Device Toolbox, using 52 HP Embedded Web Server changing password 56 opening 56 HP ePrint 30 HP ePrint software 30 HP Scan software (Mac) 39 HP Scan software (Windows) 38 HP Utility 54 HP Utility for Mac - HP Color LaserJet Pro MFP M177 | User Guide - Page 118
83 supported paper sizes 12 T toner amount remaining 83 toner cartridge checking for damage 86 low threshold settings 60 replacing 62 using when low 60 transparencies printing (Windows) 25 Tray 1 orientation 16 trays included 2 locating 4 troubleshooting faxes 102 jams 75 network problems 96 - HP Color LaserJet Pro MFP M177 | User Guide - Page 119
wireless network interference 100 ENWW Index 109 - HP Color LaserJet Pro MFP M177 | User Guide - Page 120
110 Index ENWW
-
 1
1 -
 2
2 -
 3
3 -
 4
4 -
 5
5 -
 6
6 -
 7
7 -
8
-
9
-
10
-
11
-
12
-
13
-
14
-
15
-
16
-
17
-
18
-
19
-
20
-
21
-
22
-
23
-
24
-
25
-
26
-
27
-
28
-
29
-
30
-
31
-
32
-
33
-
34
-
35
-
36
-
37
-
38
-
39
-
40
-
41
-
42
-
43
-
44
-
45
-
46
-
47
-
48
-
49
-
50
-
51
-
52
-
53
-
54
-
55
-
56
-
57
-
58
-
59
-
60
-
61
-
62
-
63
-
64
-
65
-
66
-
67
-
68
-
69
-
70
-
71
-
72
-
73
-
74
-
75
-
76
-
77
-
78
-
79
-
80
-
81
-
82
-
83
-
84
-
85
-
86
-
87
-
88
-
89
-
90
-
91
-
92
-
93
-
94
-
95
-
96
-
97
-
98
-
99
-
100
-
101
-
102
-
103
-
104
-
105
-
106
-
107
-
108
-
109
-
110
-
111
-
112
-
113
-
114
-
115
-
116
-
117
-
118
-
119
-
120
 |
 |
COLOR LASERJET PRO MFP
User Guide
M176
M177
OK
X