HP Color LaserJet Pro MFP M177 User Guide - Page 103
Improve fax image quality, Check the scanner glass for dirt or smudges
 |
View all HP Color LaserJet Pro MFP M177 manuals
Add to My Manuals
Save this manual to your list of manuals |
Page 103 highlights
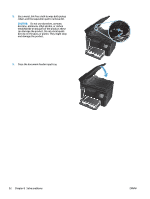
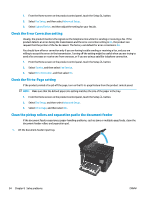
Improve fax image quality ● Check the scanner glass for dirt or smudges ● Check the send-fax resolution setting ● Check the lightness/darkness setting ● Check the Error Correction setting ● Check the Fit-to-Page setting ● Clean the pickup rollers and separation pad in the document feeder ● Send to a different fax machine ● Check the sender's fax machine Check the scanner glass for dirt or smudges Over time, specks of debris might collect on the scanner glass and white plastic backing, which can affect performance. Use the following procedure to clean the scanner. 1. Press the power button to turn the product off, and then disconnect the power cable from the electrical outlet. 2. Open the scanner lid. 3. Clean the scanner glass, the document feeder strips, and the white plastic backing with a soft cloth or sponge that has been moistened with nonabrasive glass cleaner. CAUTION: Do not use abrasives, acetone, benzene, ammonia, ethyl alcohol, or carbon tetrachloride on any part of the product; these can damage the product. Do not place liquids directly on the glass or platen. They might seep and damage the product. 4. Dry the glass and white plastic parts with a chamois or a cellulose sponge to prevent spotting. 5. Close the scanner lid. 6. Connect the power cable to an outlet, and then press the power button to turn the product on. Check the send-fax resolution setting 1. From the Home screen on the product control panel, touch the Setup button. 2. Select Fax Setup. 3. Select Advanced Setup, and then select Fax Resolution. 4. Select the desired resolution setting, and then touch OK. Check the lightness/darkness setting If the fax output is too light or too dark, check the lightness/darkness setting to make sure it is appropriate for the fax job. ENWW Improve fax image quality 93
-
 1
1 -
2
-
3
-
4
-
5
-
6
-
7
-
8
-
9
-
10
-
11
-
12
-
13
-
14
-
15
-
16
-
17
-
18
-
19
-
20
-
21
-
22
-
23
-
24
-
25
-
26
-
27
-
28
-
29
-
30
-
31
-
32
-
33
-
34
-
35
-
36
-
37
-
38
-
39
-
40
-
41
-
42
-
43
-
44
-
45
-
46
-
47
-
48
-
49
-
50
-
51
-
52
-
53
-
54
-
55
-
56
-
57
-
58
-
59
-
60
-
61
-
62
-
63
-
64
-
65
-
66
-
67
-
68
-
69
-
70
-
71
-
72
-
73
-
74
-
75
-
76
-
77
-
78
-
79
-
80
-
81
-
82
-
83
-
84
-
85
-
86
-
87
-
88
-
89
-
90
-
91
-
92
-
93
-
94
-
95
-
96
-
97
-
 98
98 -
 99
99 -
 100
100 -
 101
101 -
 102
102 -
 103
103 -
 104
104 -
 105
105 -
 106
106 -
 107
107 -
 108
108 -
109
-
110
-
111
-
112
-
113
-
114
-
115
-
116
-
117
-
118
-
119
-
120
 |
 |