HP Color LaserJet Pro MFP M177 User Guide - Page 95
Perform additional print quality troubleshooting, Print the print quality
 |
View all HP Color LaserJet Pro MFP M177 manuals
Add to My Manuals
Save this manual to your list of manuals |
Page 95 highlights
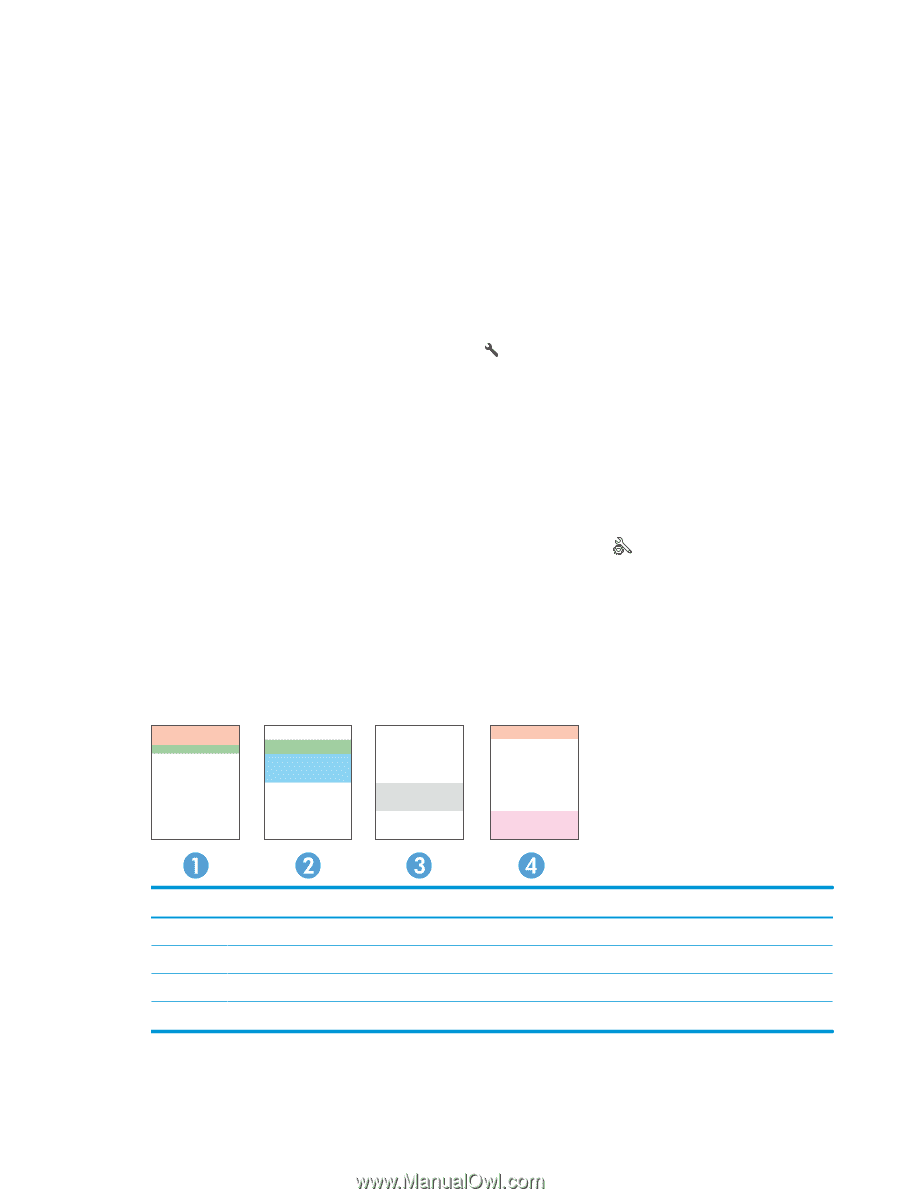
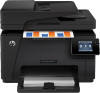
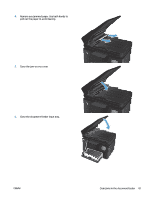
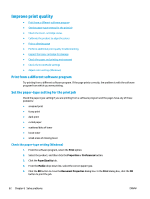
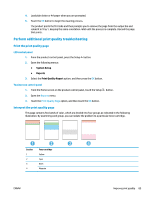
4. Load plain letter or A4 paper when you are prompted. 5. Touch the OK button to begin the cleaning process. The product prints the first side and then prompts you to remove the page from the output bin and reload it in Tray 1, keeping the same orientation. Wait until the process is complete. Discard the page that prints. Perform additional print quality troubleshooting Print the print quality page LCD control panel 1. From the product control panel, press the Setup button. 2. Open the following menus: ● System Setup ● Reports 3. Select the Print Quality Report option, and then press the OK button. Touchscreen control panel 1. From the Home screen on the product control panel, touch the Setup 2. Open the Reports menu. 3. Touch the Print Quality Page option, and then touch the OK button. button. Interpret the print quality page This page contains five bands of color, which are divided into four groups as indicated in the following illustration. By examining each group, you can isolate the problem to a particular toner cartridge. Section 1 2 3 4 Toner cartridge Yellow Cyan Black Magenta ENWW Improve print quality 85
-
 1
1 -
2
-
3
-
4
-
5
-
6
-
7
-
8
-
9
-
10
-
11
-
12
-
13
-
14
-
15
-
16
-
17
-
18
-
19
-
20
-
21
-
22
-
23
-
24
-
25
-
26
-
27
-
28
-
29
-
30
-
31
-
32
-
33
-
34
-
35
-
36
-
37
-
38
-
39
-
40
-
41
-
42
-
43
-
44
-
45
-
46
-
47
-
48
-
49
-
50
-
51
-
52
-
53
-
54
-
55
-
56
-
57
-
58
-
59
-
60
-
61
-
62
-
63
-
64
-
65
-
66
-
67
-
68
-
69
-
70
-
71
-
72
-
73
-
74
-
75
-
76
-
77
-
78
-
79
-
80
-
81
-
82
-
83
-
84
-
85
-
86
-
87
-
88
-
89
-
 90
90 -
 91
91 -
 92
92 -
 93
93 -
 94
94 -
 95
95 -
 96
96 -
 97
97 -
 98
98 -
 99
99 -
 100
100 -
101
-
102
-
103
-
104
-
105
-
106
-
107
-
108
-
109
-
110
-
111
-
112
-
113
-
114
-
115
-
116
-
117
-
118
-
119
-
120
 |
 |