HP LaserJet 5000 HP LaserJet 5000, 5000 N, 5000 GN, and 5000 DN Printers - Us - Page 63
Loading Custom-Size Paper in the 500-Sheet Tray, of the paper. The front corners of
 |
View all HP LaserJet 5000 manuals
Add to My Manuals
Save this manual to your list of manuals |
Page 63 highlights
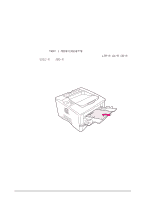
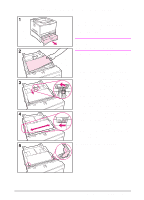
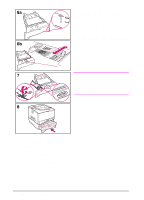
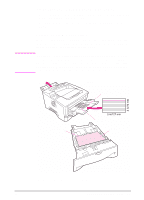
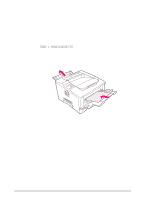
Loading Custom-Size Paper in the 500-Sheet Tray The following instructions are for loading custom-sizes in a 500-sheet tray (optional). For supported sizes of paper, see page A-5. To load standard sizes, see page 33. Note To avoid paper jams, do not load trays while the printer is printing. 1 Pull the tray completely out of the printer and place it on a flat surface. 2 Load the tray. 3 Squeeze the release on the back of the rear paper guide. Slide the rear guide against the edge of the paper. The front corners of the paper should be lined up with the marks on the front side guide's tabs. 4 Squeeze the release on the outside of the left guide and adjust the left and right guides to match the width of the paper. The front corners of the paper should be below the tabs on the guides, and the edges should be lined up with the markings on the tabs. The guides should touch the paper without bending it. 5 Make sure the paper is flat in the tray at all four corners and below the tabs on the guides. Continued on the next page. EN Chapter 2: Printing Tasks 51
-
 1
1 -
2
-
3
-
4
-
5
-
6
-
7
-
8
-
9
-
10
-
11
-
12
-
13
-
14
-
15
-
16
-
17
-
18
-
19
-
20
-
21
-
22
-
23
-
24
-
25
-
26
-
27
-
28
-
29
-
30
-
31
-
32
-
33
-
34
-
35
-
36
-
37
-
38
-
39
-
40
-
41
-
42
-
43
-
44
-
45
-
46
-
47
-
48
-
49
-
50
-
51
-
52
-
53
-
54
-
55
-
56
-
57
-
 58
58 -
 59
59 -
 60
60 -
 61
61 -
 62
62 -
 63
63 -
 64
64 -
 65
65 -
 66
66 -
 67
67 -
 68
68 -
69
-
70
-
71
-
72
-
73
-
74
-
75
-
76
-
77
-
78
-
79
-
80
-
81
-
82
-
83
-
84
-
85
-
86
-
87
-
88
-
89
-
90
-
91
-
92
-
93
-
94
-
95
-
96
-
97
-
98
-
99
-
100
-
101
-
102
-
103
-
104
-
105
-
106
-
107
-
108
-
109
-
110
-
111
-
112
-
113
-
114
-
115
-
116
-
117
-
118
-
119
-
120
-
121
-
122
-
123
-
124
-
125
-
126
-
127
-
128
-
129
-
130
-
131
-
132
-
133
-
134
-
135
-
136
-
137
-
138
-
139
-
140
-
141
-
142
-
143
-
144
-
145
-
146
-
147
-
148
-
149
-
150
-
151
-
152
-
153
-
154
-
155
-
156
-
157
-
158
-
159
-
160
-
161
-
162
-
163
-
164
-
165
-
166
-
167
-
168
-
169
-
170
-
171
-
172
-
173
-
174
-
175
-
176
-
177
-
178
-
179
-
180
-
181
-
182
-
183
-
184
-
185
-
186
-
187
-
188
-
189
-
190
-
191
-
192
-
193
-
194
-
195
-
196
-
197
-
198
-
199
-
200
-
201
-
202
-
203
-
204
 |
 |
