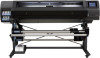
HP Latex 560 User Guide - Page 183
Printer cannot get an IP address, Cannot access the Embedded Web Server, Printer is not printing
 |
View all HP Latex 560 manuals
Add to My Manuals
Save this manual to your list of manuals |
Page 183 highlights
Printer cannot get an IP address If your network has no DHCP server, the printer cannot automatically retrieve an IP address. In this case, you must set the printer's IP address manually, in the following way. 1. From the front panel, press , then Setup > Network connectivity > Gigabit Ethernet > Modify configuration > TCP/ IP > IPV4 settings > Config method > Manual. 2. From the IPV4 Settings menu, select Manual settings > IP address. 3. Enter the IP address that you wish to use, and press OK when finished. Cannot access the Embedded Web Server If you have not done so already, please read the instructions in Access the Embedded Web Server on page 24. 1. Go to the front panel and press On. , then Connectivity > Network Connectivity > Advanced > Allow EWS > 2. Press , then Connectivity > Network information. 3. The information should read: IP enabled: Yes. If it does not, you might need to use a different connection. If you still cannot access the Embedded Web Server, turn the printer off with the power button on the front panel and then turn it on again. If you experience very slow progress while trying to access the Embedded Web Server, the problem could be that you are using a proxy server. Try bypassing the proxy server and accessing the Embedded Web Server directly. ● In Internet Explorer 6 for Windows, go to Tools > Internet Options > Connections > LAN Settings, and select the Bypass proxy server for local addresses check box. Alternatively, for more precise control, click the Advanced button and add the printer's IP address to the list of exceptions, for which the proxy server is not used. ● In Firefox 3.0 for Windows, go to Tools > Options > Network > Connection > Settings, and select the Direct connection to the Internet check box. Alternatively, when the Manual proxy configuration check box is selected, add the printer's IP address to the list of exceptions, for which the proxy server is not used. ● In Firefox 2.0 for Linux, go to Edit > Preferences > Network > Connection > Settings, and select the Direct connection to the Internet check box. Alternatively, when the Manual proxy configuration check box is selected, add the printer's IP address to the list of exceptions, for which the proxy server is not used. Printer is not printing If a file you have sent from your computer is not printing when expected, the possible reasons include the following: ● There may be a problem with the electrical power. If the printer is not performing and the front panel does not respond, check that the power switch at the rear is on, the power cable is correctly connected, and the electrical socket is providing power. ● The network cable is disconnected, or you have problems with your communications setup. See Communication failures between computer and printer on page 179, or contact your IT department or communications system provider. ● Check all the alerts on the front panel-there may be more than one, hidden under the first-by dragging down the top bar of the home screen. The alerts may explain why printing has stopped, such as: ENWW Printer cannot get an IP address 177
-
 1
1 -
2
-
3
-
4
-
5
-
6
-
7
-
8
-
9
-
10
-
11
-
12
-
13
-
14
-
15
-
16
-
17
-
18
-
19
-
20
-
21
-
22
-
23
-
24
-
25
-
26
-
27
-
28
-
29
-
30
-
31
-
32
-
33
-
34
-
35
-
36
-
37
-
38
-
39
-
40
-
41
-
42
-
43
-
44
-
45
-
46
-
47
-
48
-
49
-
50
-
51
-
52
-
53
-
54
-
55
-
56
-
57
-
58
-
59
-
60
-
61
-
62
-
63
-
64
-
65
-
66
-
67
-
68
-
69
-
70
-
71
-
72
-
73
-
74
-
75
-
76
-
77
-
78
-
79
-
80
-
81
-
82
-
83
-
84
-
85
-
86
-
87
-
88
-
89
-
90
-
91
-
92
-
93
-
94
-
95
-
96
-
97
-
98
-
99
-
100
-
101
-
102
-
103
-
104
-
105
-
106
-
107
-
108
-
109
-
110
-
111
-
112
-
113
-
114
-
115
-
116
-
117
-
118
-
119
-
120
-
121
-
122
-
123
-
124
-
125
-
126
-
127
-
128
-
129
-
130
-
131
-
132
-
133
-
134
-
135
-
136
-
137
-
138
-
139
-
140
-
141
-
142
-
143
-
144
-
145
-
146
-
147
-
148
-
149
-
150
-
151
-
152
-
153
-
154
-
155
-
156
-
157
-
158
-
159
-
160
-
161
-
162
-
163
-
164
-
165
-
166
-
167
-
168
-
169
-
170
-
171
-
172
-
173
-
174
-
175
-
176
-
177
-
 178
178 -
 179
179 -
 180
180 -
 181
181 -
 182
182 -
 183
183 -
 184
184 -
 185
185 -
 186
186 -
 187
187 -
 188
188 -
189
-
190
-
191
-
192
-
193
-
194
-
195
-
196
-
197
-
198
-
199
-
200
-
201
-
202
-
203
 |
 |
